Linux使用SMB给macOS做无线Time Machine备份

前要:

一直以来使用外置硬盘给Mac做Time Machine备份盘,但是存在若干不够方便的地方,如:

  • 磁盘需要格式化为APFS格式,虽然APFS的“卷共享容器空间”的机制可以很方便的让Time Machine卷和其他资料卷共用空间,而不是像传统的分盘让空间分隔,还要考虑空间分配问题。但APFS格式只在macOS设备间方便使用
  • 虽然在不连接磁盘的情况下,内置存储也会保留24小时内到每小时快照,但总是需要刻意记起找出插入硬盘进行备份的操作

正好最近使用旧电脑刷了Ubuntu用作NAS使用,于是想了解关于如何配置无线Time Machine

无线Time Machine的共享协议选择:

最开始找到的教程是使用AFP的开源实现netatalk让Linux支持AFP共享协议,然后作为Time Machine盘。但发现netatalk最近曝出过严重漏洞项目本身在GitHub也只有0.2K Star的关注。主观感觉其稳定性是存在疑问的。

后来发现,并不一定是AFP协议的共享才能做Time Machine备份盘;Samba只要进行一些配置就能做Time Machine备份用了

在 Mac 上可以与时间机器配合使用的磁盘类型

在Apple官方文档中说明有写到

【提示】如果可以选择 SMB 或 AFP,请使用 SMB 来备份到外置备份磁盘。

目前Apple官方也是更推荐使用SMB协议来作为无线Time Machine备份的

Linux上Samba的配置

首先需要安装avahi和samba,关于其安装和配置和samba用户的设置管理这里不再赘述,不同的Linux发行版安装方式会有一些差异,可以自行搜索。

个人的 /etc/samba/smb.conf 内容如下

[global]
   workgroup = WORKGROUP
   server string = %h server (Samba, Ubuntu)
   log file = /var/log/samba/log.%m
   max log size = 1000
   logging = file
   panic action = /usr/share/samba/panic-action %d
   server role = standalone server
   obey pam restrictions = yes
   unix password sync = yes
   passwd program = /usr/bin/passwd %u
   passwd chat = *Enter\snew\s*\spassword:* %n\n *Retype\snew\s*\spassword:* %n\n *password\supdated\ssuccessfully* .
   pam password change = yes
   map to guest = never
   usershare allow guests = no
   security = user
   public = no
   writable = yes
   guest ok = no

   vfs objects = catia fruit streams_xattr
   min protocol = SMB3_11
   smb encrypt = required
   ea support = yes
   fruit:metadata = stream
   fruit:model = MacSamba
   fruit:posix_rename = yes
   fruit:veto_appledouble = no
   fruit:wipe_intentionally_left_blank_rfork = yes
   fruit:delete_empty_adfiles = yes
   fruit:aapl = yes
[samba_WD]
   #comment = mydisk
   #available = yes
   #browseable = yes
   path = /media/xiaoming/WD
   vaild user = xiaoming
   create mask = 0755
[samba_xiaoming]
   #comment = xiaominghome
   #available = yes
   #browseable = yes
   path = /home/xiaoming/Documents
   vaild user = xiaoming
   create mask = 0755
[myTimeMachine]
   path = /media/xiaoming/WD/tmbackup
   valid users = xiaoming
   fruit:time machine = yes
   #fruit:time machine max size = 500G

其中,与 Time Machine 的启用相关的关键部分为:

[global]
   vfs objects = catia fruit streams_xattr
   min protocol = SMB3_11
   smb encrypt = required
   ea support = yes
   fruit:metadata = stream
   fruit:model = MacSamba
   fruit:posix_rename = yes
   fruit:veto_appledouble = no
   fruit:wipe_intentionally_left_blank_rfork = yes
   fruit:delete_empty_adfiles = yes
   fruit:aapl = yes
[myTimeMachine]
   path = /media/xiaoming/WD/tmbackup
   valid users = xiaoming
   fruit:time machine = yes
   #fruit:time machine max size = 500G

因为个人这里是只配合自己的Mac使用的,所以配置文件尽量确保了安全性和与macOS设备的兼容性,比如在global中把最小连接协议设置为SMB3_11,强制启用了传输加密,和很多更加兼容macOS的fruit选项。请根据个人需求修改。

配置可参考

Configure Samba to Work Better with Mac OS X

最后使用systemctl restart smbd另配置生效即可。

备份盘的选择:

上述配置文件中,/media/xiaoming/WD是外置硬盘在fstab中设置挂载的路径,而Time Machine备份的目录则放在了该目录的./tmbackup下。登陆用户我设置为“xiaoming”,并确保这两个目录都具有用户“xiaoming”的权限读写。后续在使用SMB访问时,才能正常读写文件

特别提示:如果你的外置磁盘并非ext4这样的适合Linux使用的格式,而是如exFAT这种,会出现问题。像exFAT是不兼容在Linux上的文件用户分组的。个人测试,exFAT磁盘中所有文件所属只能为root:root。且使用sudo chown -R xiaoming:xiaoming也无法更改权限。建议备份磁盘文件后,格式化为ext4这种适合Linux使用的格式

macOS上的配置:

打开访达,边栏上应该能直接看到服务器,点击后点上面的“连接身份...”,再点“注册用户”,输入用户和密码,勾选“在我的钥匙串中记住此密码”,点连接,随后会显示出多个共享,多选连接即可。

如果边栏没有,则需按command+K来手动连接,输入smb://xiaomingnas.local。这里xiaomingnas.local中的xiaomingnas是主机的hostname,通常avahi的mDNS服务会使用<hostname>.local作为域名。点连接,后续步骤与上述相同。

随后在Mac的系统设置-通用-时间机器,点+号,就能选择设置的Time Machine进行备份了。然后根据提示设置登录用户名,时间机器的加密密码即可。

无线备份受限于网络传输速度,首次备份可能需要数小时才能完成,可耐心等待。

Time Machine默认设置了速度限制,以保障网络和磁盘可正常使用,首次备份可以在Mac上暂时解除该限制

#解除限制
$ sudo sysctl debug.lowpri_throttle_enabled=0

#恢复速度限制:
$ sudo sysctl debug.lowpri_throttle_enabled=1

#查看状态
$ sysctl -n debug.lowpri_throttle_enabled

用外置磁盘和无线共享设置Time Machine的区别:

使用外置磁盘备份,点击边栏上的卷后,可以看到目录形式展示的每次的备份,并直接查看其中的目录文件。还可以方便地多选备份进行删除,来腾出空间占用

而使用SMB共享作为备份盘。这会在共享路径下生成一个类似“小明的MacBook Air.sparsebundle”目录。大致结构如下

$ tree -L 2
.
└── 小明的MacBook Air.sparsebundle
    ├── bands
    ├── com.apple.TimeMachine.MachineID.bckup
    ├── com.apple.TimeMachine.MachineID.plist
    ├── com.apple.TimeMachine.Results.plist
    ├── com.apple.TimeMachine.SnapshotHistory.plist
    ├── Info.bckup
    ├── Info.plist
    ├── lock
    ├── mapped
    └── token

其中bands目录中会有大量固定大小为67MB的二进制文件,这些便是备份的数据。

Apple官方对sparsebundle的解释的大致意思是,它是一个以二进制形式存储的,可按需收缩和扩大的可扩展文件。

在 Mac 上使用“磁盘工具”创建磁盘映像

这样看用SMB共享设置Time Machine实际上更加灵活,相比之下不挑磁盘格式,且备份在Linux上的磁盘中仅作为某个路径下的某个目录存在,而不像使用外置磁盘备份一样单独占据一个APFS卷。

但其不能像外置磁盘一样,可以任意多选删除备份来腾出空间。但可以设置fruit:time machine max size来限制备份大小,这样达到空间临界点时macOS就会自动删除最旧的备份来腾出空间。当然,磁盘备份同样也可以在添加APFS卷时,通过设置“配额大小”来限制Time Machine过度膨胀(但设置完毕后不易变更)

实际使用的体验:

无线备份的速度慢于磁盘备份,这取决于你的局域网环境。不过备份过程同样是完全无感的,和有线备份一样,即使是合盖休眠情况下也会自动创建备份。

Time Machine是可以同时备份到多个位置的,因此可以同时使用磁盘备份和无线备份,这样数据安全性也更好。如果再配合zerotier异地组网,设置一个异地的NAS作为无线Time Machine,那么你就得到了一个符合“3-2-1原则”的,完全无感、自动化、无需干涉的备份系统。且Time Machine本身也有加密,无惧因备份介质遗失导致数据泄漏的风险。

考虑到传输速度,无线的Time Machine用于找回过去的文件没有问题,但不太适合做整机恢复,如果是换机这种操作,还是建议使用磁盘备份节省时间。

更建议使用 docker-timemachine 镜像进行配置,可以在搜索 docker-timemachine 然后进行配置。

参考链接


Linux使用SMB给macOS做无线Time Machine备份

Coping with the TCP TIME-WAIT state on busy Linux servers

TL;DR

Do not enable net.ipv4.tcp_tw_recycle—it doesn’t even exist anymore since Linux 4.12. Most of the time, TIME-WAIT sockets are harmless. Otherwise, jump to the summary for the recommended solutions.

The Linux kernel documentation is not very helpful about what net.ipv4.tcp_tw_recycle and net.ipv4.tcp_tw_reuse do. This lack of documentation opens the path to numerous tuning guides advising to set both these settings to 1 to reduce the number of entries in the TIME-WAIT state. However, as stated by the tcp(7) manual page, the net.ipv4.tcp_tw_recycle option is quite problematic for public-facing servers as it won’t handle connections from two different computers behind the same NAT device, which is a problem hard to detect and waiting to bite you:

Enable fast recycling of TIME-WAIT sockets. Enabling this option is not recommended since this causes problems when wrking with NAT (Network Address Translation).

I will provide here a more detailed explanation of how to properly handle the TIME-WAIT state. Also, keep in mind we are looking at the TCP stack of Linux. This is completely unrelated to Netfilter connection tracking which may be tweaked in other ways.1

继续阅读Coping with the TCP TIME-WAIT state on busy Linux servers

GNOME 46 桌面环境加入 RDP 协议支持,今年 3 月起 Linux 发行版用户远程登录更轻松

外媒 Phoronix 报道,GNOME 桌面环境在最近合并的 PR 中获得了远程桌面协议(RDP)支持,预计相关特性将集成至 2024 年 3 月发布的 GNOME 46 版本中,届时 Linux 发行版用户能够更方便地使用 RDP 软件远程访问桌面环境。

Written by Michael Larabel in GNOME on 6 January 2024 at 01:16 PM EST. 58 Comments

After the merge request was open since August of 2022, merged today is support within the GNOME Remote Desktop code for handling graphical remote log-ins.

The merge request by Joan Torres finishes an important piece of the Remote Desktop Protocol (RDP) support for the GNOME desktop with allowing graphical remote logins. Torres explained in that merge request:
"The standard daemon now is abstracted and two new behaviours are implemented:

- Running as a system service (AKA daemon-system):
Started with --system option. It is started as gnome-remote-desktop user. On a new RDP connection it requests GDM to start a RemoteDisplay with a headless GDM greeter session. When a new RemoteDisplay iface from GDM is exported it will register a handover iface to handover the RDP client to the session on this RemoteDisplay. It handovers RDP clients between sessions using these handover ifaces (See the commit descriptions for more info).

- Running on a headless user session (AKA daemon-handover):
Started with --handover option. This daemon is attached as a service on greeter or user headless sessions. It will tell daemon-system using the handover dbus iface to start the handover, and daemon-system will proceed with the handover process. This daemon gets the RDP socket connection from the daemon-system.

- The standard daemon now is daemon-user."

这项 RDP 功能同时支持 X.Org 与 Wayland 显示服务器协议,可作为系统服务运行,也可在无 header 用户会话中运行,从而为 GNOME 桌面环境实现 GUI 远程桌面能力。

继续阅读GNOME 46 桌面环境加入 RDP 协议支持,今年 3 月起 Linux 发行版用户远程登录更轻松

WireGuard 教程:WireGuard 的工作原理

本文翻译自:https://github.com/pirate/wireguard-docs

WireGuard 是由 Jason Donenfeld 等人用 C 语言编写的一个开源 VPN 协议,被视为下一代 VPN 协议,旨在解决许多困扰 IPSec/IKEv2OpenVPN 或 L2TP 等其他 VPN 协议的问题。它与 Tinc 和 MeshBird 等现代 VPN 产品有一些相似之处,即加密技术先进、配置简单。从 2020 年 1 月开始,它已经并入了 Linux 内核的 5.6 版本,这意味着大多数 Linux 发行版的用户将拥有一个开箱即用的 WireGuard。

无论你是想破墙而出,还是想在服务器之间组网,WireGuard 都不会让你失望,它就是组网的『乐高积木』,就像 ZFS 是构建文件系统的『乐高积木』一样。

继续阅读WireGuard 教程:WireGuard 的工作原理

Box64 running on M1 with Asahi

The Asahi project has now released a first alpha version, so I tried that on a MacBookPro. Asahi is a full linux distribution that can be installed on mac with an M1 processor, it installs alongside your current macOS. It’s an alpha release so many things are missing for now, including 3D hardware acceleration, but on the other hand, for an alpha release, many things are already working, and working fine!

After a (quite) long installation process, I got linux running on that mac. Note that I add to restart the installation process, as the mac went to sleep mode during “root expension” and that actually froze the installation. I needed to break, remove all the create partitions (a risky process) to be able to start again.

Now, the M1 processor is very fast ARM64 processor, but it only supports 64bits operations. No ARM32 there, so no box86. Also, the Asahi readme mentions that the Pagesize is 16K, instead of the standard 4K. That breaks a few things on the way. Fortunatly, I had already encountered a system with 16K pagesize (Loongarch64 systems), so there is some supporting code on box64 already for it. And after enabling it (plus some compilation options), box64, with dynarec, was running!

To try things, I wanted to install a simple linux game. Remember that there is no Hardware acceleration yet, so I choose WorldOfGoo, with its simple graphics (it’s still an OpenGL game). Launching the install didn’t work, as by default, the setup tries to run x86 code (32bits, so needing box86 not available here). To work around that, I created a simple uname script that spoofs the setup into thinking this is an x86_64 system:

the file simply contains

#!/bin/bash

if [ "$1" == "-m" ];then
 echo x86_64
 exit 0
fi

/bin/uname "$@"

And I created an x86_64 folder in my home directory to put some pc stuffs (and that uname script)

Then I launched the setup as PATH=~/x86_64:$PATH ./WorldOfGoo.Linux.153.sh et voilà, the setup launched… But as text only… Ok, gtk2 libs are not installed. So sudo pacman -S gtk2 and try again…

继续阅读Box64 running on M1 with Asahi

Musl libc:为什么我们会需要另一个 libc?

如果你是一个 Linux 用户,那你一定至少听说过 Glibc 的鼎鼎大名,或者甚至在日常使用中碰到不少关于它的问题,例如 Glibc 版本不匹配等问题。而本文的主角—— Musl libc 与之相比就要默默无闻的多,毕竟绝大多数的 Linux 发行版使用的 libc 库都是 Glibc,只有 Alpine Linux 等极少数 Linux 发行版才会使用 Musl libc,并且还会遇到诸如闭源 JDK 无法正常使用等问题的困扰,那么,为什么我们会需要另一个 libc 函数库呢?

Glibc 并不完美

Glibc 作为目前使用最广泛的 libc 函数库,虽然拥有最广泛的发行版支持和用户群体,并且在兼容性和性能方面也存在一些优势,但它并不完美,有三个问题严重困扰着它。

代码库陈旧

Glibc 拥有悠久的历史——对于软件而言这可能并不一定是一句赞誉,尤其是当你需要处理上世纪九十年代就存在的代码库时。三十多年来,程序员们编写 C 程序的方式并不是一成不变的,某些在那个年代被认为是好习惯或者是必须的编程方式在今天看来可能完全不合时宜,诸如叠床架屋的宏等等。这些问题严重拖累了 Glibc 的源码可读性,例如下面这一段源代码,摘自 Glibc 的 fopen 函数。

FILE *
__fopen_internal (const char *filename, const char *mode, int is32)
{
  struct locked_FILE
  {
    struct _IO_FILE_plus fp;
#ifdef _IO_MTSAFE_IO
    _IO_lock_t lock;
#endif
    struct _IO_wide_data wd;
  } *new_f = (struct locked_FILE *) malloc (sizeof (struct locked_FILE));

  if (new_f == NULL)
    return NULL;
#ifdef _IO_MTSAFE_IO
  new_f->fp.file._lock = &new_f->lock;
#endif
  _IO_no_init (&new_f->fp.file, 0, 0, &new_f->wd, &_IO_wfile_jumps);
  _IO_JUMPS (&new_f->fp) = &_IO_file_jumps;
  _IO_new_file_init_internal (&new_f->fp);
  if (_IO_file_fopen ((FILE *) new_f, filename, mode, is32) != NULL)
    return __fopen_maybe_mmap (&new_f->fp.file);

  _IO_un_link (&new_f->fp);
  free (new_f);
  return NULL;
}

作为对比,下面是 Musl 库中同样对 fopen 函数的实现

FILE *fopen(const char *restrict filename, const char *restrict mode)
{
    FILE *f;
    int fd;
    int flags;

    /* Check for valid initial mode character */
    if (!strchr("rwa", *mode)) {
        errno = EINVAL;
        return 0;
    }

    /* Compute the flags to pass to open() */
    flags = __fmodeflags(mode);

    fd = sys_open(filename, flags, 0666);
    if (fd < 0) return 0;
    if (flags & O_CLOEXEC)
        __syscall(SYS_fcntl, fd, F_SETFD, FD_CLOEXEC);

    f = __fdopen(fd, mode);
    if (f) return f;

    __syscall(SYS_close, fd);
    return 0;
}

两者的可读性差距不言自明,笔者在这里并非是要批判 Glibc 的代码风格,但对于初次上手阅读源码的人来说,显然是 Musl 的风格更加友好,更便于理解。

体积过大

由于 Glibc 相较体积更加关注性能,因此其链接生成的二进制文件相较于 Musl uClibc 等专注于嵌入式等场合的库来说要大很多,而这些场合往往非常关注几百 K 大小的区别,因为 SRAM 的大小往往关乎整体开发板的成本。

下面这张表展示了不同 libc 库编译的文件大小。

尺寸对比 musl uClibc dietlibc glibc
.a 426k 500k 120k 2.0M
.so 527k 560k 185k 7.9M
静态最小 1.8k 5k 0.2k 662k
静态输出 13k 70k 6k 662k

可以看出 Glibc 在程序大小上明显大于其他 libc 库,此外,这里的静态也是有水分的,这就引出了 Glibc 的下一个问题,也是最重要的问题之一:静态链接。

对静态链接支持不佳

理论上来说,Glibc 是支持静态链接的。但,这也仅仅是从理论上来说,由于一些历史遗留问题(当然,也包括对功能实现的考虑)Glibc 的静态链接并不是真正的静态链接:如果你的程序中使用了某些不支持静态链接的特性(这一点在大型软件中非常常见),那么即便你在链接时选择静态链接,生成出来的程序实际上仍然是依赖于 Glibc 动态库的,一旦你尝试删除掉它,你立马就会发现这些“静态”链接的程序统统罢工不干了。

谁在用 Musl?

在发行版中,主要是 Alpine Linux,作为最特立独行的 Linux 发行版之一,它选用了 Musl + Busybox 的组合,而非通常的 Glibc + Coreutils,这使得它的最小安装可以控制在惊人的 5 MB 之内!相比之下,普通的 CentOS 最小安装则需要 200 MB 左右,这一点使得它在嵌入式等对内存占用极为敏感的场合占据了相当的优势。

此外,Musl 从设计之初就很关注静态链接的可用性,因此它完全可以被静态链接进其他程序中,不存在 Glibc 对动态库的依赖问题,这一点也有助于缓解不同版本 libc 之间的兼容性问题——只要我把万物都静态链接进去,就不存在版本问题了。当然,这种做法也会带来体积膨胀等问题,所以并不是一个太好的解决方案。

Musl 的问题与未来

虽然拥有诸多优点,但 Musl 在性能方面逊于 Glibc 也是不争的事实,毕竟简化实现的代价就包括牺牲性能,不过这一点并非不可拯救,通过使用开源的 malloc 实现(诸如微软的实现)替换这些对性能影响较大的热点函数,就可以在很大程度上解决性能方面的问题。

同时,试图取代或至少部分取代 Glibc 的库也并不止 Musl 一个, 例如用于 AOSP 项目上的 bionic,以及广泛应用于各种嵌入式开发中的 uClibc 等。与它们相比,Musl 背后既没有 Google 这样的大公司撑腰,在压缩体积方面做的也不够极致,相较之下就没有那么受到开发者们的青睐,在新功能和新特性跟进上也不是非常积极。

出于这些原因,也许 Musl 在今后的很长一段时间内会继续保持这种“小而美”的特点,但这对于我们来说并非就是一件坏事,能够看到与 GNU Glibc 风格截然不同的另一种实现,对于 Linux 社区的多样性,以及对于我们这些学习者来说,何尝不是一件美事?

参考链接


Box86/Box64 vs QEMU vs FEX (vs Rosetta2)

Comparing performances

I decided to compare the performances of the OpenSource Linux Userspace Emulator that allows you to run x86/x86_64 apps on ARM linux. There are QEMU-userFEX-emu and Box86/Box64.

How to bench Linux userspace emulator

Test will consist of the bench I already used a couple of time, and that can be run as native or emulated:

  • 7-zip integrated benchmark, that contains mostly integer code (no x87 or SSE), and can be used as a baseline to see the pure x86 code translation efficiency. The version 16 present in Ubuntu was used for those tests.
  • dav1d, an opensource video transcoding tool, that includes hand-optimized SSE assembly code (SSE3 or more).
  • glmark2 that is GL limited and should run at mostly native speed (as long as GL is hardware accelerated). I couldn’t install the armhf version of glmark2 on Ubuntu, so only the native 64bits version was benchmarked.
  • openarena, that contains x87 code, and a JIT, and, in that config, is very much GPU limited, and so should be running very close to the native speed (again, as long as GL is still hardware accelerated).

The 7z, dav1d and glmark2 bench are described here, and the openarena one there.

I’ll also do some quick bench not available natively. The fps will simply be measured with `HUD_GALLIUM=fps` on a stable and reproducible moment in the game:

  • WorldOfGoo: The game has simple graphics, it should run fine. Measures will be done on the Title screen.
  • FTL: that I added to the bench after doing the QEMU measures. Measures will be done on the 1st Tutorial screen, while the game is paused.
  • CINEBENCH r15: A benchmark based on a raytracing engine. Lots of SSE (SSE2 and more) code here. Use multi-core also. Does include a CPU bench and OpenGL bench, but only the CPU one is used here. It provides a simple number indicating the performance (the higher, the better).

To install WorldOfGoo, the “uname” trick will be used, as this allows to choose x86 or x86_64 installation (without the trick, the installer doesn’t recognise “aarch64” platform and fallback to x86). WorldOfGoo will run at 1920×1080 fullscreen.

CINEBENCH r15. This one needs Wine, and a 64bits version of it. It’s a benchmark with the CINEMA 4D Engine.

After some some testing, I realized that both openarena and WorldOfGoo mainly use x87 code, at least for the 32bits version of WorldOfGoo. Both QEMU and FEX seem to use use Softfloat for it, to keep the 80bits precision, while box uses hardware float (with some tricks to keep 80bits when needed, like on some data copy used by old games), so I decided to also check the menu page of FTL, that I know use SSE code. But I didn’t test on QEMU (it’s not hardware accelerated anyway, so it would be too slow). FTL will run at default resolution of 1280×720 windowed. I’ll launch the tutorial, answer to the 1st dialog box and mesure the fps at this point.

继续阅读Box86/Box64 vs QEMU vs FEX (vs Rosetta2)

云服务器 ECS Linux SSH 客户端断开后保持进程继续运行配置方法

在云服务器 ECS Linux 系统中,通常我们在执行一些运行时间比较长的任务时,必须等待执行完毕才能断开 SSH 连接或关闭客户端软件,否则可能会导致执行中断。

本文介绍几种保障程序在用户退出登录后持续运行的方法。

使用 nohup 执行


nohup 的作用顾名思义,它使得后面的命令不会响应挂断(SIGHUP)信号。也就是说,通过远程登录执行 nohup 后,即使退出登录后,程序还是会正常执行。通常情况下,nohup 命令最后会跟上 & 字符,表示将这个命令放至后台执行,这样才能真正做到将这个命令放至后台持续的执行。

操作示例:
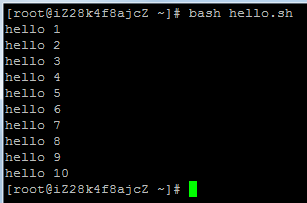
1. 正常的执行命令为 bash hello.sh,执行结果为每秒输出一行的小程序:

2. 在命令头尾分别加上 nohup 和 &,变为 nohup bash hello.sh &,可以看到 nohup 输出了一行信息,再按一下回车键就跳回了 shell 命令行,此时命令已经在后台执行了,nohup 将命令的输出重定向至当前目录的 nohup.out 文件中。同时注意到 nohup 会将对应程序的 PID 输出,PID 可用于需要中断进程时 kill 进程。

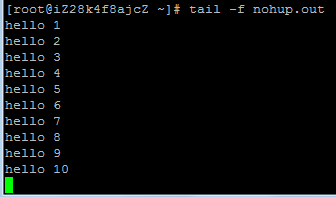
3. 通过 tail -f nohup.out 可以持续的查看 nohup.out 的输出,达到监视程序的效果。

4. 在命令中也可以使用重定向将程序的输出改为自己想要的文件名,如 nohup bash hello.sh >hello.log &,则程序的输出就会写到 hello.log 文件中。

5. 若程序不会自动退出,那么此时需要使用 kill 命令来结束进程。比如,可以使用命令 kill -TRM <PID> 来操作,其中 PID 即为之前 nohup 输出的值,在此例中该值为 1231。

使用限制:

nohup 通常用于执行无干预的自动化程序或脚本,无法完成带有交互的操作。

使用 screen 执行


安装 sceen 工具

Linux 系统默认未自带 screen 工具,需要先进行安装:

  • CentOS 系列系统: yum install screen
  • Ubuntu 系列系统: sudo  apt-get  install screen
使用简介

1. 创建 screen 窗口

$ screen -S  name
# name可以设置为ssh、ftp,用于标注该 screen 窗口用途
# 示例:
screen -S ftp

2. 列出 screen 进程,并进入所需 screen

$ screen -ls 
##列出 screen 进程列表

如下图

然后进行所需操作,比如运行脚本、执行程序等等。

如下图示例:创建ftp连接后台下载传输文件

3. 退出保存

前述 ftp 操作示例开始传输后,在窗口中键入Ctrl+a 键,再按下 d 键,就可以退出 SSH 登录,但不会影响 screen 程序的执行。

4. 保存会话以便继续执行

可以利用 screen 这种功能来管理的远程会话。操作步骤概述:

  • 正常 SSH 登录服务器
  • 创建 screen 窗口
  • 执行所需任务
  • 需要临时中断退出时,Ctrl + a 再按下 Ctrl + d 保存退出
  • 需要继续工作时,再次 SSH 登录服务器,然后直接执行 screen -r -d 恢复会话即可。

参考链接


云服务器 ECS Linux SSH 客户端断开后保持进程继续运行配置方法

Centos 7/RedFlag 7/Asianux 7安装|更新Git

背景描述

Centos 7/RedFlag 7/Asianux 7 上的 Git 版本太陈旧,在使用过程中会遇到问题,比如不支持目录分支(release/v01 这种格式会在检出的时候报错),因此需要升级 Git 版本。

$ git --version
git version 1.8.3.1

# 系统版本:(CentOS 7.6)
$ cat /etc/redhat-release 
CentOS Linux release 7.6.1810 (Core)

安装依赖包

源代码安装和编译git,需安装一些依赖。

$ yum install curl-devel expat-devel gettext-devel openssl-devel zlib-devel asciidoc -y

$ yum install  gcc perl-ExtUtils-MakeMaker -y

卸载旧版本

$ yum remove git

安装步骤

$ cd /usr/local/src/

$ wget https://mirrors.edge.kernel.org/pub/software/scm/git/git-2.38.1.tar.gz

# 或者 wget http://www.mobibrw.com/wp-content/uploads/2023/09/git-2.38.1.tar.gz

$ tar -xvf git-2.38.1.tar.gz

$ cd git-2.38.1/

$ ./configure --prefix=/usr/local/git all

$ make -j && make install
 
# 链接到系统默认搜索路径 
$ ln -s /usr/local/git/bin/git /usr/bin/git

验证版本

[root@localhost ~]# git --version
git version 2.38.1

参考链接