JS常用方法封装

做项目是遇到一个封装的不错的Util类,写一下,长期备用:

CMD标准

define(function(require, exports, module) {
    "use strict";

    function Util() {}

    (function() {
        Util.isWindow = function(obj) {
            return obj !== null && obj === obj.window;
        };

        Util.isFunction = function(obj) {
            return typeof obj === 'function';
        };

        Util.isObject = function(obj) {
            return typeof obj === 'object';
        };

        Util.isArray = function(obj) {
            return obj instanceof Array;
        };

        Util.isPlainObject = function(obj) {
            return Util.isObject(obj) && !Util.isWindow(obj);
        };

        Util.isString = function(obj) {
            return typeof obj === 'string';
        };

        // 将其他的object统统搞到一个object中去
        // 这个函数不如直接写两个参数看着舒服 target objects,就不用各种slice shift了
        Util.extend = function(target) {
            var deep;
            var args = [].slice.call(arguments, 1);

            if (typeof target === 'boolean') {
                deep = target;
                target = args.shift();
            }

            args.forEach(function(arg) {
               extend(target, arg, deep);
            });

            return target;

            // 这个函数就是把source里面的一层一层往下展开给target,object 和 array会一直展开
            function extend(target, source, deep) {
                for (var key in source) {
                    if (deep && (Util.isPlainObject(source[key]) || Array.isArray(source[key]))) {
                        if (Util.isPlainObject(source[key]) && !Util.isPlainObject(source[key])) {
                            target[key] = {};
                        }

                        if (Array.isArray(source[key]) && !Array.isArray(target[key])) {
                            target[key] = [];
                        }
                        extend(target[key], source[key], deep);
                    } else {
                        target[key] = source[key];
                    }
                }
            }
        };

        Util.ajaxGet = function(url, data, callback) {
            // 简单学习一下XMLHttpRequest,一个JS对象,提供了封装的获得url上资源数据的方法,支持xml http ftp file
            // 步骤简单: open(method, url, sync), send(), 如果是异步的话 就调用onreadystatechange方法
            var xhr = new XMLHttpRequest();
            // 设置超时时间为30s
            xhr.timeout = 30000;

            xhr.onreadystatechange = function() {
                console.log("xhr.status is " + xhr.readyState);
                if (xhr.readyState === 4) {
                    var status = 0;
                    try {
                        status = xhr.status;
                    } catch(e) {
                        // eat and ignore the exception, since access the status of XHR might cause a exception after timeout occurs;
                        return;
                    }

                    if (status === 200) {
                        var result = null;
                        try {
                            result  = JSON.parse(xhr.responseText.replace(/\n|\r|\t|\b|\f/g, ''));
                        } catch(e) {
                            callback(null);
                            return;
                        }
                        callback(result);
                    } else {
                        callback(null);
                    }

                    xhr.onreadystatechange = null;
                    xhr = null;
                }
            };
            xhr.withCredentials = true;
            xhr.open("GET", url + "?" + data, true);
            xhr.send(null);
            return xhr;
        };

        Util.ajaxPost = function(url, data, callback) {
            var xhr = new XMLHttpRequest();
            // 原来navigator除了online,还有个connection
            // 这个connection,而且这个connection很刁,何以拿到type,还有change事件
            // 关键是一大堆浏览器都TM的不支持
            var connection = navigator.connection;
            switch(connection.type) {
                case connection.WIFI :
                case connection.ETHERNET:
                    xhr.timeout = 3000;
                    break;
                case connection.CELL_3G:
                case connection.CELL_4G:
                    xhr.timeout = 5000;
                    break;
                case connection.CELL_2G:
                    xhr.timeout = 30000;
                    break;
                default :
                    xhr.timeout = 30000;
            }

            // POST比GET复杂,首先不同网络timeout不一样,其次有很多事件需要监听
            xhr.addEventListener("error", function(e) {
                if (e && e.loaded === 60) {
                    // https error
                    if (e.total === 9) {
                        callback("CERTIFICATE TIME ERROR");
                    } else {
                        callback("CERTIFICATE ERROR");
                    }
                } else {
                    callback("NETWORK_ERROR");
                }
            });

            xhr.addEventListener("abort", function() {
                console.log("request abort!");
            });

            xhr.addEventListener("timeout", function() {
                callback("TIMEOUT");
            });

            xhr.addEventListener("readystatechange", function() {
                if (xhr.readyState === 4) {
                    if (xhr.status === 200) {
                        var result;
                        try {
                            result = JSON.parse(xhr.responseText.replace(/\n|\r|\t|\b|\f/g, ''));
                        } catch(e) {
                            callback("DATA_INVALID");
                            return;
                        }
                        callback(result);
                    } else if (xhr.status !== 0) {
                        callback("HTTP_ERROR");
                    }
                }
            });

            // withCredentials = true 将使得请求会带上cookie
            xhr.withCredentials = true;
            xhr.open("POST", url, true);
            xhr.setRequestHeader("Content-type", "application/x-www-form-urlencoded");
            xhr.send(data);
            return xhr;
        };

        Util.abort = function(xhr) {
            xhr.abort;
        };

        Util.getGeoLocation = function(callback) {
            var timeout = 30000;
            if (navigator.connection && navigator.connection.type) {
                switch (navigator.connection.type) {
                    // wifi
                    case 2:
                        timeout = 8000;
                        break;
                    // 2G
                    case 3:
                        timeout = 30000;
                        break;
                    // 3g:
                    case 4:
                        timeout = 20000;
                        break;
                    default:
                        timeout = 30000;
                        break;
                }
            }

            // 这里就是浏览器获取地理位置的用法
            navigator.geolocation.getCurrentPosition(
                function(position) {
                callback.call(this, position);
                }.bind(this),
                function(error) {
                    callback.call(this, null);
                }.bind(this),
                {
                    enableHighAccuracy: true,
                    maximumAge: 180000,
                    timeout: timeout
                });
        };

        // 实时定位, 返回一个ID,用来取消监听
        Util.startWatchGeoLocation = function(callback) {
            return navigator.geolocation.watchPosition(
                function(position) {
                    callback.call(this, position);
                }.bind(this),
                function() {
                    callback.call(this, null);
                }.bind(this),
                {
                    maximumAge: 600000,
                    timeout: 20000
                }
            );
        };

        Util.stopWatchGeoLocation = function(geoId) {
            navigator.geolocation.clearWatch(geoId);
        };

        // 主要用来 ajax request中把object转为字符串
        Util.paramToStr = function(params) {
            var data = '';
            var isFirstChar = true;
            for (var key in params) {
                if (params.hasOwnProperty(key)) {
                    if (isFirstChar === true) {
                        isFirstChar = false;
                        data += key + "=" + params[key];
                    } else {
                        data += "&" + key + "=" + params[key];
                    }
                }
            }
            return data;
        };

        // 预加载一个Image
        Util.preloadImage = function(images) {
            if (images && images.length) {
                for(var i = 0; i < images.length; i++) {
                    var imgContainer = new Image();
                    imgContainer.src = images[i];
                    imgContainer = null;
                }
            }
        };

        // 就是把 rgb(,,)换成了rgba(,,,)
        Util.addOpacity = function(color, opacity) {
            var newColor = color.replace(/rgb/g, "rgba").replace(/\)/g, "," + opacity + ")");
            return newColor;
        };

        Util.isOffline = function() {
            return !navigator.onLine;
        };

        Util.getStorageValue = function(key) {
            var item = window.localStorage.getItem(key);
            if (!item) {
                return;
            }

            item = JSON.parse(item);
            var data = item.data;
            var type = item.type;
            var value = null;
            switch(type) {
                case "Boolean":
                    value = Boolean(data);
                    break;
                case "String":
                    value = String(data);
                    break;
                case "Number":
                    value = Number(data);
                    break;
                case "JSON":
                    value = JSON.parse(data);
                    break;
            }

            return value;
        };

        Util.setStorageValue = function(key, value) {
            var type = null;
            var data = value;
            if (typeof value === "boolean") {
                type = "Boolean";
            } else if (typeof value === "string") {
                type = "String";
            } else if (typeof value === "number") {
                type = "Number";
            } else if (typeof value === "object") {
                type = "JSON";
                data = JSON.stringify(value);
            }

            window.localStorage.setItem(key, JSON.stringify({data: data, type: type}));
        }
    }).();

    module.exports = Util;
});

IScroll的使用-方向键绑定&自定义滚动条样式

之前在webkit上开发一个滚动控件,需要完成的是一段文字,上下键可以滚动,且自定义滚动条。第一想法就是浏览器原生overflow:scroll,且webkit支持自定义滚动条样式:

webkit自定义滚动条样式:

/*定义滚动条高宽及背景 高宽分别对应横竖滚动条的尺寸*/
::-webkit-scrollbar
{
    width: 0.05rem;
    height:1rem;
    background-color: transparent;
}

/*定义滚动条轨道 内阴影+圆角*/
::-webkit-scrollbar-track
{
    background-color: transparent;
}

/*定义滑块 内阴影+圆角*/
::-webkit-scrollbar-thumb
{
    border-radius: 0.1rem;
    /*-webkit-box-shadow: inset 0 0 6px rgba(0,0,0,.3);*/
    background-color: rgba(255,255,255,0.6);
}

后来换了个引擎,发现其他引擎不支持自定义滚动条,那就满足不了UED的要求了。来同事推荐使用IScroll,用了一下,确实比较方便,与平台无关,可操作的属性还有性能都很理想,记录一下:

首先看官方文档 https://iiunknown.gitbooks.io/iscroll-5-api-cn/content/versions.html

github地址:https://github.com/cubiq/iscroll

demo:http://cubiq.org/dropbox/iscroll4/examples/simple/

直接拿demo中的iscroll.js套到自己的工程上,一个段落就是一个li,new 一下就完事了,滚动拖动也很happy。然后发现,我按上下方向键没有响应。

IScroll按键事件绑定:

查源码看iscroll的事件处理,都在handleEvent函数里面

handleEvent: function (e) {
    var that = this;
    switch(e.type) {
        case START_EV:
        if (!hasTouch && e.button !== 0) return;
        that._start(e);
        break;
        case MOVE_EV: that._move(e); break;
        case END_EV:
        case CANCEL_EV: that._end(e); break;
        case RESIZE_EV: that._resize(); break;
        case WHEEL_EV: that._wheel(e); break;
        case 'mouseout': that._mouseout(e); break;
        case TRNEND_EV: that._transitionEnd(e); break;
    }
}

根本就没有keyEvent,看来偷懒是不行的,官方文档看一下,原来iscroll有5个版本,各自平台都是不一样的,demo中这个估计是移动平台用的iscroll-lite版本,移动平台根本不鸟方向键的。

去github上down下来源码,找了找,build目录下,5个版本都有。用最原始的common版本,这个版本的handleEvent就丰富多了:

handleEvent: function (e) {
   switch ( e.type ) {
      case 'touchstart':
      case 'pointerdown':
      case 'MSPointerDown':
      case 'mousedown':
         this._start(e);
         break;
      case 'touchmove':
      case 'pointermove':
      case 'MSPointerMove':
      case 'mousemove':
         this._move(e);
         break;
      case 'touchend':
      case 'pointerup':
      case 'MSPointerUp':
      case 'mouseup':
      case 'touchcancel':
      case 'pointercancel':
      case 'MSPointerCancel':
      case 'mousecancel':
         this._end(e);
         break;
      case 'orientationchange':
      case 'resize':
         this._resize();
         break;
      case 'transitionend':
      case 'webkitTransitionEnd':
      case 'oTransitionEnd':
      case 'MSTransitionEnd':
         this._transitionEnd(e);
         break;
      case 'wheel':
      case 'DOMMouseScroll':
      case 'mousewheel':
         this._wheel(e);
         break;
      case 'keydown':
         this._key(e);
         break;
      case 'click':
         if ( !e._constructed ) {
            e.preventDefault();
            e.stopPropagation();
         }
         break;
   }
}

然后套用上去,可以支持方向键了。中间遇到两个小问题,第一个是按键一直没反应,检查下是z-index太小,keyEvent被上层元素拿走了;第二个是只有在#warpper拿到focus的时候才响应按键,但我用的引擎不支持focus,这个也不难,页面强行绑定handleEvent:

document.addEventListener("keydown", function(evt) {
    if (evt.keyCode === keyCodes.ENTER) {
    } else {
        myScroll && myScroll.handleEvent(evt);
    }
}, false);

然后整个页面随便按什么键,都可以响应了。接下来就是滚动条样式的问题了,这个也简单,跟着官方文档&样例走就行

http://lab.cubiq.org/iscroll5/demos/styled-scrollbars/

关键步骤有三个:

1.option

myScroll = new IScroll(document.getElementById('wrapper'), {
    keyBindings: true,          // 绑定按键事件
    scrollbars: 'custom',       // 自定义样式
    resizeScrollbars: false     // 是否自动缩放滚动条
});

设置了scrollbars: 'custom',在页面的Elements就可以找到

<div class="iScrollVerticalScrollbar iScrollLoneScrollbar" ></div>

里面还包含了

<div class="iScrollIndicator" ></div>

第一个是滚动区域,第二个是滚动条。拿到Element就好办了,css给定样式:

.iScrollVerticalScrollbar {
    position: absolute;
    z-index: 9999;
    width: 0.1rem;
    bottom: 2px;
    top: 2px;
    right: 0;
    overflow: hidden;
}

.iScrollIndicator {
    position: absolute;
    width: 0.08rem; height: 0.3rem;
    background: rgba(255,255,255,0.6);
    border-radius: 0.1rem;
}

大功告成!

当然,IScroll不止这点功能,官方文档后面还有无限滚动等高级用法,以后用到再添加。

使用grunt压缩代码&配置多个任务

grunt是node环境下一个压缩、合并 js、css代码的工具,还可以做一下代码美化等。体验了一下压缩合并,还是不错的,大概流程如下:

在工程下建一个grunt目录,写两个文件 package.json-工程依赖Gruntfile.js-压缩任务

package.jsn:

{
  "name": "xxx",
  "version": "v0.1.0",
  "devDependencies": {
    "grunt": "^0.4.5",
    "grunt-contrib-concat": "~0.5.1",
    "grunt-contrib-cssmin": "~0.12.3",
    "grunt-contrib-jshint": "~0.10.0",
    "grunt-contrib-nodeunit": "~0.4.1",
    "grunt-contrib-uglify": "~0.5.0",
    "grunt-htmlhint": "~0.9.2"
  }
}

Gruntfile.js:

module.exports = function(grunt) {
    // 配置参数
    grunt.initConfig({
        pkg:grunt.file.readJSON('package.json'),
        // 代码合并
        concat:{
            options:{
                separator: ";",
                stripBanners: true
            },
            dist:{
                src:[
                    "../focusManager/base.js",
                    "../focusManager/tween.js",
                    "../focusManager/widget.js",
                    "../focusManager/yunos.js"
                ],
                dest: "dest/focusManager.js"
            }
        },
        // 代码压缩
        uglify:{
            options:{

            },
            dist:{
                files:{
                    "dest/focusManager-min.js" : "dest/focusManager.js"
                }
            }
        },
        // css压缩
        cssmin: {
            options: {
                keepSpecialComments: 0
            },
            compress:{
                files:{
                    "dest/default.css": [
                        "../focusManager/base.css",
                        "../focusManager/reset.css"
                    ]
                }
            }
        }
    });

    // 载入concat、uglify、cssmin插件,进行压缩
    grunt.loadNpmTasks('grunt-contrib-concat');
    grunt.loadNpmTasks('grunt-contrib-uglify');
    grunt.loadNpmTasks('grunt-contrib-cssmin');

    // 注册任务
    grunt.registerTask('default', ['concat', 'uglify', 'cssmin']);
};

这个Gruntfile很容易理解,想要压缩的文件以及目标文件写好就行,还有另一种自动化的写法,后面再说。

之后运行命令,grunt

1

出现了一个错误,网上解释

Note that installing grunt-cli does not install the grunt task runner! The job of the grunt CLI is simple: run the version of grunt which has been installed next to a Gruntfile. This allows multiple versions of grunt to be installed on the same machine simultaneously.

So in your project folder, you will need to install (preferably) the latest grunt version:

也就是说,之前装的grunt-cli只是grunt的运行环境,在工程目录下,还需要装一下grunt,运行一下命令:

$npm install grunt --save-dev

Option --save-dev will add grunt as a dev-dependency to your package.json. This makes it easy to reinstall dependencies.

2

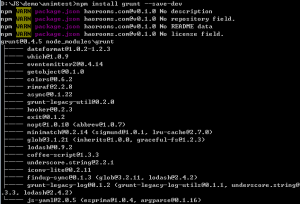
之后再次运行grunt命令,又出现错误:

3

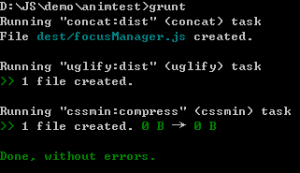
好吧,没有装这三个插件?原来是grunt一样,也要在工程下装,分别运行 npm install装一下,运行,成功:

4

工程复杂之后,肯定不会一个一个手动填文件,grunt也可以通过逻辑自动压缩js css文件,Gruntfile.js写法:

module.exports = function(grunt) {
    // 任务配置
    grunt.initConfig({
        pkg: grunt.file.readJSON('package.json'),

        // 压缩JS
        uglify: {
            // 文件头部输出信息
            options: {
                banner: '/*! <%= pkg.name %> <%= grunt.template.today("yyyy-mm-dd") %> */\n'
            },
            my_target: {
                files: [
                    {
                        expand: true,
                        // 相对路径
                        cwd: '../focusManager',
                        src: ['*.js', '**/*.js'],
                        // src:['**/*.js', '!**/*.min.js'] 多个src的写法以及不包括哪些js
                        dest: 'dest/js/',
                        rename: function (dest, src) {
                            var folder = src.substring(0, src.lastIndexOf('/'));
                            var filename = src.substring(src.lastIndexOf('/'), src.length);
                            filename = filename.substring(0, filename.lastIndexOf('.'));
                            var resultname = dest + folder + filename + '-min.js';
                            grunt.log.writeln("正在处理文件:" + src + " 处理后文件:" + resultname);

                            return resultname;
                        }
                    }
                ]
            }
        },

        // 压缩css
        cssmin: {
            // 文件头部输出信息
            options: {
                banner: '/*! <%= pkg.name %> <%= grunt.template.today("yyyy-mm-dd") %> */\n',
                // 美化代码
                beautify: {
                    // 防止乱码
                    ascii_only: true
                }
            },
            my_target: {
                files: [
                    {
                        expand: true,
                        // 相对路径
                        cwd: '../focusManager',
                        src: '*.css',
                        // src:['**/*.js', '!**/*.min.js'] 多个src的写法以及不包括哪些js
                        dest: 'dest/css/',
                        rename: function (dest, src) {
                            var folder = src.substring(0, src.lastIndexOf('/'));
                            var filename = src.substring(src.lastIndexOf('/'), src.length);
                            filename = filename.substring(0, filename.lastIndexOf('.'));
                            var resultname = dest + folder + filename + '-min.css';
                            grunt.log.writeln("正在处理文件:" + src + " 处理后文件:" + resultname);

                            return resultname;
                        }
                    }
                ]
            }
        }
    });

    // 加载模块
    grunt.loadNpmTasks('grunt-contrib-uglify');
    grunt.loadNpmTasks('grunt-contrib-cssmin');

    grunt.registerTask('default', ['uglify', 'cssmin']);
};

逻辑也很简单,就是把src里面的文件,压缩,生成文件会经过rename函数处理。

这里面需要注意的地方有

src: ['*.js', '**/*.js'],

如果只写一个*.js,是不会递归cwd目录下的所有文件的,要递归几级写到数组中就可以了,如果不想添加什么文件,加!符号-‘!*.min.js’。

当然,这次也没有一帆风顺,运行的时候遇到错误:

5

报错在 最后一句,

grunt.registerTask('default', ['uglify', 'cssmin']);

查了半天也没找到这里有什么错误,网上搜了一下,大多数是 中括号里的uglify没有引号,跟我的情况也不一样。后来仔细检查了一下代码,发现了两处拼写错误,改了后就运行通过了,也就是说,其他错误都会报到最后一句。

做了一个小小的试验,写一个空模块

(function(){
    // for test
})();

压缩后是这样的:


对,什么都没了。


最近有新的需求,压缩不同版本的文件,就需要开多个contact uglify任务,琢磨了一会,搞出来了,同时对grunt有了进一步的认识。

配置多任务是这么写的

module.exports = function(grunt) {
    // 配置参数
    grunt.initConfig({
        pkg:grunt.file.readJSON('package.json'),
        // 代码合并
        concat:{
            options:{
                separator: ";",
                stripBanners: true
            },
            123456: {
                src:[
                    "../../system/123.js",
                    "../../system/456.js",
                    "../../system/network/789.js"
                ],
                dest: "out/123456789.js"
            },
            all: {
                src:[
                    "../../system/blitz.js",
                    "../../system/base.js",
                    "../../system/**/*.js",
                ],
                dest: "out/test_all.js"
            }
        },
        uglify:{
            123456: {
                files: [
                    {
                        "out/123456789.min.js" : "out/123456789.js"
                    }
                ]
            },
            all: {
                files: [
                    {
                        "out/test_all.min.js" : "out/test_all.js"
                    }
                ]
            },
            every: {
                // 文件头部输出信息
                //options: {
                //    banner: '/*! <%= pkg.name %> <%= grunt.template.today("yyyy-mm-dd") %> */\n'
                //},
                files: [
                    {
                        expand: true,
                        // 相对路径
                        cwd: '../../system',
                        // 这里写三层,如果还有更多的再说
                        src: ['*.js', '**/*.js', '**/**/*.js'],
                        // src:['**/*.js', '!**/*.min.js'] 多个src的写法以及不包括哪些js
                        dest: './out/all/',
                        rename: function (dest, src) {
                            var folder = src.substring(0, src.lastIndexOf('/'));
                            var filename = src.substring(src.lastIndexOf('/'), src.length);
                            filename = filename.substring(0, filename.lastIndexOf('.'));
                            var resultname = dest + folder + filename + '.min.js';
                            grunt.log.writeln("正在处理文件:" + src + " 处理后文件:" + resultname);

                            return resultname;
                        }
                    }
                ]
            }
        }
    });

    // 载入concat、uglify、cssmin插件,进行压缩
    grunt.loadNpmTasks('grunt-contrib-concat');
    grunt.loadNpmTasks('grunt-contrib-uglify');
    //grunt.loadNpmTasks('grunt-contrib-cssmin');

    // 注册任务
    grunt.registerTask('default', ['concat', 'uglify']);
};

r简单看一下配置文件

contact

首先配置了option,option中配置了不同文件中间增加;分隔符。

这个是contact所有任务的全局配置

后面又写了三个合并任务,分别配置下src和dest就可以了。

合并顺序就是 src中配置的顺序,*.js则按照字母排序。

uglify

uglify中配置了三个压缩任务,

压缩contact的文件

压缩所有文件并生成.min.js

最后运行

grunt.registerTask('default', ['concat', 'uglify']);

会自动加载contact和uglify中的所有任务。

来源于http://www.haorooms.com/post/qd_grunt_cssjs。

ES6新特性

ECMAScript出现了许多有趣的新特性,梳理一下:

1.支持constant声明

ES5中,想实现constant变量必须通过修改var的property实现

Object.defineProperty(this, "PI", {
    value: 3.1415926,
    configurable: false,
    writable: false
});

2.支持块作用域声明let,

JS只有函数作用域,没有块作用域,var声明有变量提升的效果,即如果var声明了一个未声明过的变量,会自动将此声明提升到顶端,所以想实现块作用域在ES5中是通过闭包的形式。

(function(param) {})(i);

同时ES6也支持了块级作用域的函数

3.一种function的新写法

function中支持this的使用

nums.forEach(function(v) {
    return foo(v);
});

nums.forEach(v => {
    foo(v)
});

4.undefined参数默认配置

ES6:

function(x, y = 7, z = 10) {
    return x + y + z;
}

等效于ES5:

function(x, y, z) {
    if (y === undefined) {
        y = 7;
    }
    if (z === undefined) {
        z = 10;
    }
    return x + y + z;
}

5.支持剩余参数写法

即...p写法会被解释为

p.prototype.slice

ES6:

function f (x, y, ...a) {
    return (x + y) * a.length
}
f(1, 2, "hello", true, 7) === 9

ES5:

function f (x, y) {
    var a = Array.prototype.slice.call(arguments, 2);
    return (x + y) * a.length;
};
f(1, 2, "hello", true, 7) === 9;

6.可以直接在字符串中加入${表达式}

即console.log("Error: ${e.toString()}");

7.引用

//lib/math.js
export function sum(x, y) {return x + y};
export var pi = 3.1415926;

//app.js
import * as math from "lib/math"
console.log(math.sum(math.pi, math.pi););

8.支持class 继承,setter、getter

class Shape {
    constructor (id, x, y) {
        this.id = id;
        this.move(x, y);
    }
    move (x, y) {
        this.x = x;
        this.y = y;
    }
}
class Rectangle extends Shape {
    constructor (id, x, y, width, height) {
        super(id, x, y);
        this.width  = width;
        this.height = height;
    }
    set width(width) {this.width = width}
    get width()      {return this.width}
}
class Circle extends Shape {
    constructor (id, x, y, radius) {
        super(id, x, y);
        this.radius = radius;
    }
}

9.支持Promise Generators(待学习)

10.bufferArray

class Example {
    constructor (buffer = new ArrayBuffer(24)) {
        this.buffer = buffer
    }
    set buffer (buffer) {
        this._buffer    = buffer
        this._id        = new Uint32Array (this._buffer,  0,  1)
        this._username  = new Uint8Array  (this._buffer,  4, 16)
        this._amountDue = new Float32Array(this._buffer, 20,  1)
    }
    get buffer ()     { return this._buffer       }
    set id (v)        { this._id[0] = v           }
    get id ()         { return this._id[0]        }
    set username (v)  { this._username[0] = v     }
    get username ()   { return this._username[0]  }
    set amountDue (v) { this._amountDue[0] = v    }
    get amountDue ()  { return this._amountDue[0] }
}

let example = new Example()
example.id = 7
example.username = "John Doe"
example.amountDue = 42.0