在 macOS 中,给 PKG 文件进行签名是一个确保用户能够顺利无警告地安装软件的重要步骤。以下是给 PKG 签名的详细步骤:
一、准备阶段
获取开发者账号和证书:
- 首先,需要在苹果开发者网站(Apple Developer)注册一个有效的开发者账号。
- 登录开发者账号后,进入 “Certificates, IDs & Profiles” 页面。
- 创建并下载 “Developer ID Application” 证书和 “Developer ID Installer” 证书。这两个证书分别用于签名应用程序和 PKG 安装包。
- 将下载的证书双击安装到“钥匙串访问”中。
打包PKG文件:
- 使用 Packages 工具或其他打包工具,将需要分发的应用程序和相关文件打包成一个 PKG 安装包。
- 在打包过程中,可以添加安装前和安装后的脚本来执行一些自定义操作。
二、签名阶段
获取证书名称:
- 打开终端,输入命令 security find-identity -v,列出所有已安装的证书。
- 找到与 “Developer ID Installer” 相关的证书名称,通常格式为 “Developer ID Installer: 开发者名称 (证书标识符)”。
签名PKG文件:
使用 productsign 命令对 PKG 文件进行签名。命令格式如下:
|
1 |
$ productsign --sign "Developer ID Installer: 开发者名称 (证书标识符)" 原始PKG文件路径 签名后的PKG文件路径 |
例如:
|
1 |
$ productsign --sign "Developer ID Installer: Your Company, Co., LTD (2988ZTAM4B)" App.pkg App-Signed.pkg |
这将生成一个新的签名后的 PKG 文件。
三、验证签名
验证PKG文件签名:
使用 pkgutil 命令验证 PKG 文件的签名是否有效。命令格式如下:
|
1 |
$ pkgutil --check-signature 签名后的PKG文件路径 |
如果签名有效,命令将输出 “signed by a developer certificate issued by Apple for distribution”。
四、公证阶段(可选)
从 macOS 10.14.5 开始,苹果要求所有分发的软件都必须经过公证(Notarization)。公证过程如下:
准备已签名的软件包:
在公证之前,你需要确保你的 .pkg 文件已经使用 codesign 命令进行了签名。
将公证凭证存储到 macOS 的钥匙串中:
|
1 2 3 4 |
$ xcrun notarytool store-credentials "$KEYCHAIN_PROFILE" \ --apple-id "$APPLE_ID" \ --team-id "$TEAM_ID" \ --password "$APP_SPECIFIC_PASSWORD" |
上传PKG文件到苹果服务器:
使用 notarytool 提交你的软件包进行公证。这一步会将你的软件包上传到 Apple 的公证服务,并启动公证流程。
|
1 |
$ xcrun notarytool submit $ /path/to/your/signed/package.pkg --keychain-profile $KEYCHAIN_PROFILE --wait |
- /path/to/your/signed/package.pkg 是你的已签名软件包的路径。
- --keychain-profile 参数用于指定包含你签名证书的钥匙串配置文件(可选,如果证书在默认钥匙串中则不需要)。
- --wait 参数告诉 notarytool 等待公证完成并返回结果。
如果公证成功,notarytool 会返回一个 RequestUUID,你可以使用这个 UUID 来查询公证状态或进行后续操作。
检查公证结果(如果未使用 --wait):
如果你没有使用 --wait 参数,你需要使用返回的 RequestUUID 来检查公证状态。
|
1 |
$ xcrun notarytool status <RequestUUID> |
替换 <RequestUUID> 为你实际获得的 UUID。
五、盖章步骤
一旦你的软件包通过了公证,你就可以使用 stapler 工具对其进行盖章。
对软件包进行盖章:
使用 stapler 工具对你的软件包进行盖章,以表明它已经通过了 Apple 的公证服务。
|
1 |
$ xcrun stapler staple /path/to/your/signed/package.pkg |
/path/to/your/signed/package.pkg 是你的已签名且已公证的软件包的路径。
验证盖章结果(可选):
你可以使用 stapler 工具来验证你的软件包是否已经被正确盖章。
|
1 |
$ xcrun stapler validate /path/to/your/stapled/package.pkg |
/path/to/your/stapled/package.pkg 是你的已盖章软件包的路径。
如果所有步骤都成功完成,你的软件包现在应该已经准备好分发给用户了。
用户可以通过 macOS 的“安装未知开发者应用”的安全设置来安装你的软件包,而不会因为未经验证的应用程序而被阻止。
六、命令集合
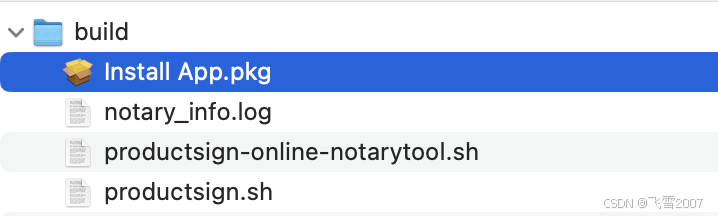
以下是一个简要的流程,以及一个相应的 .sh 脚本示例:
1.用于签名 .pkg 文件( productsign.sh )。
|
1 2 3 4 5 6 7 8 9 10 11 12 13 14 15 16 17 18 19 20 21 22 23 24 25 26 27 28 29 |
#!/bin/bash # 证书名称,使用"security find-identity -v"命令查找并替换 CERT_NAME="Developer ID Installer: Your Company Co., Ltd. (4H8C8HR626)" # 原始PKG文件路径,替换为你的PKG文件路径 PKG_PATH="Install App.pkg" # 签名后的PKG文件路径,替换为你想要保存的签名PKG文件路径 SIGNED_PKG_PATH="../Install App.pkg" # 签名PKG文件 echo "正在签名PKG文件..." productsign --sign "$CERT_NAME" "$PKG_PATH" "$SIGNED_PKG_PATH" if [ $? -ne 0 ]; then echo "签名PKG文件失败" exit 1 fi echo "PKG文件签名成功" # 验证签名 echo "正在验证PKG文件签名..." pkgutil --check-signature "$SIGNED_PKG_PATH" if [ $? -ne 0 ]; then echo "验证PKG文件签名失败" exit 1 fi echo "PKG文件签名验证成功" echo "所有脚本执行成功!" |
2.用于签名和公证 .pkg 文件(productsign-online-notarytool.sh)。
|
1 2 3 4 5 6 7 8 9 10 11 12 13 14 15 16 17 18 19 20 21 22 23 24 25 26 27 28 29 30 31 32 33 34 35 36 37 38 39 40 41 42 43 44 45 46 47 48 49 50 51 52 53 54 55 56 57 58 59 60 61 62 63 64 65 66 67 68 69 70 71 72 73 74 75 76 77 78 79 80 81 82 83 84 85 86 87 88 89 90 91 92 93 94 95 96 97 98 99 100 101 102 103 104 105 106 107 108 109 110 111 112 113 114 115 116 117 118 119 120 121 122 123 124 125 126 127 128 129 130 |
#!/bin/bash # 证书名称,使用"security find-identity -v"命令查找并替换 CERT_NAME="Developer ID Installer: Your Company Co., Ltd. (4H8C8HR626)" # 开发者团队ID # 从CERT_NAME中提取TEAM_ID # 假设TEAM_ID总是位于最后一对括号内 # TEAM_ID="4H8C8HR626" TEAM_ID=$(echo "$CERT_NAME" | awk -F'[()]' '{print $2}') # 原始PKG文件路径,替换为你的PKG文件路径 PKG_PATH="Install App.pkg" # 签名后的PKG文件路径,替换为你想要保存的签名PKG文件路径 SIGNED_PKG_PATH="../Install App.pkg" # 苹果开发者账号 APPLE_ID="apple@163.com" # 应用专属密码(不是账号的登录密码),替换为你的应用专属密码 # 申请链接:https://account.apple.com/account/manage APP_SPECIFIC_PASSWORD="wet-erwc-ssdf-hqaf" KEYCHAIN_PROFILE="my_notary_credentials" # 钥匙串配置文件名称 # 签名PKG文件 echo "正在签名PKG文件..." productsign --sign "$CERT_NAME" "$PKG_PATH" "$SIGNED_PKG_PATH" if [ $? -ne 0 ]; then echo "签名PKG文件失败" exit 1 fi echo "PKG文件签名成功" # 验证签名 echo "正在验证PKG文件签名..." pkgutil --check-signature "$SIGNED_PKG_PATH" if [ $? -ne 0 ]; then echo "验证PKG文件签名失败" exit 1 fi echo "PKG文件签名验证成功" # ==== Xcode 16 === # 存储公证凭证到钥匙串 echo "正在存储公证凭证..." xcrun notarytool store-credentials "$KEYCHAIN_PROFILE" \ --apple-id "$APPLE_ID" \ --team-id "$TEAM_ID" \ --password "$APP_SPECIFIC_PASSWORD" if [ $? -ne 0 ]; then echo "存储凭证失败!" exit 1 fi # 上传PKG文件进行公证并获取RequestUUID echo "正在上传PKG文件进行公证, 请稍等..." OUTPUT=$(xcrun notarytool submit "$SIGNED_PKG_PATH" \ --keychain-profile "$KEYCHAIN_PROFILE" \ --wait 2>&1) echo "上传输出信息:" echo "$OUTPUT" # 检查是否成功获取到RequestUUID REQUEST_UUID=$(echo "$OUTPUT" | awk -F': ' '/id: / {print $2; exit}') if [ -z "$REQUEST_UUID" ]; then echo "上传PKG文件进行公证失败,未获取到RequestUUID" echo "错误信息: $OUTPUT" exit 1 fi echo "PKG文件已上传进行公证,RequestUUID: $REQUEST_UUID" # 查询公证进度 echo "正在等待公证完成..." WAIT_TIME=0 INTERVAL=30 MAX_WAIT_TIME=600 # 10分钟=600秒 while [ $WAIT_TIME -lt $MAX_WAIT_TIME ]; do xcrun notarytool info "$REQUEST_UUID" --keychain-profile "$KEYCHAIN_PROFILE" > ./notary_info.log STATUS=$(grep -i "status:" ./notary_info.log | awk -F': ' '{print $2}') if [ "$STATUS" == "Accepted" ]; then echo "公证完成!" break elif [ "$STATUS" == "Success" ]; then echo "公证成功!" break elif [ "$STATUS" == "Invalid" ]; then echo "公证失败,状态为无效!" exit 1 else echo "公证进行中($WAIT_TIME)..." echo "等待$INTERVAL 秒后再次检查..." sleep $INTERVAL WAIT_TIME=$((WAIT_TIME + INTERVAL)) fi if [ $WAIT_TIME -ge $MAX_WAIT_TIME ]; then echo "公证超时!" exit 1 fi done # 盖章 echo "正在对签名的安装包进行盖章..." xcrun stapler staple "$SIGNED_PKG_PATH" if [ $? -ne 0 ]; then echo "盖章失败!" else echo "盖章成功!" exit 1 fi # 验证 echo "正在验证已经盖章的签名的安装包..." xcrun stapler staple -v "$SIGNED_PKG_PATH" if [ $? -ne 0 ]; then echo "验证失败!" exit 1 else echo "盖章和验证成功!" fi echo "PKG文件签名和公证流程全部完成" echo "所有脚本执行成功!" |
请注意,这些步骤假设你已经具备了必要的 Apple Developer 账户、证书和配置文件,并且你的 macOS 系统已经安装了 Xcode 和 Xcode Command Line Tools。如果你遇到任何问题,请检查你的证书、配置文件和路径是否正确,以及你是否拥有执行这些命令的适当权限。
|
1 2 3 4 5 6 7 8 9 |
$ cd build $ chmod +x productsign.sh $ chmod +x productsign-online-notarytool.sh $ ./productsign.sh #或者仅签名 $ ./productsign-online-notarytool.sh # 或者签名加公正[用于需要自动更新] |
参考:
- https://taoofcoding.tech/blogs/2022-11-13/use-notarytool-to-notary-macos-app
- https://blog.csdn.net/Crystal_Mr_Rose/article/details/136351429
- macOS 工具 - 查看PKG文件内容, App下载安装 SuspiciousPackage官方下载地址(免费): http://www.mothersruin.com/software/SuspiciousPackage/get.html
- Mac OS平台下应用程序PKG安装包制作工具Packages, App下载安装Packages官方下载地址(免费): http://s.sudre.free.fr/Software/Packages/resources.html