今天升级到 Android Studio Arctic Fox | 2020.3.1 出现了如下错误:
Corrputed Installation

Missing essential plugin:

 org.jetbrains.android

Please reinstall Android Studio from scratch.
今天升级到 Android Studio Arctic Fox | 2020.3.1 出现了如下错误:
Corrputed Installation Missing essential plugin: org.jetbrains.android Please reinstall Android Studio from scratch.
Public Function UploadFileTo(sFileName As String, uURL As String, nameFieldID As String, dataFieldID As String, formID As String) As Boolean
    Const STR_BOUNDARY  As String = "a832972453175"
    Dim nFile           As Integer
    Dim baBuffer()      As Byte
    Dim sPostData       As String
    Dim WinHttpReq      As Object

    Set WinHttpReq = CreateObject("Microsoft.XMLHTTP")

    UploadFileTo = False
    '--- read file
    nFile = FreeFile
    Open sFileName For Binary Access Read As nFile
        If LOF(nFile) > 0 Then
            ReDim baBuffer(0 To LOF(nFile) - 1) As Byte
            Get nFile, , baBuffer
            sPostData = StrConv(baBuffer, vbUnicode)
        End If
    Close nFile

    sPostData = "--" & STR_BOUNDARY & vbCrLf & _
        "Content-Disposition: form-data; name=""file""; filename=""" & Mid$(sFileName, InStrRev(sFileName, "\") + 1) & """" & vbCrLf & _
            "Content-Type: text/plain" & vbCrLf & vbCrLf & _
            sPostData & vbCrLf & vbCrLf & _
            STR_BOUNDARY & vbCrLf & _
            "Content-Disposition: form-data; name=""Action""" & vbCrLf & _
             vbCrLf & "Send File" & vbCrLf & _
            "--" & STR_BOUNDARY & "--"

    With WinHttpReq
        'UPLOAD REQUEST
        .Open "POST", uURL, False
        .setRequestHeader "Content-Type", "multipart/form-data; boundary=" & STR_BOUNDARY
        .setRequestHeader "User-Agent", "Mozilla/4.0 (compatible; MSIE 6.0; Windows NT 5.0)"
        .send (sPostData)
    End With
    ''---------------------------
    UploadFileTo = True
End Function

Private Sub SelFileButton_Click()
    '新建一个对话框对象
    Set oFD = Application.FileDialog(msoFileDialogFilePicker)
    '配置对话框
    With oFD
        .Title = "请选择要查找的文件夹"
        .InitialFileName = "C:\"
        .Filters.Clear
        .Filters.Add "All Files", "*.*", 1
    End With
    '显示对话框
    oFD.Show
    '获取选择对话框选择的文件夹
    Set fs = oFD.SelectedItems
    For Each f In fs
        SelFileTextBox.Value = f
    Next
End Sub

Private Sub UploadButton_Click()
    If Trim$(SelFileTextBox.Value) = vbNullString Then
            MsgBox "没有选择需要上传的文件"
    Else
        If UploadFileTo(SelFileTextBox.Value, "http://127.0.0.1:8000/", "myFileNameField", "myFileData", "myDistantForm") Then
            MsgBox "文件上传成功"
        Else
            MsgBox "文件上传失败"
        End If
    End If
End Sub
# -*- coding: utf-8 -*-
#!/usr/bin/env python3
"""Simple HTTP Server With Upload.

This module builds on BaseHTTPServer by implementing the standard GET
and HEAD requests in a fairly straightforward manner.

see: https://gist.github.com/UniIsland/3346170
"""


__version__ = "0.1"
__all__ = ["SimpleHTTPRequestHandler"]

import os
import posixpath
import http.server
import urllib.request, urllib.parse, urllib.error
import cgi
import html
import shutil
import mimetypes
import re
from io import BytesIO


class SimpleHTTPRequestHandler(http.server.BaseHTTPRequestHandler):

    """Simple HTTP request handler with GET/HEAD/POST commands.

    This serves files from the current directory and any of its
    subdirectories.  The MIME type for files is determined by
    calling the .guess_type() method. And can reveive file uploaded
    by client.

    The GET/HEAD/POST requests are identical except that the HEAD
    request omits the actual contents of the file.

    """

    server_version = "SimpleHTTPWithUpload/" + __version__

    def do_GET(self):
        """Serve a GET request."""
        f = self.send_head()
        if f:
            self.copyfile(f, self.wfile)
            f.close()

    def do_HEAD(self):
        """Serve a HEAD request."""
        f = self.send_head()
        if f:
            f.close()

    def do_POST(self):
        """Serve a POST request."""
        r, info = self.deal_post_data()
        print((r, info, "by: ", self.client_address))
        f = BytesIO()
        f.write(b'<!DOCTYPE html PUBLIC "-//W3C//DTD HTML 3.2 Final//EN">')
        f.write(b"<html>\n<title>Upload Result Page</title>\n")
        f.write(b"<body>\n<h2>Upload Result Page</h2>\n")
        f.write(b"<hr>\n")
        if r:
            f.write(b"<strong>Success:</strong>")
        else:
            f.write(b"<strong>Failed:</strong>")
        f.write(info.encode())
        f.write(("<br><a href=\"%s\">back</a>" % self.headers['referer']).encode())
        f.write(b"<hr><small>Powerd By: bones7456, check new version at ")
        f.write(b"<a href=\"http://li2z.cn/?s=SimpleHTTPServerWithUpload\">")
        f.write(b"here</a>.</small></body>\n</html>\n")
        length = f.tell()
        f.seek(0)
        self.send_response(200)
        self.send_header("Content-type", "text/html")
        self.send_header("Content-Length", str(length))
        self.end_headers()
        if f:
            self.copyfile(f, self.wfile)
            f.close()

    def deal_post_data(self):
        content_type = self.headers['content-type']
        if not content_type:
            return (False, "Content-Type header doesn't contain boundary")
        boundary = content_type.split("=")[1].encode()
        remainbytes = int(self.headers['content-length'])
        line = self.rfile.readline()
        remainbytes -= len(line)
        if not boundary in line:
            return (False, "Content NOT begin with boundary")
        line = self.rfile.readline()
        remainbytes -= len(line)
        fn = re.findall(r'Content-Disposition.*name="file"; filename="(.*)"', line.decode())
        if not fn:
            return (False, "Can't find out file name...")
        path = self.translate_path(self.path)
        fn = os.path.join(path, fn[0])
        line = self.rfile.readline()
        remainbytes -= len(line)
        line = self.rfile.readline()
        remainbytes -= len(line)
        try:
            out = open(fn, 'wb')
        except IOError:
            return (False, "Can't create file to write, do you have permission to write?")

        preline = self.rfile.readline()
        remainbytes -= len(preline)
        while remainbytes > 0:
            line = self.rfile.readline()
            remainbytes -= len(line)
            if boundary in line:
                preline = preline[0:-1]
                if preline.endswith(b'\r'):
                    preline = preline[0:-1]
                out.write(preline)
                out.close()
                return (True, "File '%s' upload success!" % fn)
            else:
                out.write(preline)
                preline = line
        return (False, "Unexpect Ends of data.")

    def send_head(self):
        """Common code for GET and HEAD commands.

        This sends the response code and MIME headers.

        Return value is either a file object (which has to be copied
        to the outputfile by the caller unless the command was HEAD,
        and must be closed by the caller under all circumstances), or
        None, in which case the caller has nothing further to do.

        """
        path = self.translate_path(self.path)
        f = None
        if os.path.isdir(path):
            if not self.path.endswith('/'):
                # redirect browser - doing basically what apache does
                self.send_response(301)
                self.send_header("Location", self.path + "/")
                self.end_headers()
                return None
            for index in "index.html", "index.htm":
                index = os.path.join(path, index)
                if os.path.exists(index):
                    path = index
                    break
            else:
                return self.list_directory(path)
        ctype = self.guess_type(path)
        try:
            # Always read in binary mode. Opening files in text mode may cause
            # newline translations, making the actual size of the content
            # transmitted *less* than the content-length!
            f = open(path, 'rb')
        except IOError:
            self.send_error(404, "File not found")
            return None
        self.send_response(200)
        self.send_header("Content-type", ctype)
        fs = os.fstat(f.fileno())
        self.send_header("Content-Length", str(fs[6]))
        self.send_header("Last-Modified", self.date_time_string(fs.st_mtime))
        self.end_headers()
        return f

    def list_directory(self, path):
        """Helper to produce a directory listing (absent index.html).

        Return value is either a file object, or None (indicating an
        error).  In either case, the headers are sent, making the
        interface the same as for send_head().

        """
        try:
            list = os.listdir(path)
        except os.error:
            self.send_error(404, "No permission to list directory")
            return None
        list.sort(key=lambda a: a.lower())
        f = BytesIO()
        displaypath = html.escape(urllib.parse.unquote(self.path))
        f.write(b'<!DOCTYPE html PUBLIC "-//W3C//DTD HTML 3.2 Final//EN">')
        f.write(("<html>\n<title>Directory listing for %s</title>\n" % displaypath).encode())
        f.write(("<body>\n<h2>Directory listing for %s</h2>\n" % displaypath).encode())
        f.write(b"<hr>\n")
        f.write(b"<form ENCTYPE=\"multipart/form-data\" method=\"post\">")
        f.write(b"<input name=\"file\" type=\"file\"/>")
        f.write(b"<input type=\"submit\" value=\"upload\"/></form>\n")
        f.write(b"<hr>\n<ul>\n")
        for name in list:
            fullname = os.path.join(path, name)
            displayname = linkname = name
            # Append / for directories or @ for symbolic links
            if os.path.isdir(fullname):
                displayname = name + "/"
                linkname = name + "/"
            if os.path.islink(fullname):
                displayname = name + "@"
                # Note: a link to a directory displays with @ and links with /
            f.write(('<li><a href="%s">%s</a>\n'
                    % (urllib.parse.quote(linkname), html.escape(displayname))).encode())
        f.write(b"</ul>\n<hr>\n</body>\n</html>\n")
        length = f.tell()
        f.seek(0)
        self.send_response(200)
        self.send_header("Content-type", "text/html")
        self.send_header("Content-Length", str(length))
        self.end_headers()
        return f

    def translate_path(self, path):
        """Translate a /-separated PATH to the local filename syntax.

        Components that mean special things to the local file system
        (e.g. drive or directory names) are ignored.  (XXX They should
        probably be diagnosed.)

        """
        # abandon query parameters
        path = path.split('?',1)[0]
        path = path.split('#',1)[0]
        path = posixpath.normpath(urllib.parse.unquote(path))
        words = path.split('/')
        words = [_f for _f in words if _f]
        path = os.getcwd()
        for word in words:
            drive, word = os.path.splitdrive(word)
            head, word = os.path.split(word)
            if word in (os.curdir, os.pardir): continue
            path = os.path.join(path, word)
        return path

    def copyfile(self, source, outputfile):
        """Copy all data between two file objects.

        The SOURCE argument is a file object open for reading
        (or anything with a read() method) and the DESTINATION
        argument is a file object open for writing (or
        anything with a write() method).

        The only reason for overriding this would be to change
        the block size or perhaps to replace newlines by CRLF
        -- note however that this the default server uses this
        to copy binary data as well.

        """
        shutil.copyfileobj(source, outputfile)

    def guess_type(self, path):
        """Guess the type of a file.

        Argument is a PATH (a filename).

        Return value is a string of the form type/subtype,
        usable for a MIME Content-type header.

        The default implementation looks the file's extension
        up in the table self.extensions_map, using application/octet-stream
        as a default; however it would be permissible (if
        slow) to look inside the data to make a better guess.

        """

        base, ext = posixpath.splitext(path)
        if ext in self.extensions_map:
            return self.extensions_map[ext]
        ext = ext.lower()
        if ext in self.extensions_map:
            return self.extensions_map[ext]
        else:
            return self.extensions_map['']

    if not mimetypes.inited:
        mimetypes.init() # try to read system mime.types
    extensions_map = mimetypes.types_map.copy()
    extensions_map.update({
        '': 'application/octet-stream', # Default
        '.py': 'text/plain',
        '.c': 'text/plain',
        '.h': 'text/plain',
        })


def test(HandlerClass = SimpleHTTPRequestHandler,
         ServerClass = http.server.HTTPServer):
    http.server.test(HandlerClass, ServerClass, "HTTP/1.0", 8000, '127.0.0.1')

if __name__ == '__main__':
    test()
借助 Android Plugin for Gradle,您可以通过命令行在 Gradle 项目中运行单元测试。如需详细了解如何为应用构建单元测试,请参阅构建有效的单元测试。
下表总结了如何使用 Gradle 运行单元测试:
| 单元测试类型 | 要运行的命令 | 测试结果所在的位置 |
|---|---|---|
| 本地单元测试 | 调用`test`任务:
./gradlew test |
HTML 测试结果文件:`path_to_your_project/module_name/build/reports/tests/`目录。
XML 测试结果文件:`path_to_your_project/module_name/build/test-results/`目录。 |
| 插桩单元测试 | 调用 connectedAndroidTest 任务:
./gradlew connectedAndroidTest |
HTML 测试结果文件:`path_to_your_project/module_name/build/reports/androidTests/connected/`目录。
XML 测试结果文件:`path_to_your_project/module_name/build/outputs/androidTest-results/connected/`目录。 |
参照 Android Studio 3.6.3/4.0/4.1/4.2配置Robolectric-4.5.1,Powermock-1.6.6单元测试环境 配置执行单元测试。
项目使用 Android Studio 4.1.3 ,Android Gradle构建工具(AGP)版本
com.android.tools.build:gradle:4.1.3
单元测试使用的 Robolectric 从 4.5.x 升级到 4.6.x ,编译时产生如下报错:
Failed to transform bcprov-jdk15on-1.68.jar (org.bouncycastle:bcprov-jdk15on:1.68) to match attributes {artifactType=processed-jar, org.gradle.category=library, org.gradle.libraryelements=jar, org.gradle.status=release, org.gradle.usage=java-runtime}.
      > Execution failed for JetifyTransform: /home/runner/.gradle/caches/modules-2/files-2.1/org.bouncycastle/bcprov-jdk15on/1.68/46a080368d38b428d237a59458f9bc915222894d/bcprov-jdk15on-1.68.jar.
         > Failed to transform '/home/runner/.gradle/caches/modules-2/files-2.1/org.bouncycastle/bcprov-jdk15on/1.68/46a080368d38b428d237a59458f9bc915222894d/bcprov-jdk15on-1.68.jar' using Jetifier. Reason: IllegalArgumentException, message: Unsupported class file major version 59. (Run with --stacktrace for more details.)
问题排查了一下,发现 Robolectric 4.6.x 引入了 bcprov-jdk15on-1.68.jar ,这个库是使用 Java 15 编译的。
如果项目在 gradle.properties 中配置了 android.enableJetifier=true (目的是转换第三方不支持 AndroidX 的依赖,用以使整个工程升级到 AndroidX ), 当 Jetifier 小于等于 Jetifier 1.0.0-beta10时,无法反编译高于 Java 13 编译的代码库,进而引起上面的报错。
目前(2021/07/22)最新的 Android Studio 4.2.2 ,Android Gradle构建工具(AGP)版本
com.android.tools.build:gradle:4.2.2
依旧没有完成适配工作。
官方回复是 Android Gradle构建工具(AGP) 7.x版本修复,估计要到Android Studio 4.3 版本了。
目前的解决方法是在 gradle.properties 中配置 Jetifier 忽略 bcprov 库。比较庆幸的是 bcprov 库跟 AndroidX 没什么关系,因此忽略这个库是安全的。
如下:
android.enableJetifier=true
android.jetifier.blacklist=org.robolectric.*,bcprov

# Android Studio 4.2 版本开始使用 android.jetifier.ignorelist 替代 android.jetifier.blacklist
关于Android Studio单元测试中“Method d in android.util.Log not mocked.”问题的解决。
一般发生在 Robolectric 3.x 版本上,比如 Robolectric 3.8
![]()
解决方案:
 打开对应模块的build.gradle文件
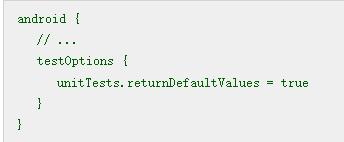
android {
    compileSdkVersion 27
    buildToolsVersion '27.0.3'
    testOptions {
        unitTests.returnDefaultValues = true
    }
}
关于Android Studio单元测试中“Method d in android.util.Log not mocked.”问题的解决。
最近在引入某些库的时候,发现额外的库被引入,造成编译冲突,想具体知道是由于哪个库引起的。参照原来的Android Studio(Gradle)解决库依赖冲突问题 提示信息比较模糊,不方便定位,尤其是只在测试模块中引入某些库,业务代码不引入的情况下。
比如我们在 Android Studio 4.2.2 单元测试引入了 Robolectric 4.3.1/4.5.1,结果在业务代码不使用任何的 AndroidX 依赖的情况下,编译会报错
This project uses AndroidX dependencies,but the 'android.useAndroidX' property is not enabled. Set this property to true in the gradle.properties file and retry. following AnroidX dependencies are detected: androidx.test:monitor:1.2.0, androidx.annotation:annotation:1.0.0
这个依赖是通过 Robolectric 4.3.1/4.5.1 引入的,解决方法是调整到 Robolectric 3.8。
Android Studio 4.2.2 自带的 Project Structure 提示更加详细,可以明确的指出到底是哪个库引入,如下图:
最近在macOS Big Sur(11.4)编译`Hummer`
//代码版本 2021-07-12

$ git clone https://github.com/didi/Hummer.git

$ cd Hummer

$ cd android

$ bash gradlew clean build

# Android Studio 打开当前目录下的项目即可
如果报错如下:
* What went wrong:
A problem occurred configuring project ':hummer-core'.
> ABIs [arm64-v8a] are not supported for platform. Supported ABIs are [armeabi-v7a, x86].
参考 ABIs [arm64-v8a] are not supported for platform. Supported ABIs are [armeabi-v7a, x86].
如果运行测试用例时报错如下:
2021-07-12 10:32:56.704 11116-11116/com.didi.hummer.demo E/log: error java.lang.ClassNotFoundException: Didn't find class "com.facebook.jni.HybridData$Destructor" on path: DexPathList[[dex file "/data/data/com.didi.hummer.demo/code_cache/.overlay/base.apk/classes2.dex", zip file "/data/app/~~ayUY1JA739Wo5kLM7hjUuQ==/com.didi.hummer.demo-7LKAxXsQNZuXWiS7L2dZwg==/base.apk"],nativeLibraryDirectories=[/data/app/~~ayUY1JA739Wo5kLM7hjUuQ==/com.didi.hummer.demo-7LKAxXsQNZuXWiS7L2dZwg==/lib/x86, /data/app/~~ayUY1JA739Wo5kLM7hjUuQ==/com.didi.hummer.demo-7LKAxXsQNZuXWiS7L2dZwg==/base.apk!/lib/x86, /system/lib, /system_ext/lib]]
2021-07-12 10:32:56.705 11116-11116/com.didi.hummer.demo A/idi.hummer.dem: java_vm_ext.cc:577] JNI DETECTED ERROR IN APPLICATION: JNI NewGlobalRef called with pending exception java.lang.ClassNotFoundException: Didn't find class "com.facebook.jni.HybridData$Destructor" on path: DexPathList[[dex file "/data/data/com.didi.hummer.demo/code_cache/.overlay/base.apk/classes2.dex", zip file "/data/app/~~ayUY1JA739Wo5kLM7hjUuQ==/com.didi.hummer.demo-7LKAxXsQNZuXWiS7L2dZwg==/base.apk"],nativeLibraryDirectories=[/data/app/~~ayUY1JA739Wo5kLM7hjUuQ==/com.didi.hummer.demo-7LKAxXsQNZuXWiS7L2dZwg==/lib/x86, /data/app/~~ayUY1JA739Wo5kLM7hjUuQ==/com.didi.hummer.demo-7LKAxXsQNZuXWiS7L2dZwg==/base.apk!/lib/x86, /system/lib, /system_ext/lib]]
    java_vm_ext.cc:577] (Throwable with no stack trace)
    java_vm_ext.cc:577]
    java_vm_ext.cc:577]     in call to NewGlobalRef
    java_vm_ext.cc:577]     from java.lang.String java.lang.Runtime.nativeLoad(java.lang.String, java.lang.ClassLoader, java.lang.Class)
解决方案为在项目中增加:
implementation 'com.facebook.fbjni:fbjni:0.0.2'
//代码版本 2021-07-12

$ git clone https://github.com/didi/Hummer.git

$ cd Hummer

$ cd iOS

$ sudo gem install cocoapods

$ pod install

# 使用 XCode 12.5.1 打开当前目录下的 Example.xcworkspace
在未修改wp-config.php之前WordPress博客默认是不能实现多个域名独立访问的,即使我们绑定了多个域名,访问时也会自动跳转到安装站点时默认的域名,就连同一个域名带www和不带www都是自动跳转到默认域名。(这一点的不便之处深有体会,我找了几天才找到这个解决办法)
那如果我们需要WordPress绑定多个域名,并且都能度独立访问怎么办?
要想实现WordPress绑定多个域名,并且都能度独立访问也不难。我们只需修改wp-config.php文件即可,在站点根目录找到“wp-config.php”文件,然后根据自己需要添加下面任意一段代码即可。
说明:在wp-config.php文件中加下面代码,就能实现绑定解析的域名都能正常访问博客,而且不会串联到其他域名。
define('WP_SITEURL', 'http://' . $_SERVER['HTTP_HOST']);
define('WP_HOME', 'http://' . $_SERVER['HTTP_HOST']);
也可以只指定某些域名可以访问。注意把`$domain = array('linqingmaoer.cn', 'www.linqingmaoer.cn');`括号内的域名改成你自己需要绑定的域名。这样就可以设置成你添加的这几个域名能正常访问。而其他未添加的域名则无法访问。
$domain = array('linqingmaoer.cn', 'www.linqingmaoer.cn');
if(in_array($_SERVER['HTTP_HOST'], $domain)) {
    define('WP_SITEURL', 'http://' . $_SERVER['HTTP_HOST']);
    define('WP_HOME', 'http://' . $_SERVER['HTTP_HOST']);
}
2. 在完成上面的工作以后,你的网站已经可以实现多域名访问了,但是还是有一个问题,那就是静态资源,在wordpress上传的图片插入文章里面,地址是固定的,修改域名以后,并不会修改图片的域名,所以还需要修改静态文件地址,使用以下代码可以解决:
define( 'WP_CONTENT_URL', '/wp-content');
把这段代码加入上面的代码下面即可。
注意上述代码需要添加在
/** Sets up WordPress vars and included files. */
require_once(ABSPATH . 'wp-settings.php');
的前面。
注意,上述配置之后,可能会出现跨域相互访问问题,需要配置跨域访问属性,如下:
指定多个域名(http://client1.xxx.com、http://client2.xxx.com等)跨域访问,则只需在server.php文件头部添加如下代码:
$origin = isset($_SERVER['HTTP_ORIGIN'])? $_SERVER['HTTP_ORIGIN'] : '';

$allow_origin = array(
    'http://client1.xxx.com',
    'http://client2.xxx.com'
);

if(in_array($origin, $allow_origin)) {
    header('Access-Control-Allow-Origin:'.$origin);
}
以前备案了多个独立网站,每次注册的时候,提交备案域名的网站标题都是不同的。现在多个网站同时指向了同一台服务器,现在就需要根据来源域名的不同,返回不同的网站标题信息,解决方法就是写自定义的拦截插件。
<?php
// 根据域名的来源不同,返回不同的网站标题
    function domain_page_title($title)
    {
        $domain = $_SERVER['HTTP_HOST'];
        if((0 == strcasecmp('www.mobibrw.com',$domain)) || (0 == strcasecmp('mobibrw.com',$domain))) {
            $title['title'] = '深海游弋的鱼'; //网站描述
        }
        return $title;
    }
    add_filter('document_title_parts', 'domain_page_title', 10, 1);
?>
在主题functions.php中添加如上代码,用来自定义分隔符号和对已生成的title标题进行二次修改。
工作中想遍历文件中的每行,并且赋值给一个变量,使用下面写法,但是循环遍历后变量依然为空,值没有变化。如下:
$ cat temp.txt
http://www.baidu.com
http://www.jd.com
http://www.huawei.com

$ cat temp.sh

#! /bin/bash
file_path=temp.txt
new_var=''
cat ${file_path} | while read line
do
    new_var="${new_var}${line};"
    echo ${line}_____
done
echo "${new_var}+++++"

$ source temp.sh
http://www.baidu.com_____
http://www.jd.com_____
http://www.huawei.com_____
+++++
上面未赋值成功是因为使用了管道符,将值传给了while,使得while在子shell中执行,子shell中的变量等在循环外无效。
可以写为:
$ cat temp.sh

#! /bin/bash
file_path=temp.txt
new_var=''
while read line
do
    new_var="${new_var}${line};"
    echo ${line}_____
done <<< "$(cat ${file_path})"
echo "${new_var}+++++"

$ source temp.sh
http://www.baidu.com_____
http://www.jd.com_____
http://www.huawei.com_____
http://www.baidu.com;http://www.jd.com;http://www.huawei.com;+++++
或者:
$ cat temp.sh

#! /bin/bash
file_path=temp.txt
new_var=''
while read line
do
    new_var="${new_var}${line};"
    echo ${line}_____
done < ${file_path}
echo "${new_var}+++++"

$ source temp.sh
http://www.baidu.com_____
http://www.jd.com_____
http://www.huawei.com_____
http://www.baidu.com;http://www.jd.com;http://www.huawei.com;+++++
或者指定换行符读取:
#! /bin/bash

IFS="
"

for LINE in `cat /etc/passwd`
do
  echo $LINE
done
或者用read读取文件重定向:
#! /bin/bash

while read LINE
do
  echo $LINE
done < /etc/passwd