一 了解进程资源图
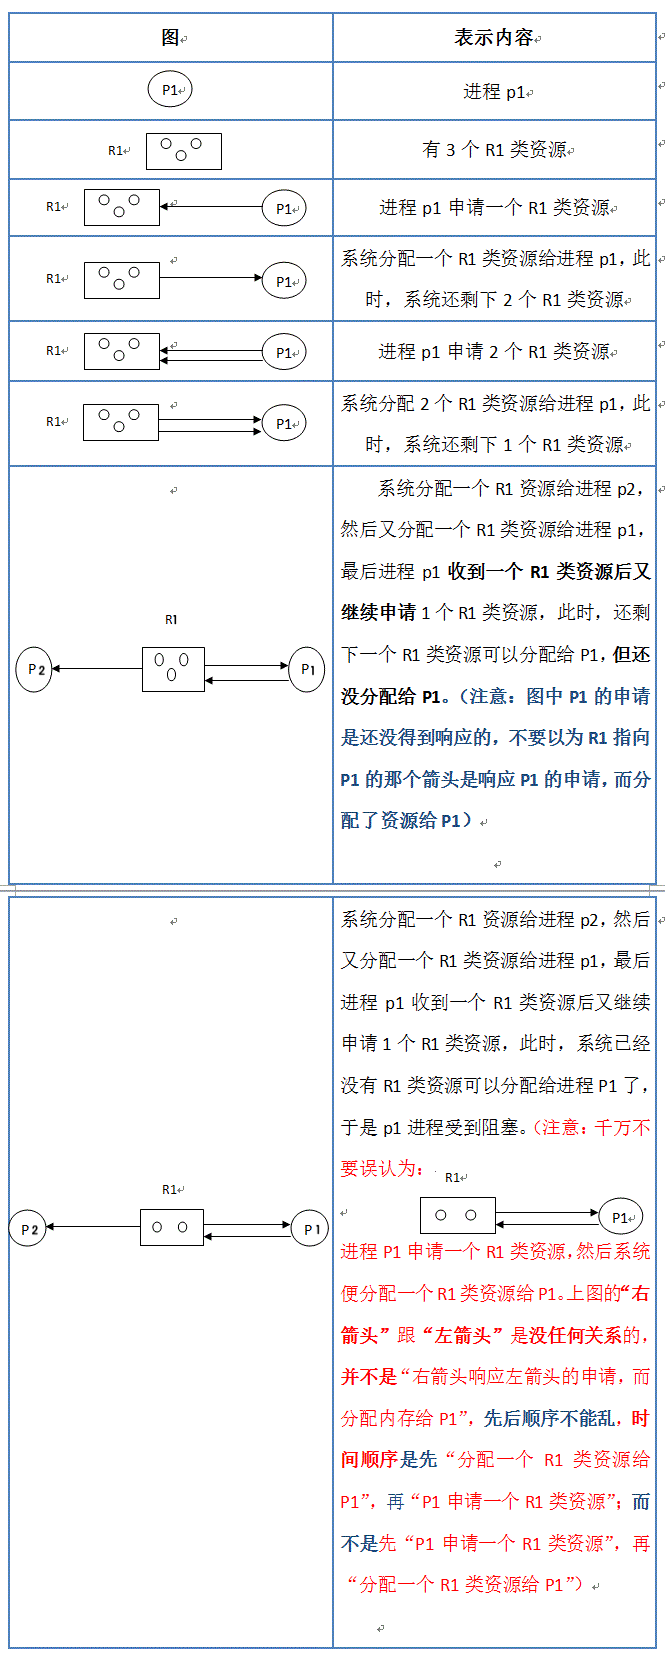
二 化简资源分配图
方法步骤
- 第一步:先看系统还剩下多少资源没分配,再看有哪些进程是不阻塞(“不阻塞”即:系统有足够的空闲资源分配给它)的
- 第二步:把不阻塞的进程的所有边都去掉,形成一个孤立的点,再把系统分配给这个进程的资源回收回来
- 第三步:看剩下的进程有哪些是不阻塞的,然后又把它们逐个变成孤立的点。
- 第四步:最后,所有的资源和进程都变成孤立的点。这样的图就叫做“可完全简化”。
如果一个图可完全简化,则不会产生死锁;如果一个图不可完全简化(即:图中还有“边”存在),则会产生死锁。这就是“死锁定理”。
实例
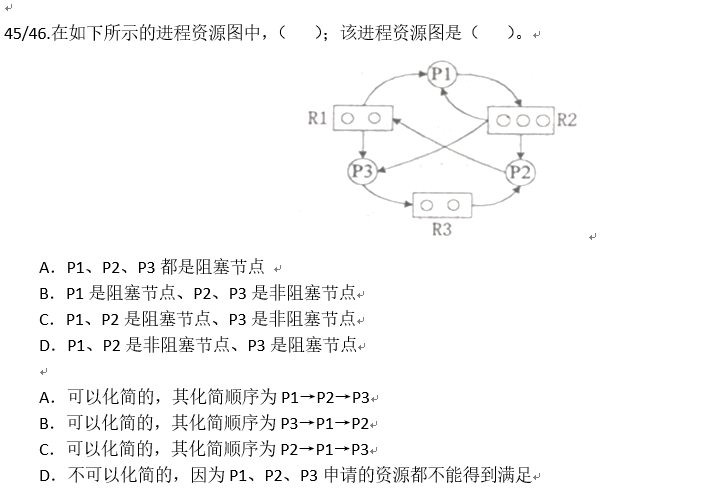
解析:
R1有两个资源,一个分配给了P1,一个分配给了P3,此时P2申请R1的资源,因为R1此时没有可用资源,P2堵塞。
R2有三个资源,已经给P1,P2,P3,各自分配了一个资源,而P1此时又再次申请资源R2,P1堵塞
R3有两个资源,已经分配给P2一个,P2申请一个资源,分配给它,所以P3是非阻塞结点
化简的话,看从没有阻塞的结点开始,删去P3周围所有的边,使其成为一个孤立的点,然后看剩下的资源按上述步骤再次进行分配,若到最后只剩下一群孤立的点,则说明该资源图是可以化简的。