在Ubuntu 12.04 LTS上安装OpenGrok浏览Android源码

OpenGrok是一个快速,便于使用的源码搜索引擎与对照引擎,它能够帮助我们快速的搜索、定位、对照代码树。接下来就具体讲解Ubuntu 12.04 LTS环境下OpenGrok的安装及使用。

1.参照 UBUNTU 13.10 APACHE 2.2 通过 AJP 整合 TOMCAT 7 中讲述的方法,进行Tomcat,Apache2的配置安装。

2.安装ctags用于对C\C++代码的支持

3.下载并安装OpenGrok

可以到"http://opengrok.github.io/OpenGrok/"手工下载文件,然后上传到服务器,也可以直接用wget命令来下载,一般选择安装在"/opt"目录下面。

解压缩文件到当前目录"/opt"

创建一个软链接,方便后续的修改

拷贝"/opt/opengrok/lib/source.war"到Tomcat7的工程目录"/var/lib/tomcat7/webapps/"

访问"http://localhost:8080/source/"确认OpenGrok是否已经安装成功,如果安装成功,出现下面的界面:OpenGrok

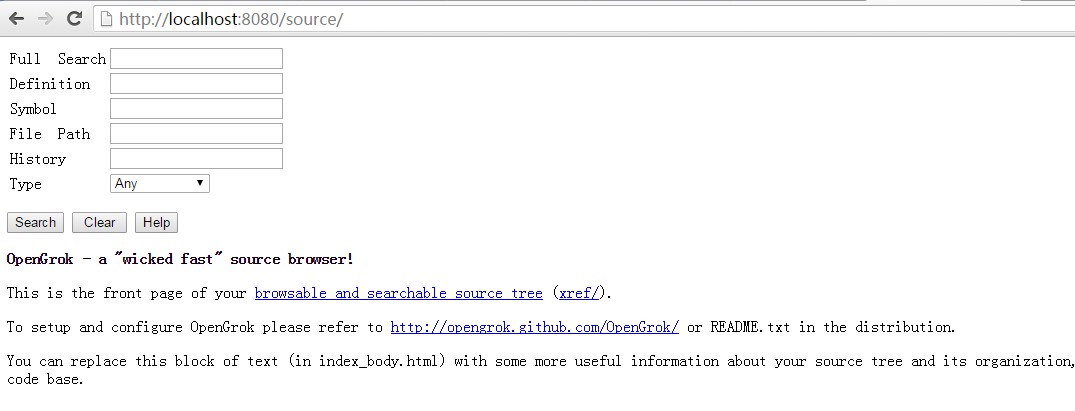
4.出于安全原因,禁止外网访问Tomcat的8080端口

只允许Tomcat在本地的8080端口监听即可,修改

添加 address="127.0.0.1"

重启Tomcat7

5.配置Apache2对Tomcat通过AJP进行反向代理

Apache2的配置文件“ /etc/apache2/sites-available/default”中,增加如下配置:

Tomcat7的配置文件/var/lib/tomcat7/conf/server.xml中增加如下配置<Context path="/AndroidXRef" docBase="source/"/>,解决跳转404问题。ProxyPass后面必须携带“/”,否则就会出现404问题。

6.配置OpenGrok对源代码进行解析

设置要建立索引的源代码目录的位置,以存储在"/data/OpenGrok/Android_4.2"上的Android代码为例子:

注意:

由于我们使用了Apache2的反向代理才需要设置 OPENGROK_WEBAPP_CONTEXT,如果没有设置反向代理,请不要设置OPENGROK_WEBAPP_CONTEXT

在使用反向代理的时候如果不设置OPENGROK_WEBAPP_CONTEXT会导致在点击具体的变量定义的时候,出现404.

不使用反向代理的时候请只设置OPENGROK_INSTANCE_BASE

创建源代码索引

执行时间在40分钟左右,执行完成。生成的索引文件在源代码的"data"目录下面,重建索引的时候需要执行如下操作,才能再次建立索引

注意,请务必删除源代码中的"prebuilts"目录,这个目录下面存储的是一系列的编译工具,在浏览代码的时候,完全用不上,但是占据的磁盘空间确是巨大的。

注意,如果服务器上面的内存比较有限,请使用如下命令进行内存限制,否则建立索引的时候,会触发内存不足的情况:

修改OpenGrok配置文件

修改其中的

为具体的工程目录"/data/OpenGrok/Android_4.2",修改后的配置如下:

刷新浏览器,可以看到Android_4.2的源码可以搜索出来了。

参考链接


Android常用命令 dumpsys

1.查看手机各类服务的项目:

2.查看应用的内存使用情况:

3.查看应用的正在运行的service

4.显示activity相关的信息

5.显示状态栏相关的信息

6.查看应用版本信息

Android的HTTP通信库Volley的基本用法

Volley简介


我们平时在开发Android应用的时候不可避免地都需要用到网络技术,而多数情况下应用程序都会使用HTTP协议来发送和接收网络数据。Android系统中主要提供了两种方式来进行HTTP通信,HttpURLConnection和HttpClient,几乎在任何项目的代码中我们都能看到这两个类的身影,使用率非常高。

不过HttpURLConnection和HttpClient的用法还是稍微有些复杂的,如果不进行适当封装的话,很容易就会写出不少重复代码。于是乎,一些Android网络通信框架也就应运而生,比如说AsyncHttpClient,它把HTTP所有的通信细节全部封装在了内部,我们只需要简单调用几行代码就可以完成通信操作了。再比如Universal-Image-Loader,它使得在界面上显示网络图片的操作变得极度简单,开发者不用关心如何从网络上获取图片,也不用关心开启线程、回收图片资源等细节,Universal-Image-Loader已经把一切都做好了。

Android开发团队也是意识到了有必要将HTTP的通信操作再进行简单化,于是在2013年Google I/O大会上推出了一个新的网络通信框架——Volley。Volley可是说是把AsyncHttpClient和Universal-Image-Loader的优点集于了一身,既可以像AsyncHttpClient一样非常简单地进行HTTP通信,也可以像Universal-Image-Loader一样轻松加载网络上的图片。除了简单易用之外,Volley在性能方面也进行了大幅度的调整,它的设计目标就是非常适合去进行数据量不大,但通信频繁的网络操作,而对于大数据量的网络操作,比如说下载文件等,Volley的表现就会非常糟糕。

下载Volley


介绍了这么多理论的东西,下面我们就准备开始进行实战了,首先需要将Volley的jar包准备好,如果你的电脑上装有Git,可以使用如下命令下载Volley的源码:

下载完成后将它导入到你的Eclipse工程里,然后再导出一个jar包就可以了。

对于Android Strudio 可以直接添加“compile 'com.mcxiaoke.volley:library-aar:1.0.0'

StringRequest的用法


前面已经说过,Volley的用法非常简单,那么我们就从最基本的HTTP通信开始学习吧,即发起一条HTTP请求,然后接收HTTP响应。首先需要获取到一个RequestQueue对象,可以调用如下方法获取到:

注意这里拿到的RequestQueue是一个请求队列对象,它可以缓存所有的HTTP请求,然后按照一定的算法并发地发出这些请求。RequestQueue内部的设计就是非常合适高并发的,因此我们不必为每一次HTTP请求都创建一个RequestQueue对象,这是非常浪费资源的,基本上在每一个需要和网络交互的Activity中创建一个RequestQueue对象就足够了。

接下来为了要发出一条HTTP请求,我们还需要创建一个StringRequest对象,如下所示:

可以看到,这里new出了一个StringRequest对象,StringRequest的构造函数需要传入三个参数,第一个参数就是目标服务器的URL地址,第二个参数是服务器响应成功的回调,第三个参数是服务器响应失败的回调。其中,目标服务器地址我们填写的是百度的首页,然后在响应成功的回调里打印出服务器返回的内容,在响应失败的回调里打印出失败的详细信息。

最后,将这个StringRequest对象添加到RequestQueue里面就可以了,如下所示:

另外,由于Volley是要访问网络的,因此不要忘记在你的AndroidManifest.xml中添加如下权限:

不过大家都知道,HTTP的请求类型通常有两种,GET和POST,刚才我们使用的明显是一个GET请求,那么如果想要发出一条POST请求应该怎么做 呢?StringRequest中还提供了另外一种四个参数的构造函数,其中第一个参数就是指定请求类型的,我们可以使用如下方式进行指定:

可是这只是指定了HTTP请求方式是POST,那么我们要提交给服务器的参数又该怎么设置呢?很遗憾,StringRequest中并没有提供设置 POST参数的方法,但是当发出POST请求的时候,Volley会尝试调用StringRequest的父类——Request中的 getParams()方法来获取POST参数,那么解决方法自然也就有了,我们只需要在StringRequest的匿名类中重写 getParams()方法,在这里设置POST参数就可以了,代码如下所示:

JsonRequest的用法


学完了最基本的StringRequest的用法,我们再来进阶学习一下 JsonRequest的用法。类似于StringRequest,JsonRequest也是继承自Request类的,不过由于 JsonRequest是一个抽象类,因此我们无法直接创建它的实例,那么只能从它的子类入手了。JsonRequest有两个直接的子 类,JsonObjectRequest和JsonArrayRequest,从名字上你应该能就看出它们的区别了吧?一个是用于请求一段JSON数据 的,一个是用于请求一段JSON数组的。

至于它们的用法也基本上没有什么特殊之处,先new出一个JsonObjectRequest对象,如下所示:

可以看到,这里我们填写的URL地址是http://m.weather.com.cn/data/101010100.html,这是中国天气网提供的 一个查询天气信息的接口,响应的数据就是以JSON格式返回的,然后我们在onResponse()方法中将返回的数据打印出来。

最后再将这个JsonObjectRequest对象添加到RequestQueue里就可以了,如下所示:

这样当HTTP通信完成之后,服务器响应的天气信息就会回调到onResponse()方法中,并打印出来。

参考链接


Android Volley完全解析(一),初识Volley的基本用法

am指令带参数启动app

使用am指令启动app

带参数启动app有两种方法

1. 传入一个字符串

app内取数据

2. 传入键值对

app内通过取数据  ei表示传入的是int es表示传入的是String

3. 关闭Activity

参考链接


使用bat自动处理dumpsys meminfo内存信息

Android内存查看有两种方法,procrank 和 dumpsys meminfo,procrank计算GPU内存不准确,所以选择meminfo指令。

但meminfo需要一遍一遍的敲命令,而且结果比较乱,那能不能有批处理工具呢?答案是肯定的。

MemoryLeakToolRobin Hu编写的一款用于监测Android进程内存使用情况的脚本工具,简称为MLT。具体使用方法请参考

http://hubingforever.blog.163.com/blog/static/171040579201243071752744/

这里不再赘述(CSDN下载要10分,痛心啊!)。

整套工具使用起来很简单,有图形界面。

1.在config.bat中配置包名

2.根据需要运行各种工具。

一般的Android开发已经够用了。如果你对这一套bat有兴趣或者想自定义输出或者运行出了问题,那么请往下看。

我遇到的问题是,我在非标准的Android上运行了dumpsys meminfo,输出结构跟Android不一致,所以没有得到我想要的结果。那就需要改造脚本。

getMemoryState.bat

核心是这一句

adb shell "dumpsys meminfo %curProcessName%" >%meminfoFile%

在shell下执行 dumpsys meminfo %curProcessName%指令并将结果输出到%meminfoFile%

%%是bat语法,通过set 定义一个变量

如 set test=1,通过%test%来引用它

curProcessName和meminfoFile是在第一个步骤config.bat中配置的。

这样我们就拿到了一个meminfo文件,我这里的输出是这样的(非标准):

meminfo

修改后的处理脚本

这一句是逐行读取文件,参数

skip=n 跳过n行

tokens 将要处理的列

还有一个参数delims,分隔符,默认是空格

%%i,可以理解为对应前面的tokens,从i开始,ijklmn这样的顺序使用,如你想用第二列的数据,就是%%j。


bat学习:

1.rem是注释

2.set 定义变量  %%引用变量 !!也是引用变量  (有什么区别?)

3.将文件清空 echo. >%path%,其实就是重写这个文件。(如何修改文件中某一行某一列内容?)

4.ren 修改文件名

5.set变量时,设置失败。需要开启延迟

Setlocal enabledelayedexpansion

之后启用变量引用符号 !!

6.检查str是否包含substr

if not "!str!" == "!str:substr=!"

str:substr= 表示将str中的substr置为空。

7.得到一个长路径的文件名

call :getname %path%

:getname
set outName=%~nx1

8.延时

延时有很多方法,最方便的一种是

设置延时6秒

@ping 127.0.0.1 -n 6 >nul

不精确


Windows 10 系统安装U盘的制作

以Windows 10 1511 x64 版本为例子,这个版本的下载链接如下:

在下载完成之后,去微软下载Windows USB/DVD Download Tool貌似这个链接又会指向Windows USB/DVD Download Tool然后一步一步操作即可。

这个工具也可以在本站下载

Ubuntu 12.04服务器版使用 cp -r -f 强制覆盖拷贝时仍需确认的问题

问题现象:


使用cp -r -f 强制覆盖拷贝命令时,每一个文件都需要认为的键入“Y”进行确认,甚是烦扰,难道要我点击一万下不成?

问题原因:


cp命令被设置了别名
alias cp='cp -i'
所以在每次执行cp命令是都会按照这个设置进行人为的确认(-i参数的含义)。

解决方法:


一.使用unalias cp命令 解除对cp的别名(仅本次终端连接会话临时取消),我们先输入alias命令,查看系统内部已经设置的别名:

输入unalias cp命令,取消cp命令的别名.

二.直接输入\cp命令,作用也是取消cp的别名

三.使用管道的方式,自动输入yes

PANIC: early exception 0f rip 10:ffffffff8134b348 error 0 cr2 40a0

Openmdiavault 2.1升级内存到6GB后,在开机的时候卡在启动界面中,屏幕最下方提示“PANIC: early exception 0f rip 10:ffffffff8134b348 error 0 cr2 40a0”。

万由的NAS,主板是"华擎 Q1900B-ITX主板套装".BIOS 版本是1.80版本。

网上查找了一下,发现是由于系统没有很好的支持大内存导致的,跟系统的BIOS也有一定的关系,目前只能在启动的时候限制内存到4GB的方式来启动系统。

操作方式如下:

1.重启进入开机界面:
OpenMediaVault_Grub
2.选中第一项,然后按"e"键,进入编辑界面:
OpenMediaVault_GrubEdit
3.在Linux内核的启动选项中增加“mem=4096M”:
OpenMediaVault_Grub_MemoryLimit

4.修改完成后,按键盘上的“F10”启动系统就可以了。

注意这个修改需要每次进入系统都执行一次,如果想永久执行,那么只能是进入系统后,修改配置文件了。

另外这个参数会导致系统无法使用超过4GB的内存,也就是新加的内存浪费了一部分。

希望Openmdiavault 3.0版本能够兼容掉这个问题吧!

参考链接:[SOLVED] PANIC: early exception 08 rip 246:10 after upgrading from 2 to 4GB RAM

Beyond Mocking with PowerMock

PowerMock is a Java framework that allows you to for example mock static and final methods, final classes and construction of new objects. PowerMock is thus a powerful framework and it's quite easy to misuse it unless you know what you're doing. What I've seen time and again is that people are using mocking when what they probably should be doing is stubbing. With all the powerful features in PowerMock it can easily lead to complicated and hard-to-maintain test code.

Mocking vs Stubbing


So what's the difference and why does it matter? Mocking can be summarized more in terms of a specification:

1. Setup how your mocks should behave in your test. This means creating a specification for the mocks involved in this particular test.
2. Perform the actual test
3. Verify that the interactions with the mocks matched the specification (created during setup)

If a mocked method is called more or less times than what's defined in the specification the test will fail. I would argue that most often you don't need this kind of rigorous approach. Sure you may need a way to specify that a method (let's call it X) doesn't call a third-party system but instead having it return some pre-defined value. It doesn't follow that it's always interesting to verify that X was called a particular number of times with with some exact arguments. Sometimes it's legitimate and useful, but as long as the result of the method we're testing behaves as expected (for example that it returns the expected result), the call to X is less important and may be regarded as an implementation detail.

Stubbing on the other hand doesn't require a specification to be fulfilled. What you do is to something like this:

1. Define what the collaborator methods should return when you run your test
2. Perform the actual test

Now if a collaborator happens to be called more than once, or perhaps not at all, doesn't really matter as long as the end result of the actual test behaves as expected.

So what does all this has to do with PowerMock? Well PowerMock has something called a “stubbing” API that let's you do quite many things without having to revert to mocking. You don't actually have to depend on any third-party mocking API either (like EasyMock and Mockito).

Stubbing, suppressing and replacing with PowerMock


If all you need to do is stubbing a non-static public collaborator method you don't need PowerMock. You're probably better off with just vanilla Mockito or EasyMock. How ever if you want to stub a static or private method, suppressing a constructor or replacing a method PowerMock can help!

Stubbing


So first consider stubbing a method with PowerMock. Consider the following simple Java class:

Let's say we want to stub the static hello method to always return an expected value using the PowerMock stubbing API:

Which means that a call to the hello method like this:

will now always return the string "Hello World".

Note that stub is statically imported from org.powermock.api.support.membermodification.MemberModifier and method from org.powermock.api.support.membermodification.MemberMatcher. You would also have to prepare MyClass1 for test using @PrepareForTest(MyClass1.class) and use the PowerMock runner
@RunWith(PowerMockRunner.class).
Stubbing a private method looks very similar:

Suppressing


You can also suppress methods, constructors and fields that you're not interested in. Essentially what this means is that “this piece of code doesn't do anything useful for this particular test case, just get it out of the way”. For example consider the following class:

When unit testing the made-up hello method there's no need for us to load the “some.dll” so let's get rid of it:

It’s also possible to suppress all constructors of a class:

or all methods:

In this case all methods declared in SomeClass will return a default value.

You can also essentially suppress an entire class, meaning all methods, constructors and fields:

Replacing


What if we only want to stub the hello method in MyClass1 when the parameter arg is equal to “John”? For all other arguments we like to invoke the original method. We can achieve this by replacing the method with an InvocationHandler like this:

This means that if you invoke MyClass1.hello("Someone") it'll return Hello Someone but calling it with John will return Hello John, you are awesome!.

You can also replace a method with another method! For example you may want to replace all log outputs in an integration test with your own method that simply prints everything to the console. Consider the following example:

Imagine that the Logger.debug(..) method logs to disk but in our test we simply want to print to the console. We could implement a new class for this:

And replace the Logger.debug(..) method with the ConsoleLogger.print(..) method in our test case:

This means that all calls to Logger.debug(..) will be replaced with ConsoleLogger.print(..). Note that this only works for static methods!

(Also note that in a real-life scenario there are most likely better ways to solve this problem, e.g. by simply configuring the original Logger to print to the console during our integration test).

Conclusion


As you've hopefully seen there are more to PowerMock than just mocking. For example it's often better to simply stub third party api calls than to mock them. PowerMock has good support for doing this in a simple way even for legacy systems. As always PowerMock should be used with care so whenever you find the urge to use PowerMock make sure you look into possible alternatives as well.

原文链接:Beyond Mocking with PowerMock

WebStorm下配置less环境

Webstorm是一个很优秀的js IDE。今天打算学习less的时候,创建一个less文件后发现webstorm提示是否AddWatcher,点开后发现是一个自动编译less文件的工具,可惜不能直接使用,需要简单配置一下。

所有资料来自于

https://www.jetbrains.com/webstorm/help/transpiling-sass-less-and-scss-to-css.html。

洋洋洒洒一大坨,读起来有点费劲。实际操作了一下,发现简单的要命。

首先,你要装好node环境,没装的请自行百度。

1.View-ToolWindows-Terminal

2.输入 npm install -g less

搞定。


再次打开AddWatcher窗口,你就发现所有选项已经自动填好了。

less文件左边出现了一个小箭头,点开看到了css文件,完全同步。