UPS (Uninterruptible Power Supply),是一种含有储能装置的不间断电源。主要用于给部分对电源稳定性要求较高的设备,提供不间断的电源。
一般的 UPS 都支持通过 USB 连接到电脑或者 NAS 等设备上,Linux/Mac/Windows 均支持使用 UPS。
因为电路不稳定,存在偶尔断电的情况,因此希望通过 UPS 保护树莓派、路由器、光猫、硬盘录像机等设备;将 UPS 通过 USB 接口连接到树莓派,由树莓派控制其他设备在断电时关机。
当前主要有两个方案,一个是 NUT (Network UPS Tools) 另一个是使用 apcupsd (Apcupsd UPS control software),两者二选一即可。
如果是群晖,可能只有使用 NUT (Network UPS Tools) ,如果使用 U-NAS 可能只能使用 apcupsd (Apcupsd UPS control software)。
从配置简便性上,推荐 apcupsd (Apcupsd UPS control software)。
apcupsd 配置
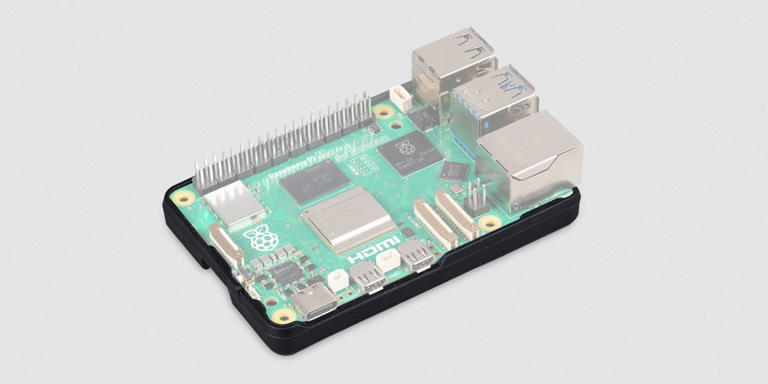
图 1 施奈德后备式UPS电源APC BK650M2。
虽然施奈德官方提供的 PowerChute 软件只支持 Windows 系统,但 Linux 下亦有 apcupsd 可以使用。该软件以守护进程的方式运行,通过串行数据通信的方式(串口或 USB )实时获取 UPS 电源信息,包括当前外部输入电压、负载功率、电池电量等。当电池电量低于指定值时,会自动运行脚本程序 /etc/apcupsd/apccontrol ,以实现电脑系统的自动关闭或任何用户指定的操作。
把 UPS 电源与电脑连好后,根据 apcupsd 的说明文档 ,我们首先使用 lsusb 命令检查 Linux 系统是否能检测到已连接的 UPS 电源。
$ lsusb | grep Uninterruptible
Bus 002 Device 004 : ID 051d : 0002 American Power Conversion Uninterruptible Power Supply
确认能够找到设备后。
安装:
$ sudo apt install apcupsd
编辑 apcupsd 的配置文件 /etc/apcupsd/apcupsd.conf,将其中 UPSCABLE 与 UPSTYPE 两项均设为 usb 。
因为台式机与 UPS 电源之间是通过 USB 通讯的,所以需要注释掉配置文件中的串口设置部分:
将 NISIP 值设为 0.0.0.0 或你想绑定的指定主机 IP
其余保持默认即可。
至此,可以启动 apcupsd 系统服务了。
$ sudo systemctl restart apcupsd
该服务启动后,除了正常的 UPS 电源实时监测外,还会在本机的端口上开启一个服务器。我们可以在命令行终端使用apcaccess命令来获得电源的运行状态。其中的主要参数为:
LINEV:线电压
LOADPCT:负载占比
TIMELEFT:电池剩余维持时间
LOTRANS:最低容许输入电压
HITRANS:最高容许输入电压
BATTV:电池输出电压
NOMPOWER:额定功率
1
2
3
4
5
6
7
8
9
10
11
12
13
14
15
16
17
18
19
20
21
22
23
24
25
26
27
28
29
30
31
32
33
34
35
36
37
38
$ sudo apcaccess status
APC : 001 , 036 , 0870
DATE : 2021 - 09 - 03 13 : 09 : 29 + 0800
HOSTNAME : [ YOUR - HOST - NAME ]
VERSION : 3.14.14 ( 31 May 2016 ) debian
UPSNAME : [ YOUR - UPS - NAME ]
CABLE : USB Cable
DRIVER : USB UPS Driver
UPSMODE : Stand Alone
STARTTIME : 2021 - 09 - 03 13 : 03 : 24 + 0800
MODEL : Back - UPS BK650M2 - CH
STATUS : ONLINE
LINEV : 226.0 Volts
LOADPCT : 20.0 Percent
BCHARGE : 100.0 Percent
TIMELEFT : 29.9 Minutes
MBATTCHG : 5 Percent
MINTIMEL : 3 Minutes
MAXTIME : 0 Seconds
SENSE : Low
LOTRANS : 160.0 Volts
HITRANS : 278.0 Volts
ALARMDEL : 30 Seconds
BATTV : 13.5 Volts
LASTXFER : No transfers since turnon
NUMXFERS : 0
TONBATT : 0 Seconds
CUMONBATT : 0 Seconds
XOFFBATT : N / A
SELFTEST : OK
STATFLAG : 0x05000008
SERIALNO : 000000000000
BATTDATE : 2001 - 01 - 01
NOMINV : 220 Volts
NOMBATTV : 12.0 Volts
NOMPOWER : 390 Watts
FIRMWARE : 294803G - 292804G
END APC : 2021 - 09 - 03 13 : 09 : 39 + 0800
客户端配置:
安装:
$ sudo apt install apcupsd
打开 apcupsd 配置文件 /etc/apcupsd/apcupsd.conf
将 UPSCABLE 值设为 ether
将 UPSTYPE 值设为 net
将 DEVICE 值设为你的 apcupsd 服务端地址和端口(也就是和 UPS 以 USB 相连接的主机)
与 NIS 相关的设置保持默认(也就是保持 NETSERVER 为 on)
# 示例配置
UPSCABLE ether
UPSTYPE net
DEVICE 10.10.10.125 : 3551
启动 apcupsd 服务,输入 apcaccess 命令,你应该能看到 apcupsd 输出电源信息。
1
2
3
4
5
6
7
8
9
10
11
12
13
14
15
16
17
18
19
20
21
22
23
24
25
26
27
28
29
30
31
32
33
34
35
36
37
38
39
$ sudo systemctl restart apcupsd
$ sudo apcaccess status
APC : 001 , 035 , 0891
DATE : 2024 - 10 - 01 12 : 45 : 29 + 0800
HOSTNAME : hpgen8
VERSION : 3.14.14 ( 31 May 2016 ) debian
UPSNAME : raspberrypi
CABLE : Ethernet Link
DRIVER : NETWORK UPS Driver
UPSMODE : Stand Alone
STARTTIME : 2024 - 10 - 01 12 : 45 : 29 + 0800
MASTERUPD : 2024 - 10 - 01 12 : 45 : 29 + 0800
MASTER : 10.10.10.125 : 3551
MODEL : Back - UPS 650
STATUS : ONLINE SLAVE
LINEV : 224.0 Volts
LOADPCT : 36.0 Percent
BCHARGE : 100.0 Percent
TIMELEFT : 3.4 Minutes
MBATTCHG : 5 Percent
MINTIMEL : 3 Minutes
MAXTIME : 0 Seconds
SENSE : Low
LOTRANS : 165.0 Volts
HITRANS : 266.0 Volts
BATTV : 13.6 Volts
LASTXFER : Unacceptable line voltage changes
NUMXFERS : 0
TONBATT : 0 Seconds
CUMONBATT : 0 Seconds
XOFFBATT : N / A
STATFLAG : 0x05000408
SERIALNO : * * * * * * * * * *
BATTDATE : 2018 - 11 - 04
NOMINV : 220 Volts
NOMBATTV : 12.0 Volts
FIRMWARE : 822.A3.I USB FW : A3
END APC : 2024 - 10 - 01 12 : 45 : 31 + 0800
NUT 配置
安装 NUT
NUT (Network UPS Tools) 是一种开源软件工具,其主要功能特点是实时监控与管理不间断电源(UPS)设备,支持多种通信协议,自动执行操作以应对电力故障,适用于多平台,并允许集中管理多个UPS设备,以确保与这些设备连接的计算机和设备在电力问题发生时能够继续正常运行或安全关闭。
NUT中的主要软件组件和功能:
Driver(驱动程序):NUT包括各种不同制造商的UPS设备的驱动程序,使NUT能够与多种型号的UPS设备通信。这些驱动程序负责与UPS设备建立连接,并获取有关电源状态、电池状态和其他参数的信息。
upsd(UPS守护进程):upsd是NUT的核心守护进程,负责与UPS设备通信,并将UPS状态信息提供给其他NUT组件和客户端。它可以通过网络协议(如SNMP、HTTP、XML-RPC等)向其他计算机提供UPS状态信息。
upsmon(UPS监控守护进程):upsmon监控守护进程用于监视UPS状态,并在检测到电力问题时执行操作。它可以配置为执行自定义脚本、关闭计算机或发送警报通知,以确保系统的连续性和数据完整性。
upslog(UPS事件记录器):upslog用于记录UPS事件和状态信息,以便后续分析和故障排除。它可以生成日志文件,其中包含UPS的运行历史和电力事件。
nutclient(NUT客户端工具):NUT提供了一些用于监控和管理UPS的命令行工具,例如upsc用于查询UPS状态,upscmd用于发送命令到UPS,以及upsrw用于修改UPS配置。
安装
apt update && apt install - y nut
通过 USB 连接 UPS
在将 UPS 通过 USB 连接到树莓派后,可以通过查看 USB 设备进行检查
其中的 Device 003 就是 UPS,说明 USB 连接正常
Bus 001 Device 004 : ID 051d : 0002 American Power Conversion Uninterruptible Power Supply
Bus 003 Device 001 : ID 1d6b : 0002 Linux Foundation 2.0 root hub
Bus 002 Device 002 : ID 174c : 55aa ASMedia Technology Inc . ASM1051E SATA 6Gb / s bridge , ASM1053E SATA 6Gb / s bridge , ASM1153 SATA 3Gb / s bridge , ASM1153E SATA 6Gb / s bridge
Bus 002 Device 001 : ID 1d6b : 0003 Linux Foundation 3.0 root hub
Bus 001 Device 003 : ID 0463 : ffff MGE UPS Systems UPS
Bus 001 Device 002 : ID 2109 : 3431 VIA Labs , Inc . Hub
Bus 001 Device 001 : ID 1d6b : 0002 Linux Foundation 2.0 root hub
正确识别到连接的 UPS 设备,驱动为 usbhid-ups,产品为 SANTAK TG-BOX
[ nutdev1 ]
driver = "usbhid-ups"
port = "auto"
vendorid = "0463"
productid = "FFFF"
product = "SANTAK TG-BOX"
serial = "Blank"
vendor = "EATON"
bus = "001"
或者如下:
[ nutdev1 ]
driver = "usbhid-ups"
port = "auto"
vendorid = "051D"
productid = "0002"
product = "Back-UPS 650 FW:822.A3.I USB FW:A3"
serial = "**********"
vendor = "APC"
bus = "001"
配置 UPS
###配置 UPS 驱动
驱动程序负责与UPS设备建立连接,并获取有关电源状态、电池状态和其他参数的信息
使用 nut-scanner 将连接的 UPS 信息追加到 /etc/nut/ups.conf 配置中,其中的 nutdev1 是设备的名称,可以自定义
sudo nut - scanner - q | sudo tee - a / etc / nut / ups .conf
使用 upsdrvctl 命令启动 NUT
配置 UPS 守护进程
upsd 负责与UPS设备通信,并将UPS状态信息提供给其他NUT组件和客户端
# 配置NUT为UPS服务器模式
sudo sed - i "s/^MODE=.*/MODE=netserver/g" / etc / nut / nut .conf
sudo upsd
查看 UPS 状态
使用 upsc 命令查看 UPS 设备的状态;其中的 nutdev1 是 /etc/nut/ups.conf 中配置的名称
sudo upsc nutdev1 @ localhost
该命令会返回 UPS 设备的所有信息
Init SSL without certificate database
battery .charge : 98
battery .charge .low : 20
battery .runtime : 2744
battery .type : PbAc
device .mfr : EATON
device .model : SANTAK TG - BOX 600
device .serial : Blank
. . .
也可以指定名称查看 UPS 状态
sudo upsc nutdev1 @ localhost ups .status
Init SSL without certificate database
OL
配置关机策略
配置 upsd 用户
upsd 用户对应的配置文件是 /etc/nut/upsd.users,配置用户用于读取 UPS的信息;在以下配置中,用户名是 upsmon,密码是 123456,运行模式是 master,即该设备为主节点(如果有同时使用其他 UPS则可以是 slave)
[ upsmon ]
password = "123456"
upsmon master
配置关机策略
关机策略使用的是 upsmon,upsmon 监控守护进程用于监视UPS状态,并在检测到电力问题时执行操作,它可以配置为执行自定义脚本、关闭计算机或发送警报通知
修改 /etc/nut/upsmon.conf,添加如下配置,使用的是刚才创建的用户信息,这样,当设备监听到 UPS 发出的 LOWBATT 命令后,就会执行关闭系统
MONITOR ups @ localhost 1 monuser 123456 master
这个命令告诉NUT要监控名为 “ups” 的UPS设备,该设备位于本地主机上。监控用户 “monuser”,可以使用密码 “123456” 连接到NUT,并具有 “master” 角色的权限。这允许用户通过NUT连接来监视和管理UPS设备
执行自定义动作
NUT 通过 upssched 支持监听 UPS 事件并执行指定脚本,因此可以用于执行一些自定义的动作,如发送通知等
配置 upsmon
修改 /etc/nut/upsmon.conf 文件,添加如下配置
该配置用于在发生事件时运行 /sbin/upssched 服务
NOTIFYFLAG ONLINE SYSLOG + WALL + EXEC
NOTIFYFLAG ONBATT SYSLOG + WALL + EXEC
NOTIFYFLAG LOWBATT SYSLOG + WALL + EXEC
这里监听了 ONLINE, ONBATT, 和 LOWBATT三个事件,分别是电源供电、电池供电和低电量事件;SYSLOG声明记录事件日志到系统中,WALL声明通知所有在线用户,EXEC 声明需要执行命令
配置 upssched
配置好 upsmon 后,还需要配置 upssched 执行相关的命令,需要将以下内容添加到 /etc/nut/upssched.conf 中
CMDSCRIPT / usr / local / bin / upssched - script .sh
PIPEFN / run / nut / upssched / upssched .pipe
LOCKFN / run / nut / upssched / upssched .lock
AT ONBATT * EXECUTE battery _ on # 发送断电的消息
AT ONLINE * EXECUTE power _ online # 发送来电的消息
AT ONBATT * START - TIMER watch _ battery 60 # 60 秒后执行监控电池状态
AT ONLINE * CANCEL - TIMER watch _ battery # 取消 监控电池状态
AT LOWBATT * EXECUTE low _ battery # 低电量
CMDSCRIPT 指定了监听到事件后需要执行的脚本 PIPEFN和LOCKFN指定了监听事件的管道并加锁,避免被修改 AT 和 EXECUTE 指定了监听的事件并执行相关的脚本;当监听到 ONBATT, ONLINE 和 LOWBATT 时执行 CMDSCRIPT指定的脚本,并将 battery_on, power_online 和 low_battery作为参数 AT 和 START-TIMER 启动了一个计时器,在 60s 后执行 AT 和 CANCEL-TIMER 指定如果在启动计时器60s 内发生了 ONLINE事件,则取消计时器
1
2
3
4
5
6
7
8
9
10
11
12
13
14
15
16
17
18
19
20
21
22
23
24
25
26
27
28
29
30
31
32
33
34
35
36
#! / bin / bash
BARK_URL = $ { BARK_URL : - "https://api.day.app/xxxxxx" }
function send_message ( ) {
message = "$1"
echo "发送通知:${message}"
curl - X "POST" "$BARK_URL" \
- H 'Content-Type: application/json; charset=utf-8' \
- d "{
\ "title \ ": \ "UPS 状态发生变化\ ",
\ "body \ ": \ "$ { message } \ ",
\ "group \ ": \ "UPS \ "
} "
}
case $ 1 in
battery_on )
battery_charge = $ ( upsc ups @localhost battery . charge )
send_message "UPS 电池已启用,目前电量: ${battery_charge}"
; ;
power_online )
battery_charge = $ ( upsc ups @localhost battery . charge )
send_message "UPS 已恢复供电,目前电量: ${battery_charge}"
; ;
watch_battery )
battery_charge = $ ( upsc ups @localhost battery . charge )
send_message "UPS 目前电量: ${battery_charge}"
; ;
low_battery )
battery_charge = $ ( upsc ups @localhost battery . charge )
send_message "UPS 低电量: ${battery_charge},开始关机"
; ;
* )
logger - t upssched - cmd "其他未知指令: $1"
; ;
esac
这段脚本用于接收事件,并执行动作;这里通过 Bark 发送了通知
记录 UPS 日志
ups 支持通过 upslog 记录 UPS 日志
sudo upslog - l / var / log / ups .log - i 1 - s ups @ localhost - f "%TIME @Y-@m-@d @H:@M:@S%, battery.charge:%VAR battery.charge%, input.voltage:%VAR input.voltage%, ups.load:%VAR ups.load%, ups.status:[%VAR ups.status%], ups.temperature:%VAR ups.temperature%, input.frequency:%VAR input.frequency%"
这段命令中,通过 -l指定了输出文件为 /var/log/ups.log,-i 1 表示1s输出一次,-s ups@localhost指定了 UPS 位置,-f 指定了日志输出格式
输出日志参考:
2023 - 10 - 06 19 : 58 : 38 , battery .charge : 78 , input .voltage : NA , ups .load : 8 , ups .status : [ OL ] , ups .temperature : NA , input .frequency : NA
配置 UPS 监控
NUT 支持通过 HTTP 接口对外提供 UPS 的信息,因此可以用于监控 UPS; https://github.com/helloworlde/nut_exporter 提供了 Prometheus Exporter,可以使用 Prometheus 和 Grafana 对 UPS 进行监控
修改 NUT 运行模式
配置文件是 /etc/nut/nut.conf;将模式修改为 netserver的目的是允许通过局域网访问 UPS 的设备信息,用于其他设备监控、监听 UPS 的状态;如果不需要监听则不需要配置
配置 upsd
修改 upsd 对应的配置文件 /etc/nut/upsd.conf,添加监听的地址和端口;添加局域网 IP 是用于局域网内其他设备进行监控,否则可能会拒绝连接
LISTEN 127.0.0.1 3493
LISTEN :: 1 3493
LISTEN 0.0.0.0 3493
sudo upsd - c reload
sudo reboot
配置 NUT Exporter
1
2
3
4
5
6
7
8
9
10
11
12
13
14
15
16
17
18
version : "3"
services :
nut - exporter :
image : hellowoodes / nut - exporter
container_name : nut - exporter
hostname : nut - exporter
restart : unless - stopped
command : -- log .level = debug
ports :
- "9199:9199"
environment :
- NUT_EXPORTER_SERVER = $ { NUT_EXPORTER_SERVER }
- NUT_EXPORTER_USERNAME = $ { NUT_EXPORTER_USERNAME }
- NUT_EXPORTER_PASSWORD = $ { NUT_EXPORTER_PASSWORD }
- NUT_EXPORTER_VARIABLES = $ { NUT_EXPORTER_VARIABLES }
volumes :
- "/etc/localtime:/etc/localtime:ro"
Server 的地址即为树莓派局域网的IP地址,用户名和密码是 upsd 的用户和密码;NUT_EXPORTER_VARIABLES是需要抓取的监控指标类型,不同的设备可能指标不一样;可以通过 upsc ups@localhost 获取所有的指标名称进行替换
NUT_EXPORTER_SERVER = 192.168.31.11
NUT_EXPORTER_USERNAME = monuser
NUT_EXPORTER_PASSWORD = 123456
NUT_EXPORTER_VARIABLES = battery .charge , battery .charge .low , battery .runtime , battery .type , device .mfr , device .model , device .serial , device .type , driver .name , driver .parameter .pollfreq , driver .parameter .pollinterval , driver .parameter .port , driver .parameter .product , driver .parameter .productid , driver .parameter .serial , driver .parameter .synchronous , driver .parameter .vendor , driver .parameter .vendorid , driver .version , driver .version .data , driver .version .internal , input .transfer .high , input .transfer .low , outlet . 1.desc , outlet . 1.id , outlet . 1.status , outlet . 1.switchable , outlet .desc , outlet .id , outlet .switchable , output .frequency .nominal , output .voltage , output .voltage .nominal , ups .beeper .status , ups .delay .shutdown , ups .delay .start , ups .firmware , ups .load , ups .mfr , ups .model , ups .power .nominal , ups .productid , ups .serial , ups .status , ups .timer .shutdown , ups .timer .start , ups .type , ups .vendorid
- job_name : ups - exporter
honor_timestamps : true
scrape_interval : 15s
scrape_timeout : 10s
metrics_path : / ups_metrics
scheme : http
static_configs :
- targets :
- 192.168.31.11 : 9199
导入 https://github.com/helloworlde/nut_exporter/blob/master/dashboard/dashboard.json 即可
参考链接


