系统与开发环境 Flutter (2.10.1~3.3.9)/Xcode 13.2.1(13C100)/macOS Big Sur 11.6.4/iPad Pro(Model A1673) iOS 15.3.1/iPhone SE 3 iOS 16.1.1
操作步骤
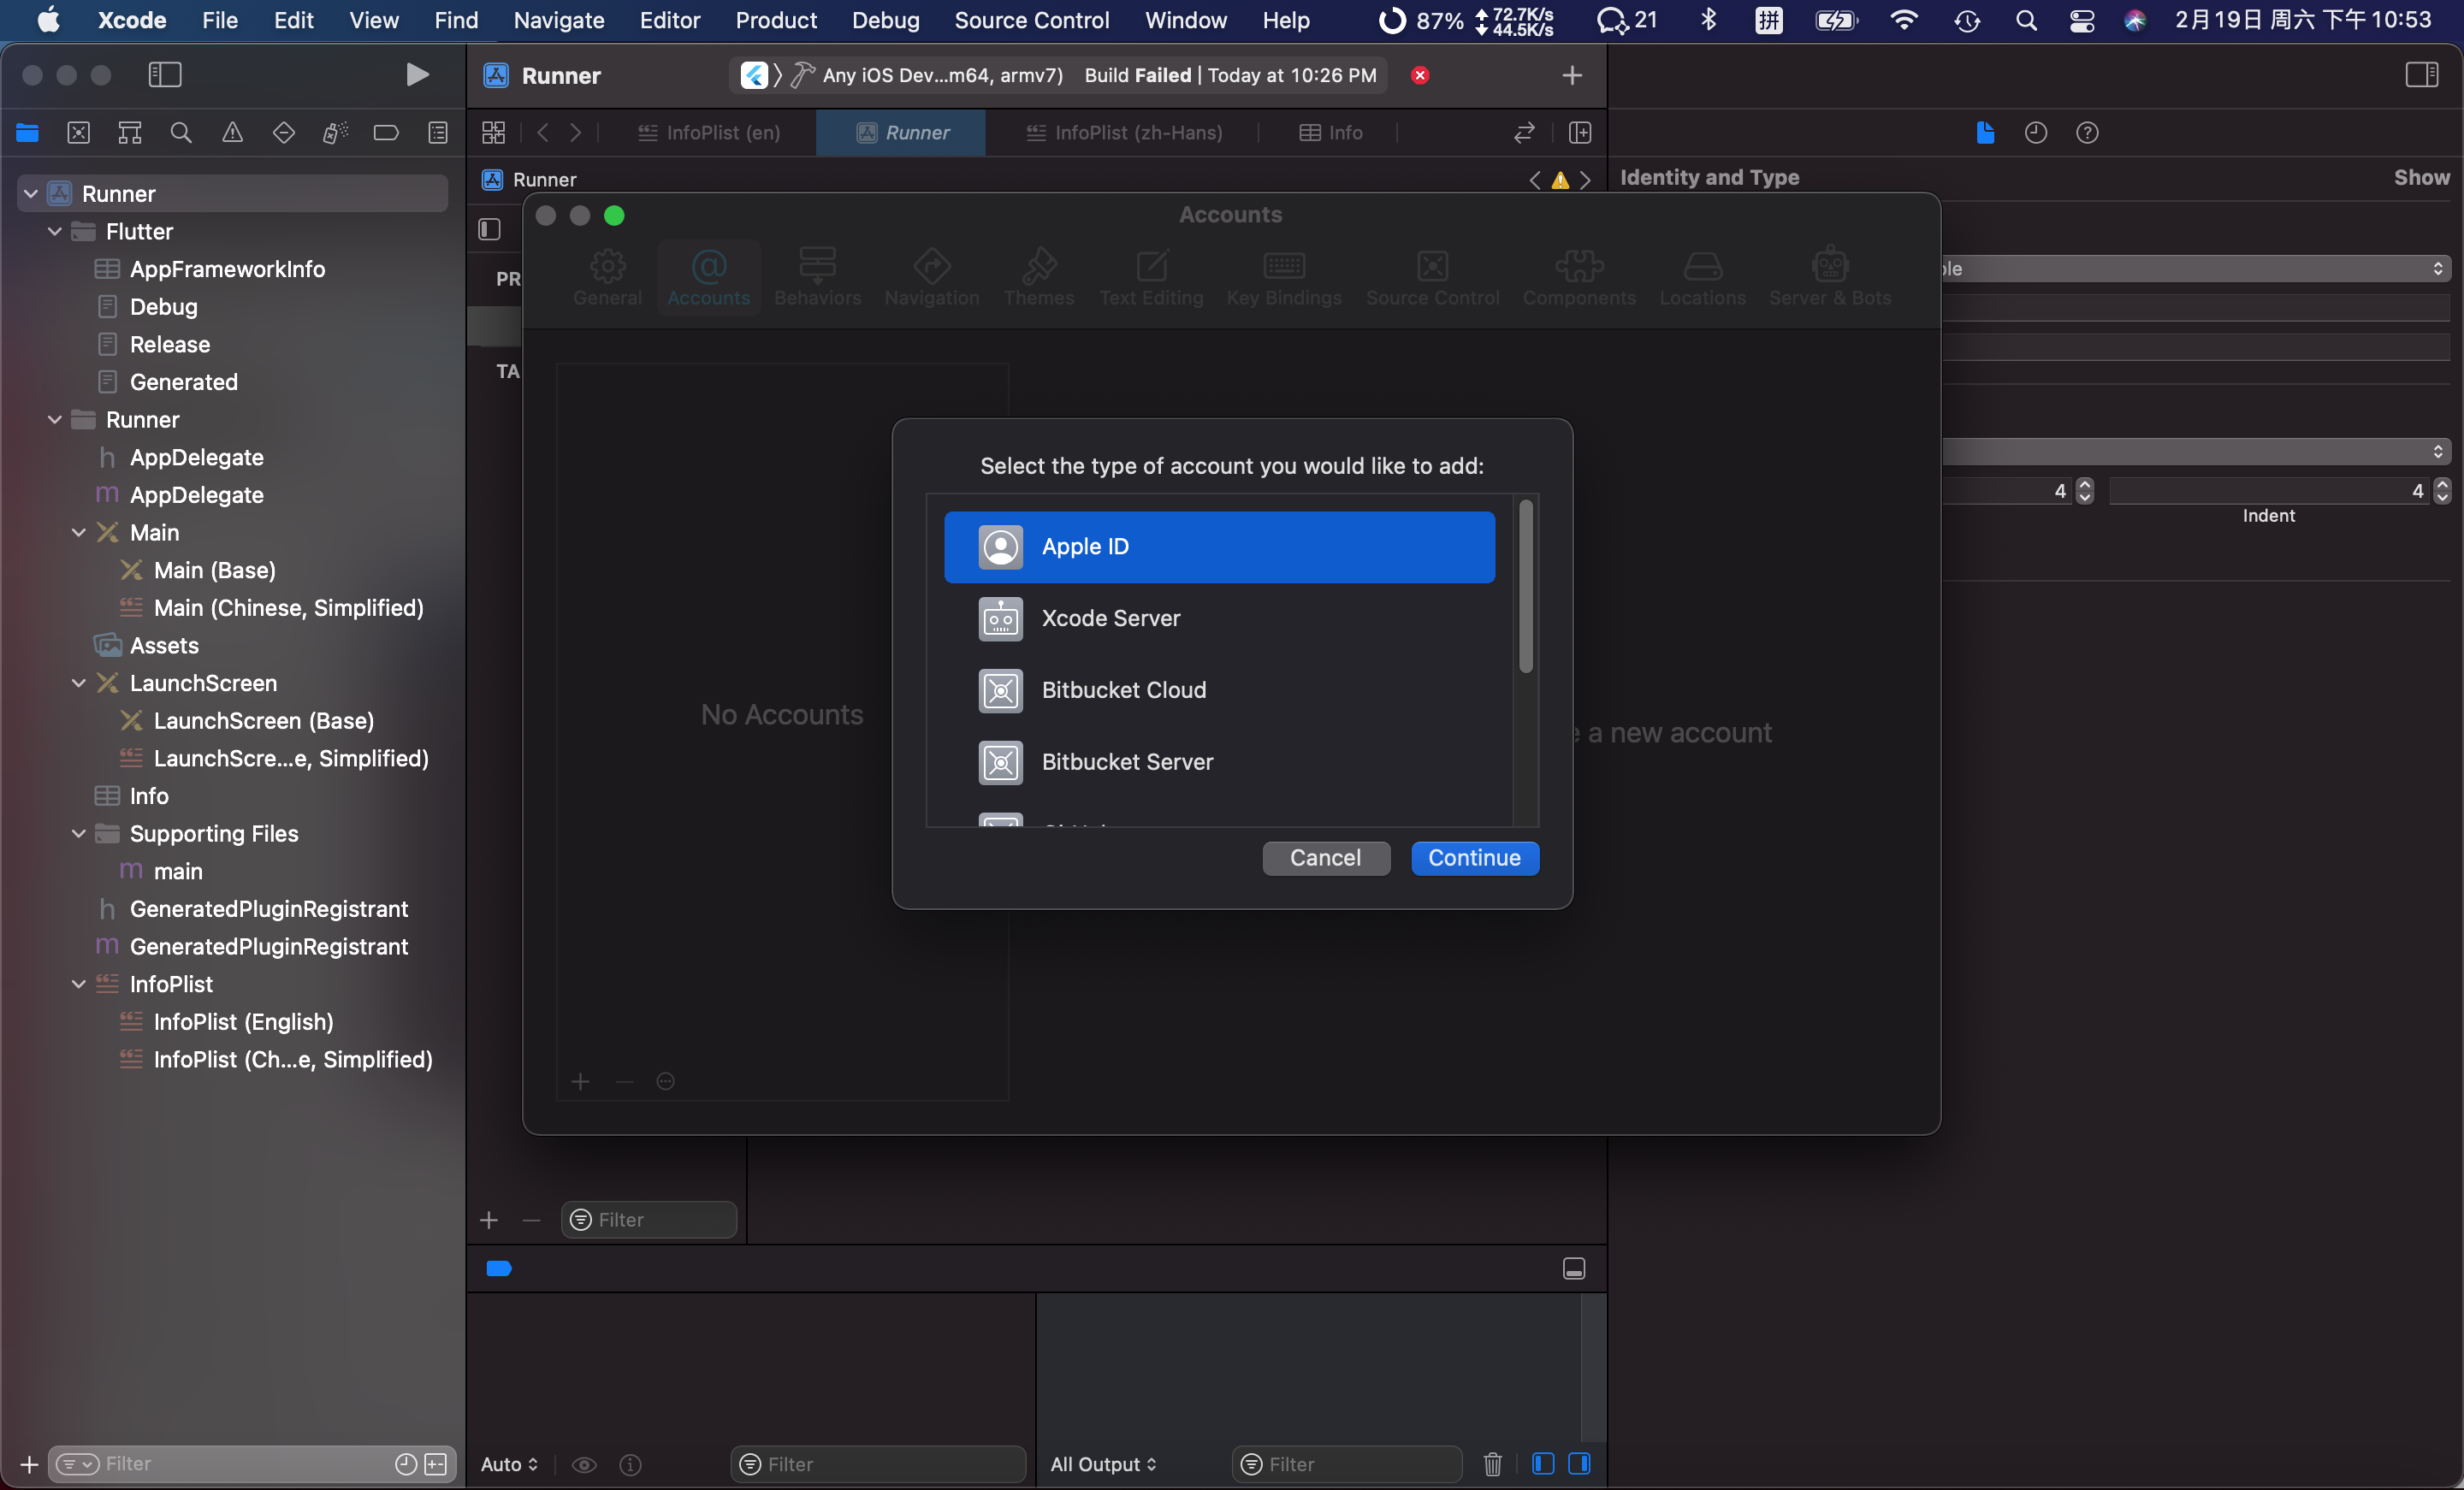
1. 苹果开发网站 注册或关联开发者账号,如果暂时不需要发布应用到 Mac App Store,只是在设备上调试应用,则不需要注册收费用户,只需要注册或者关联账号即可。具体可以查看官方介绍 选择会员资格 。
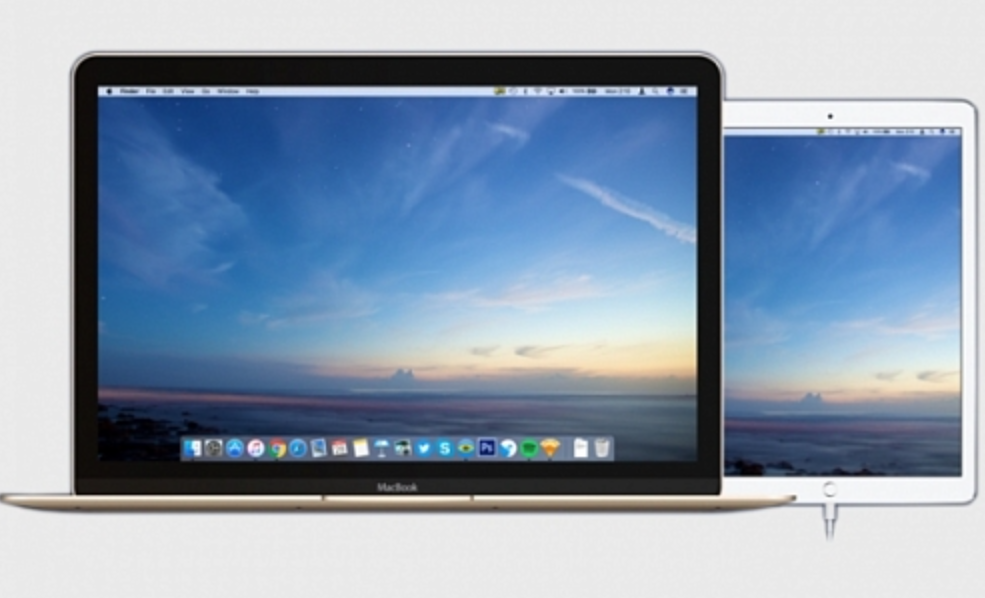
2. 在 iPad Pro 和 macbook Pro 登陆同一个注册的开发者的账号。
3. 通过 USB 数据线把 iPad Pro 与 macbook Pro 设备连接起来,如下图:
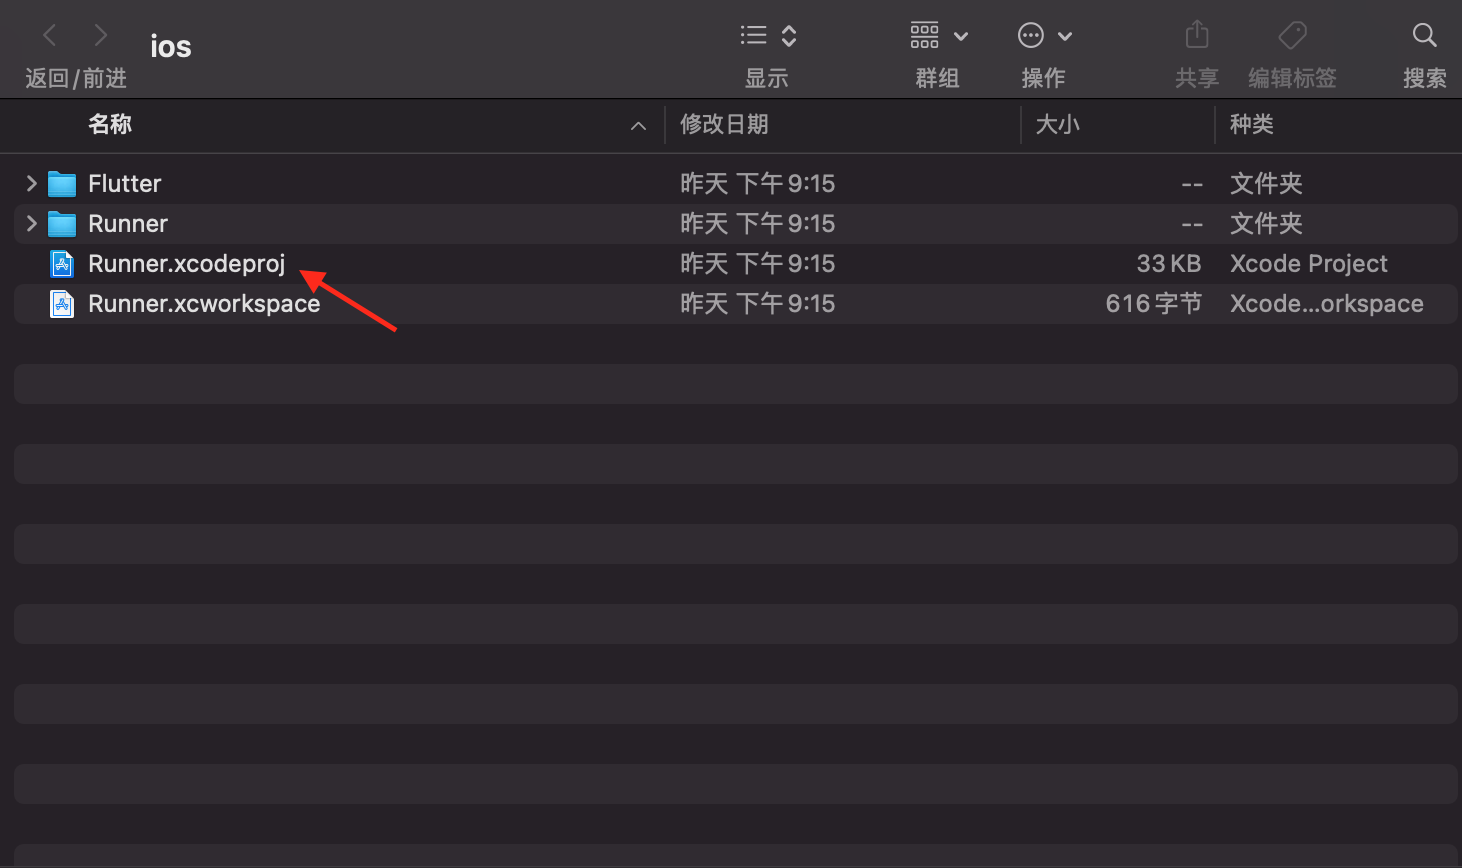
4. 在IOS目录下打开项目文件:
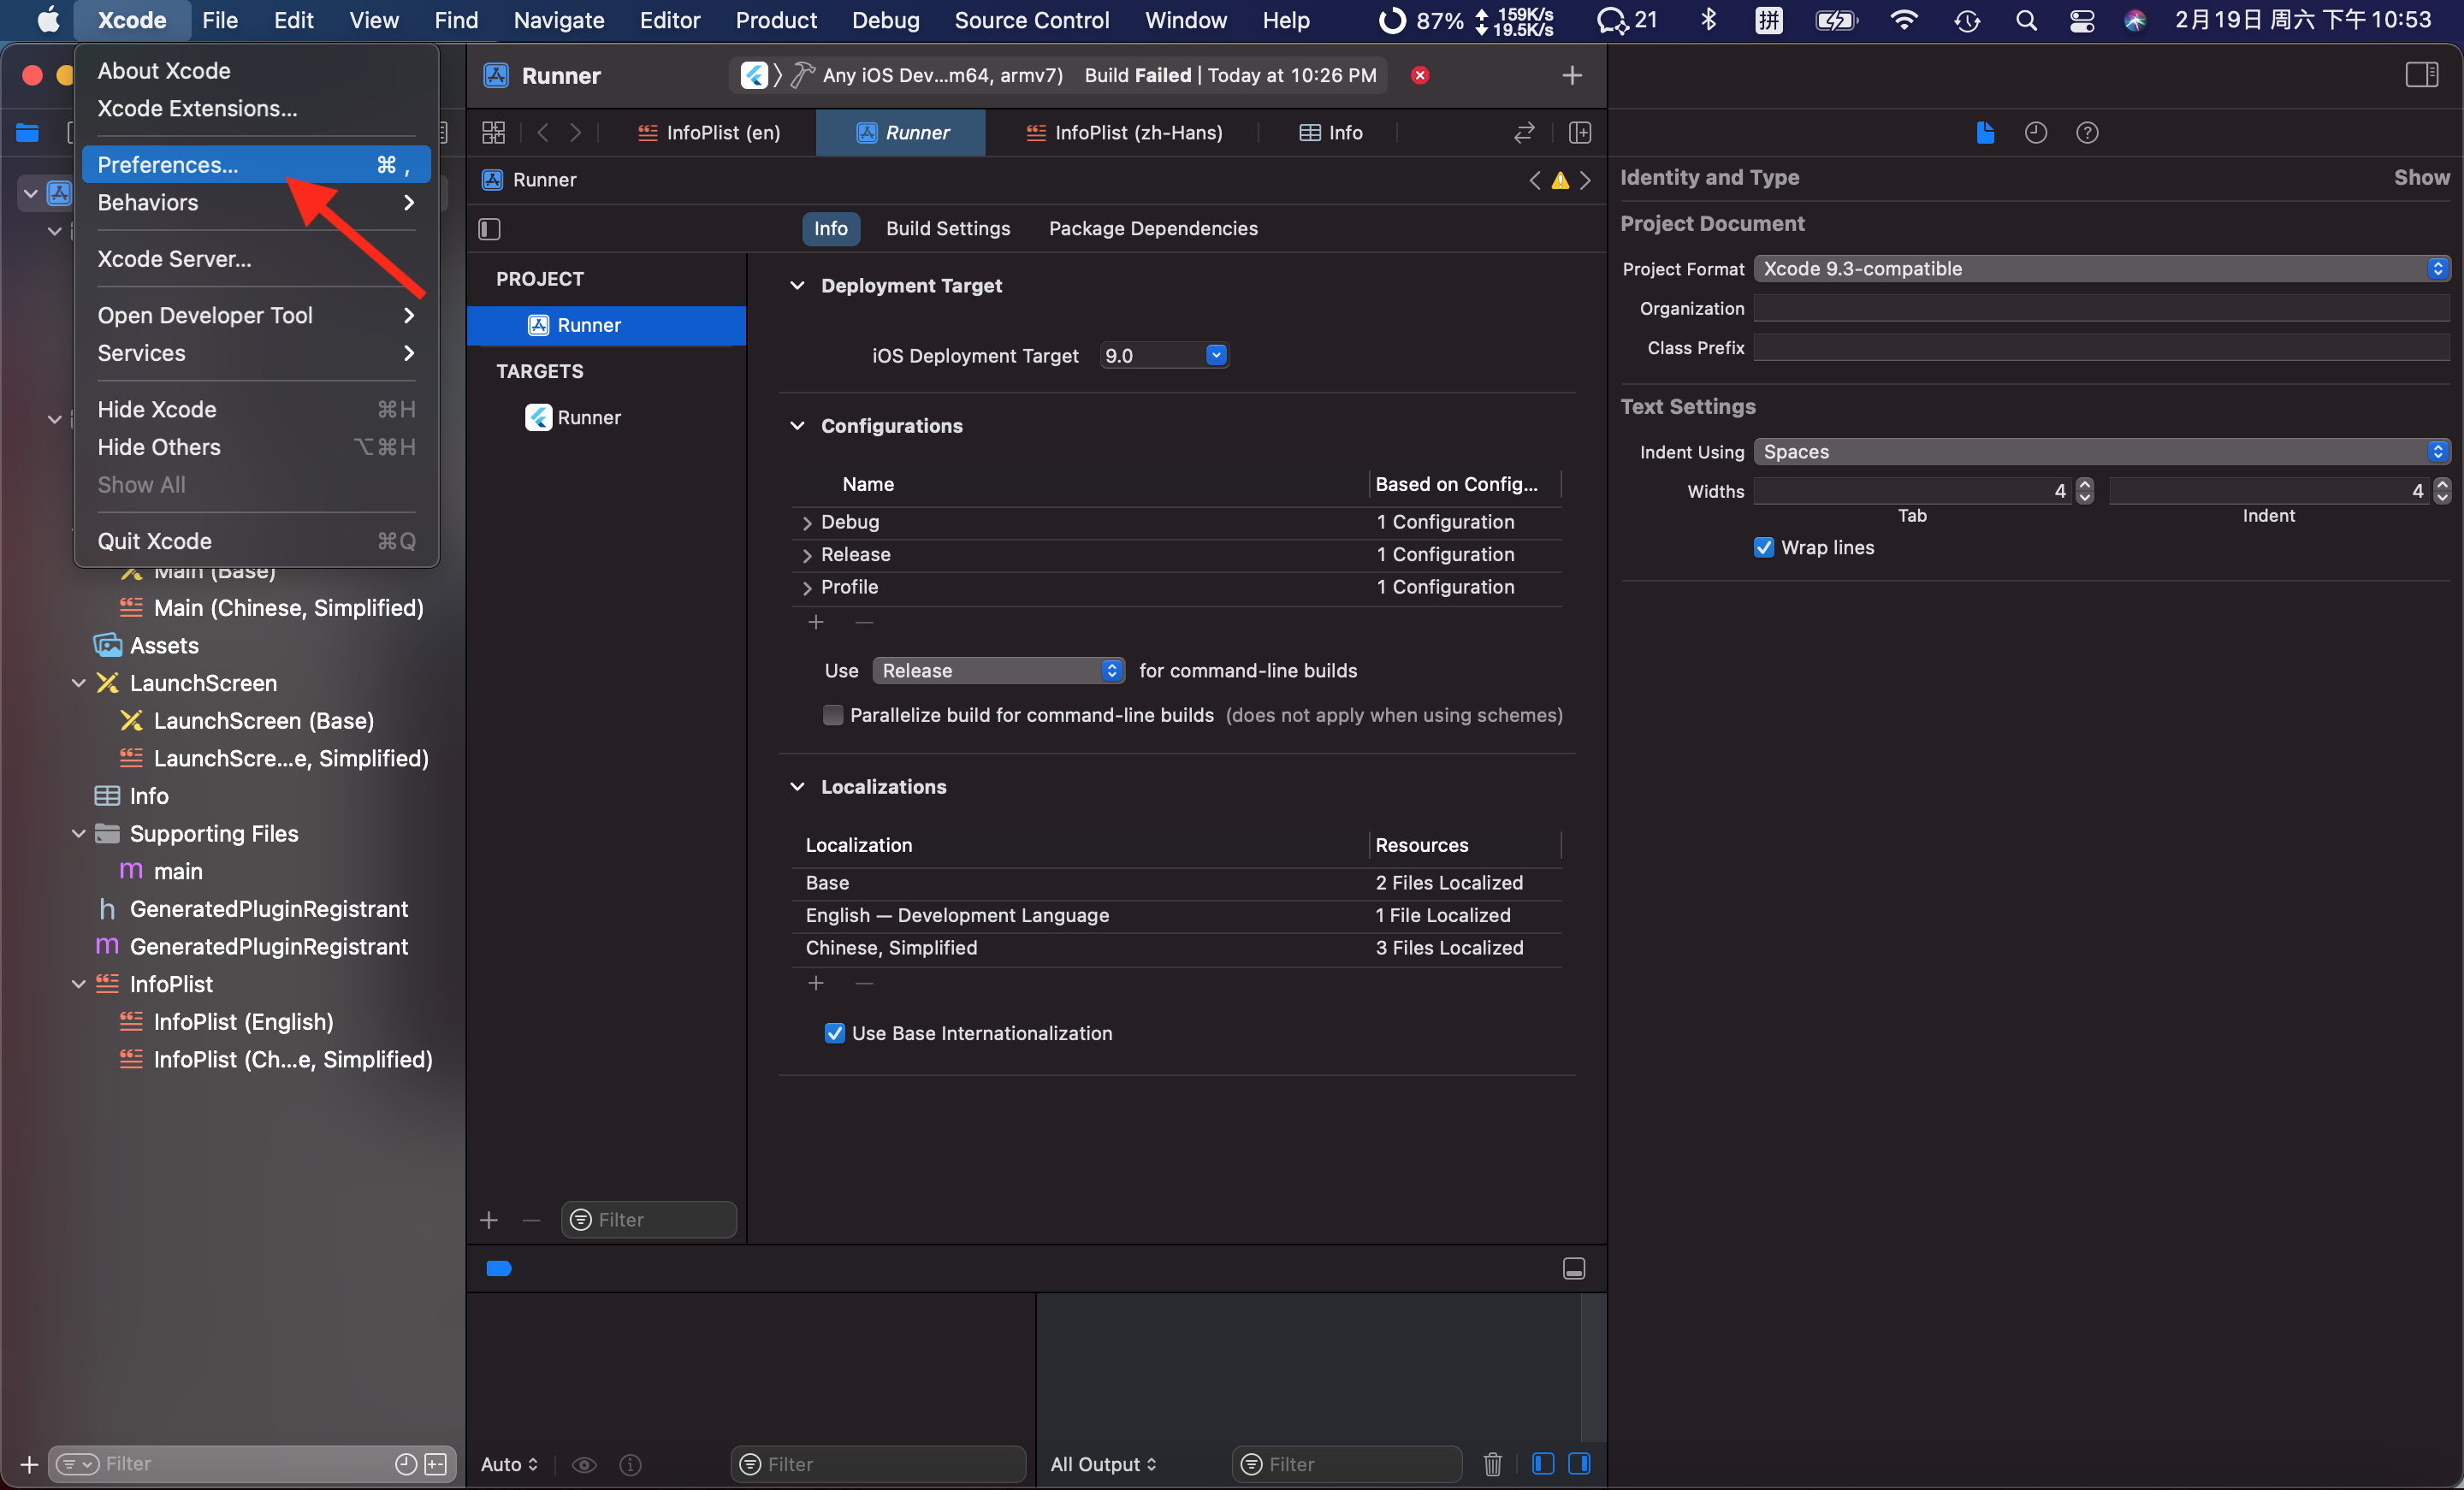
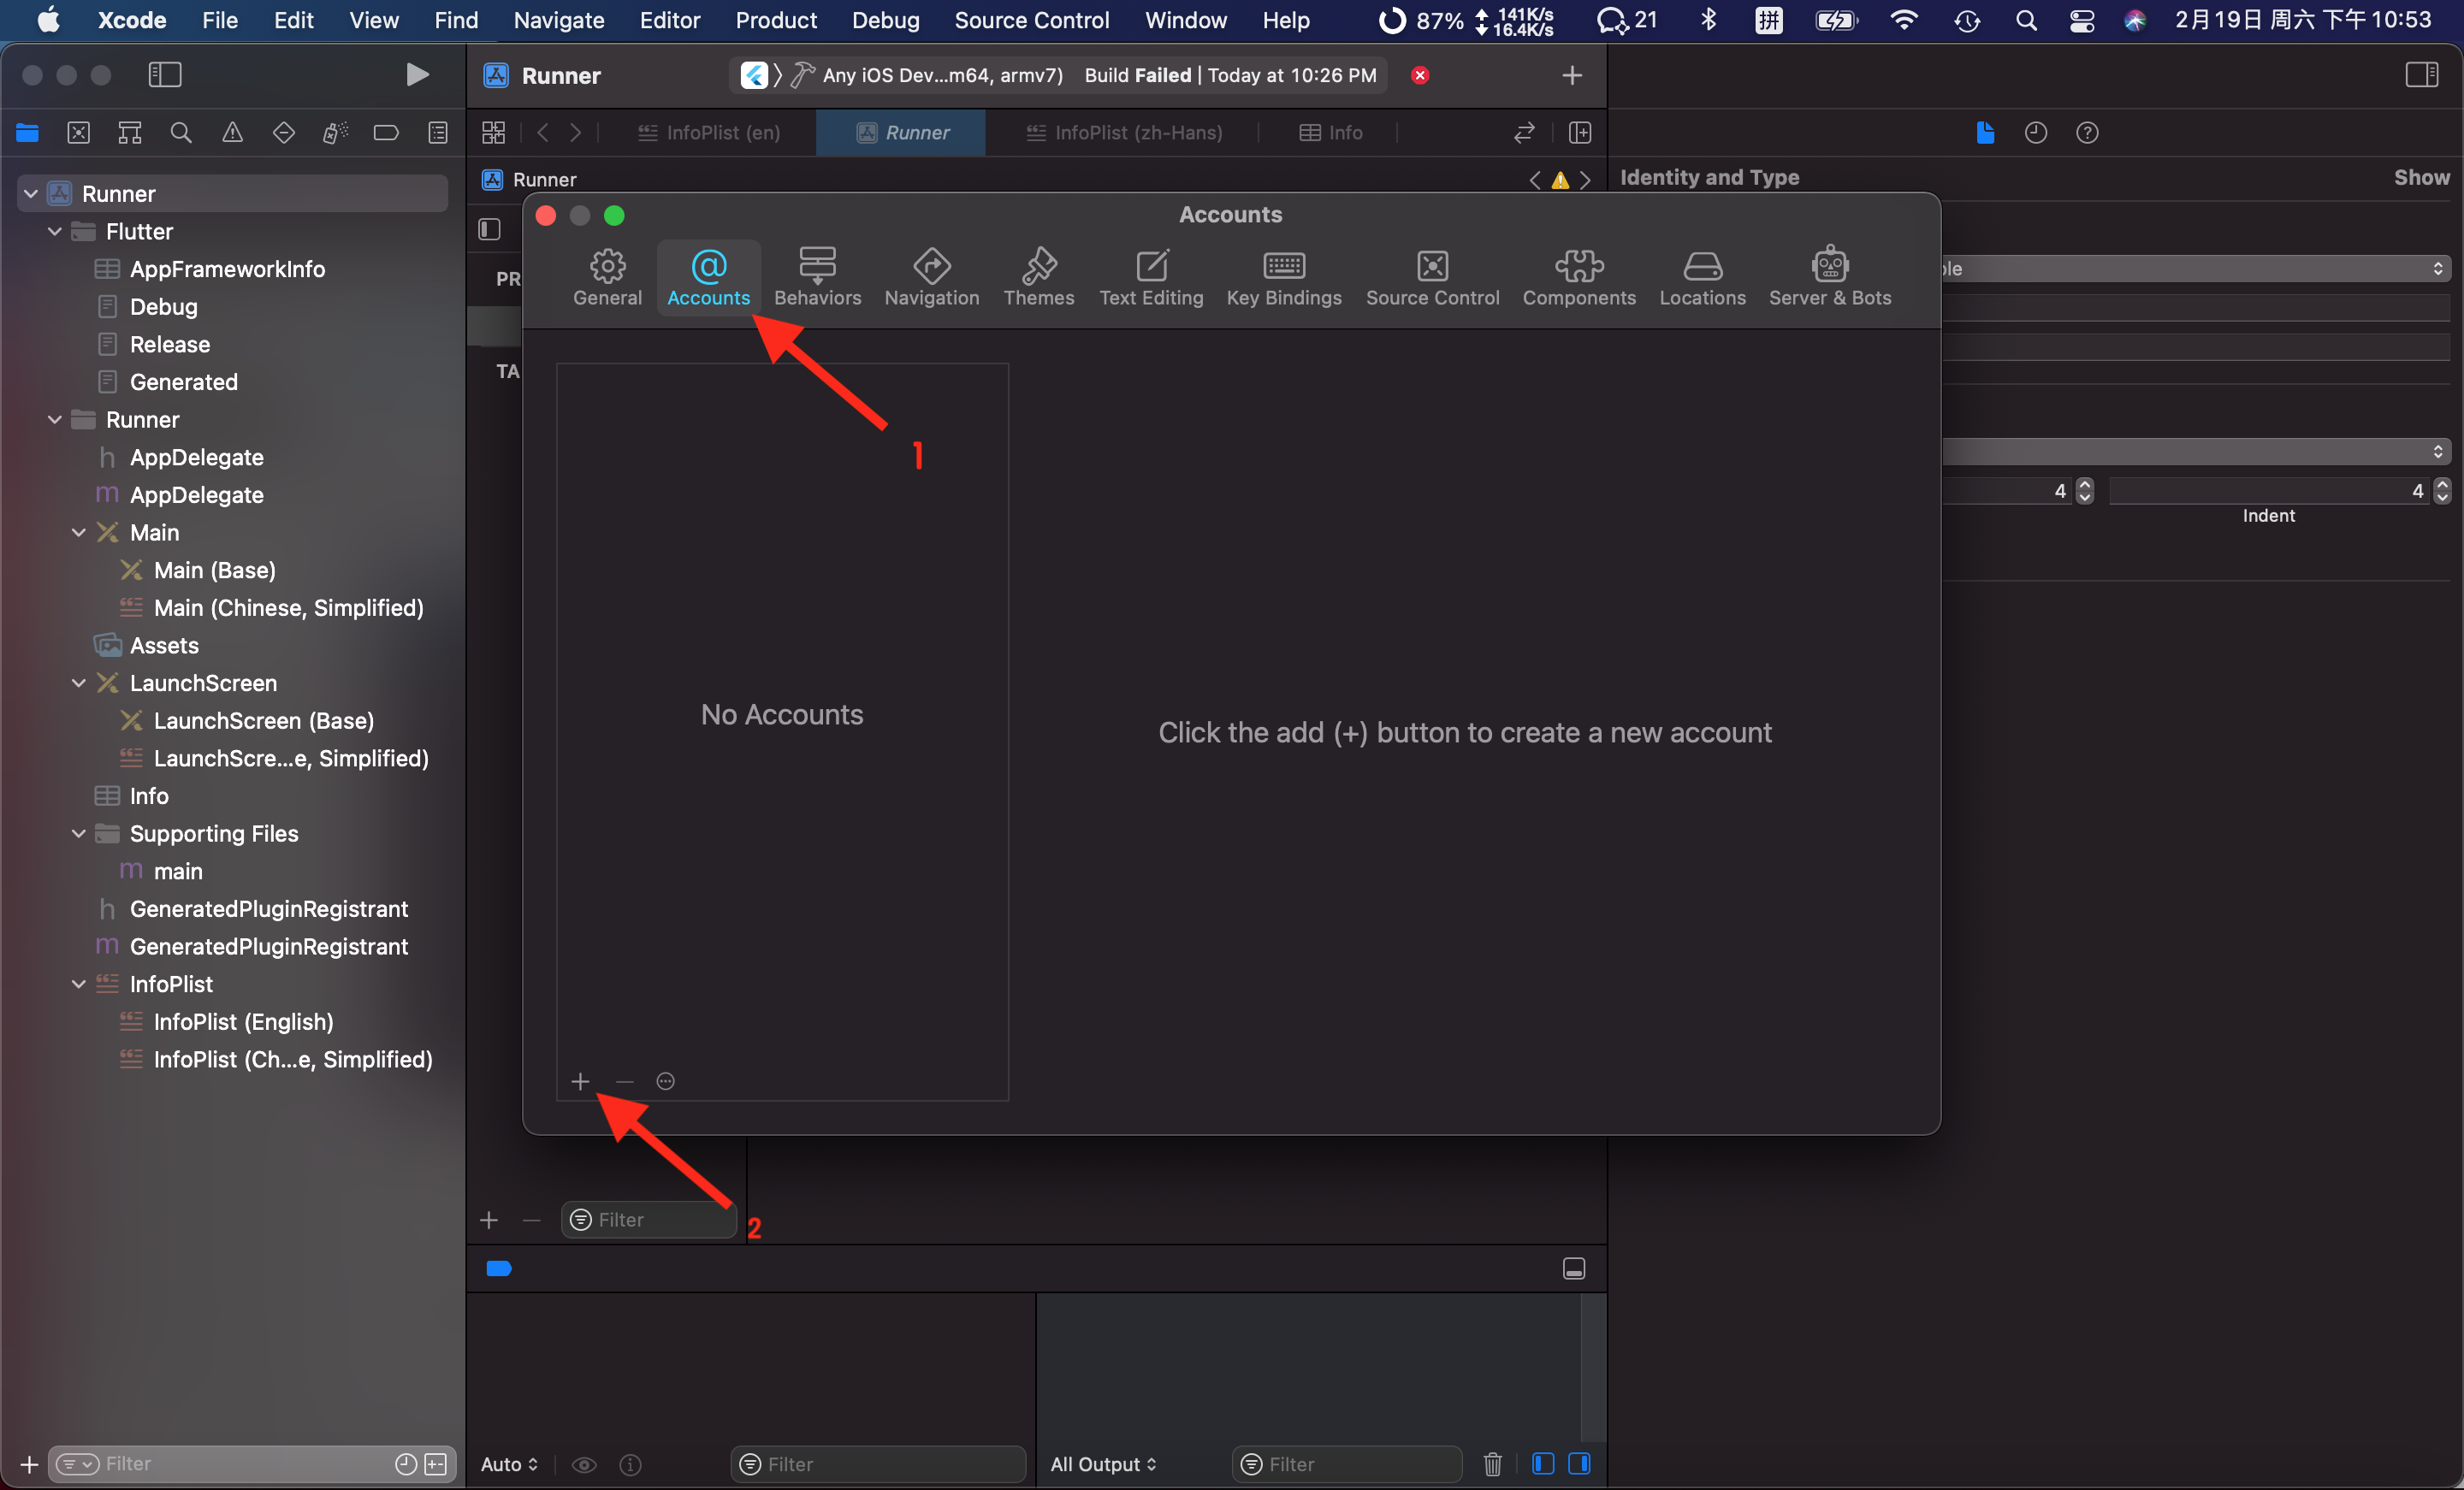
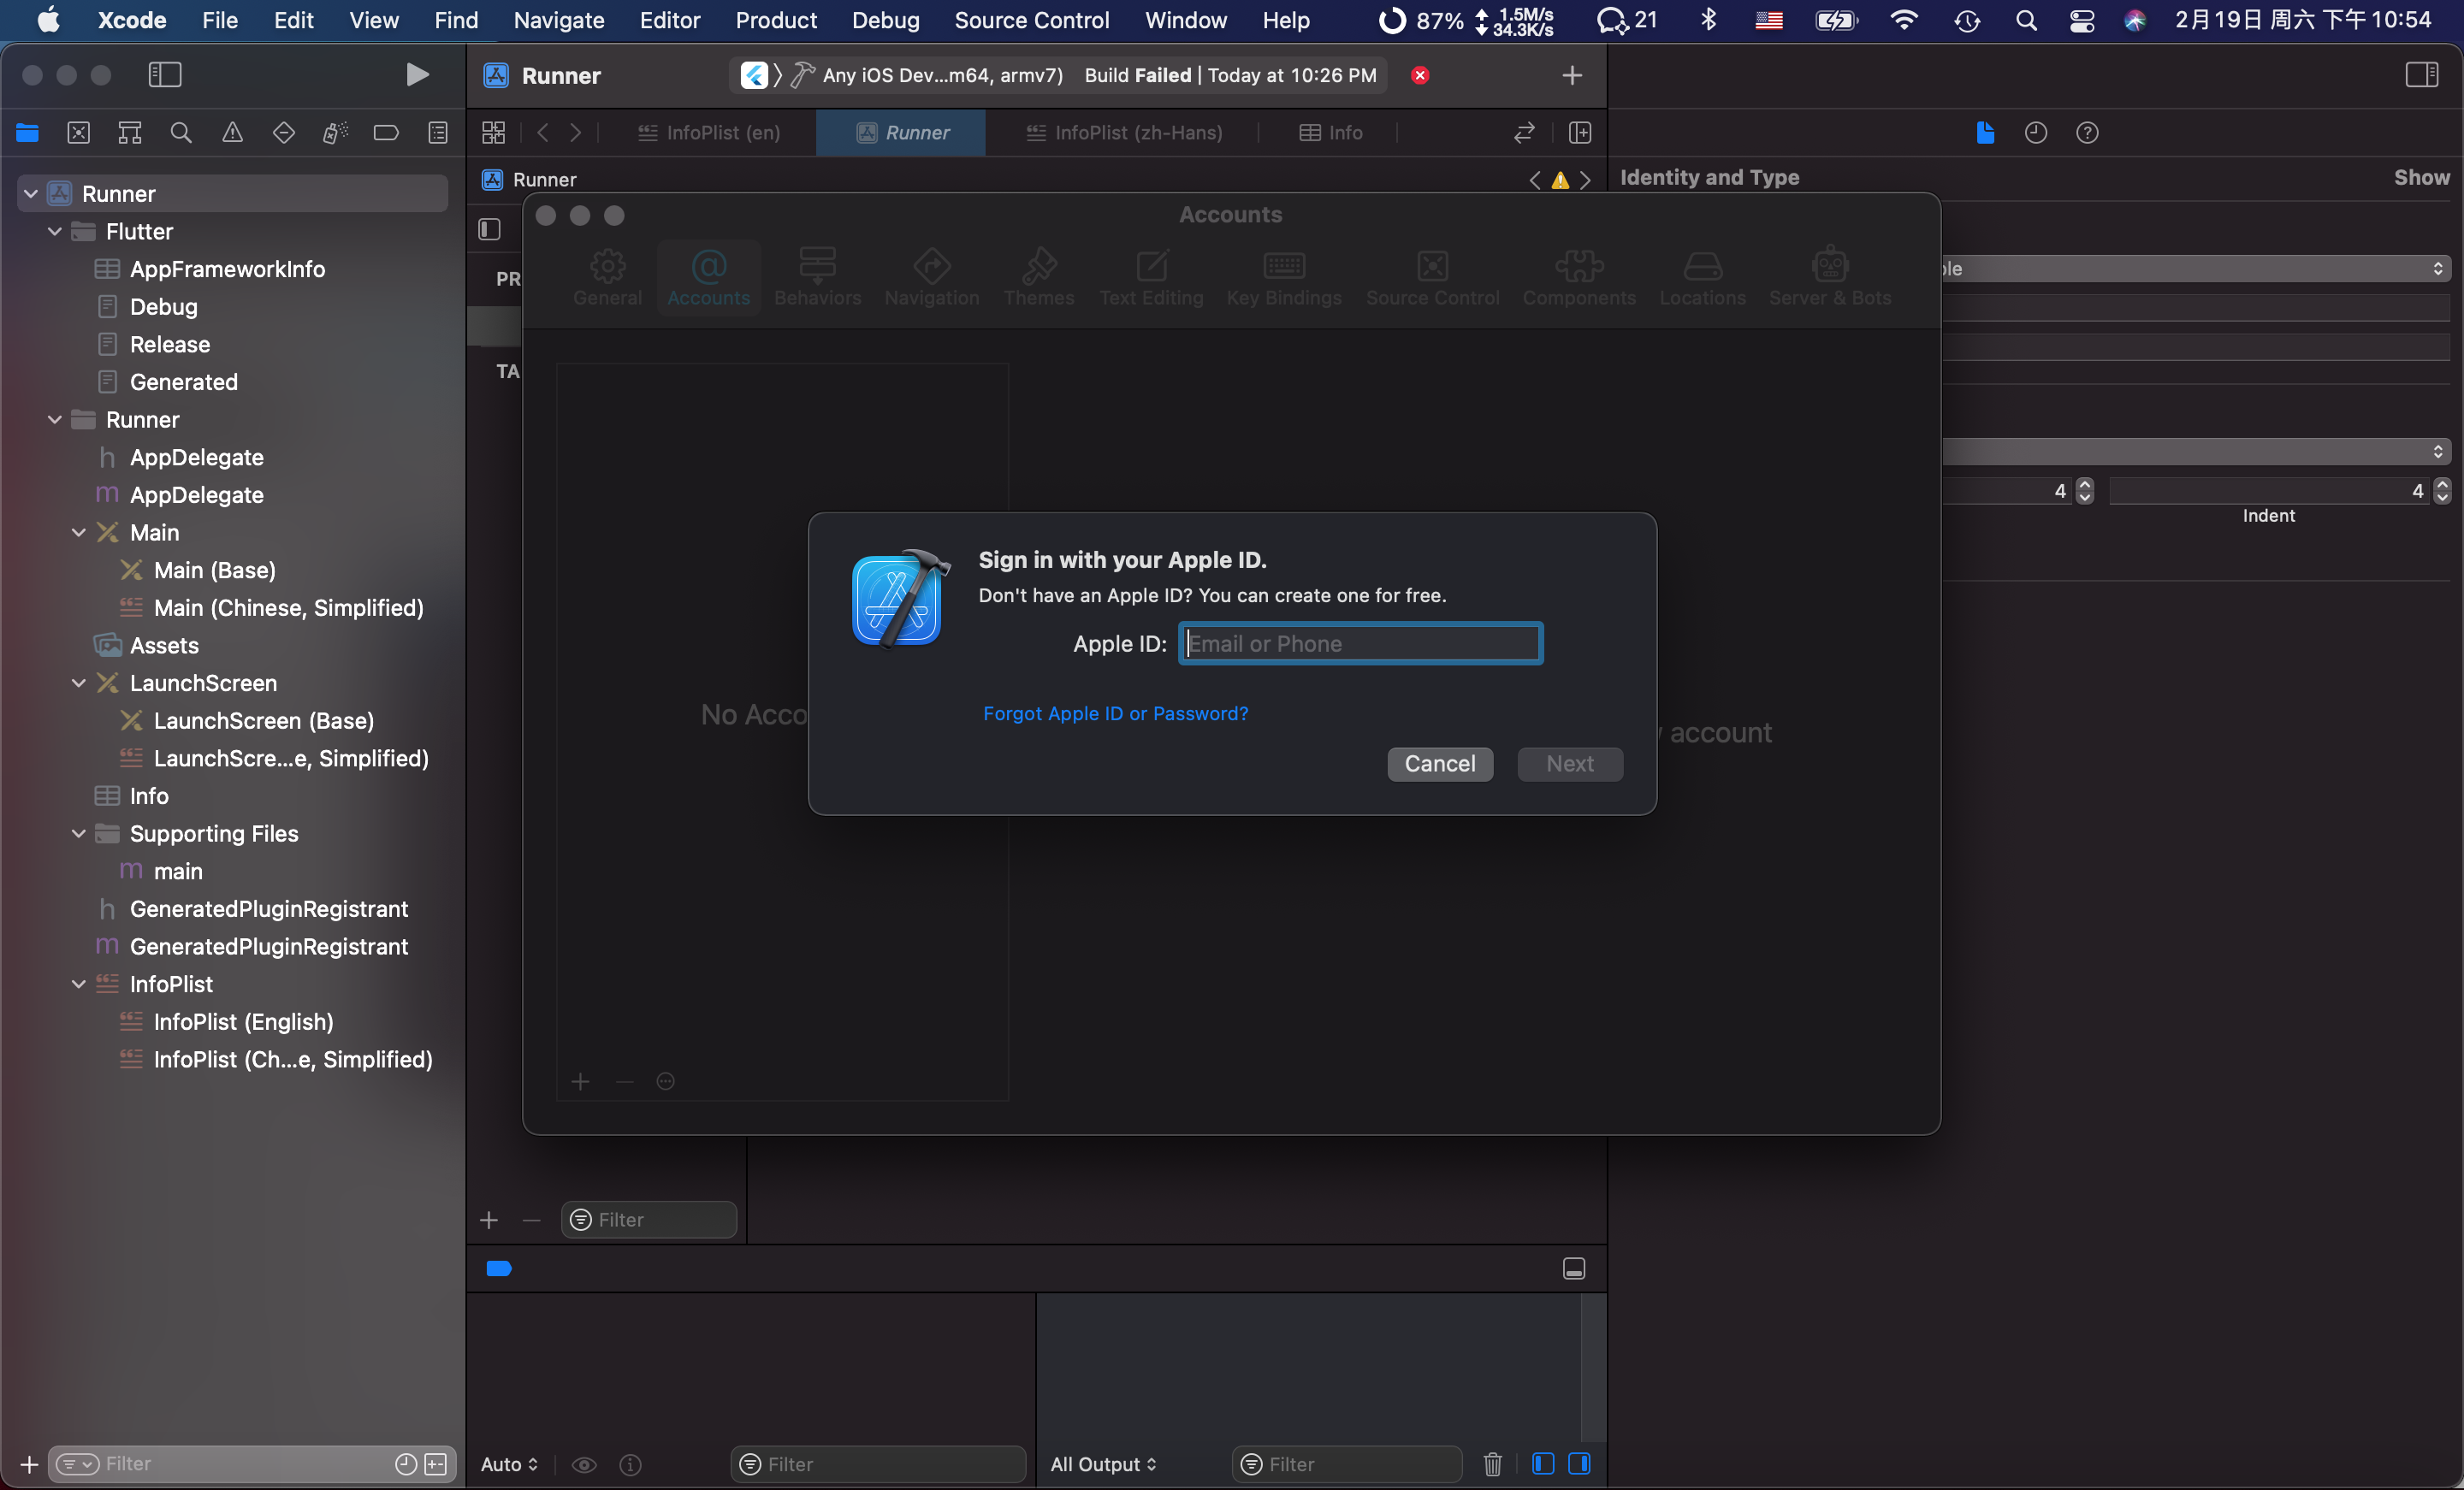
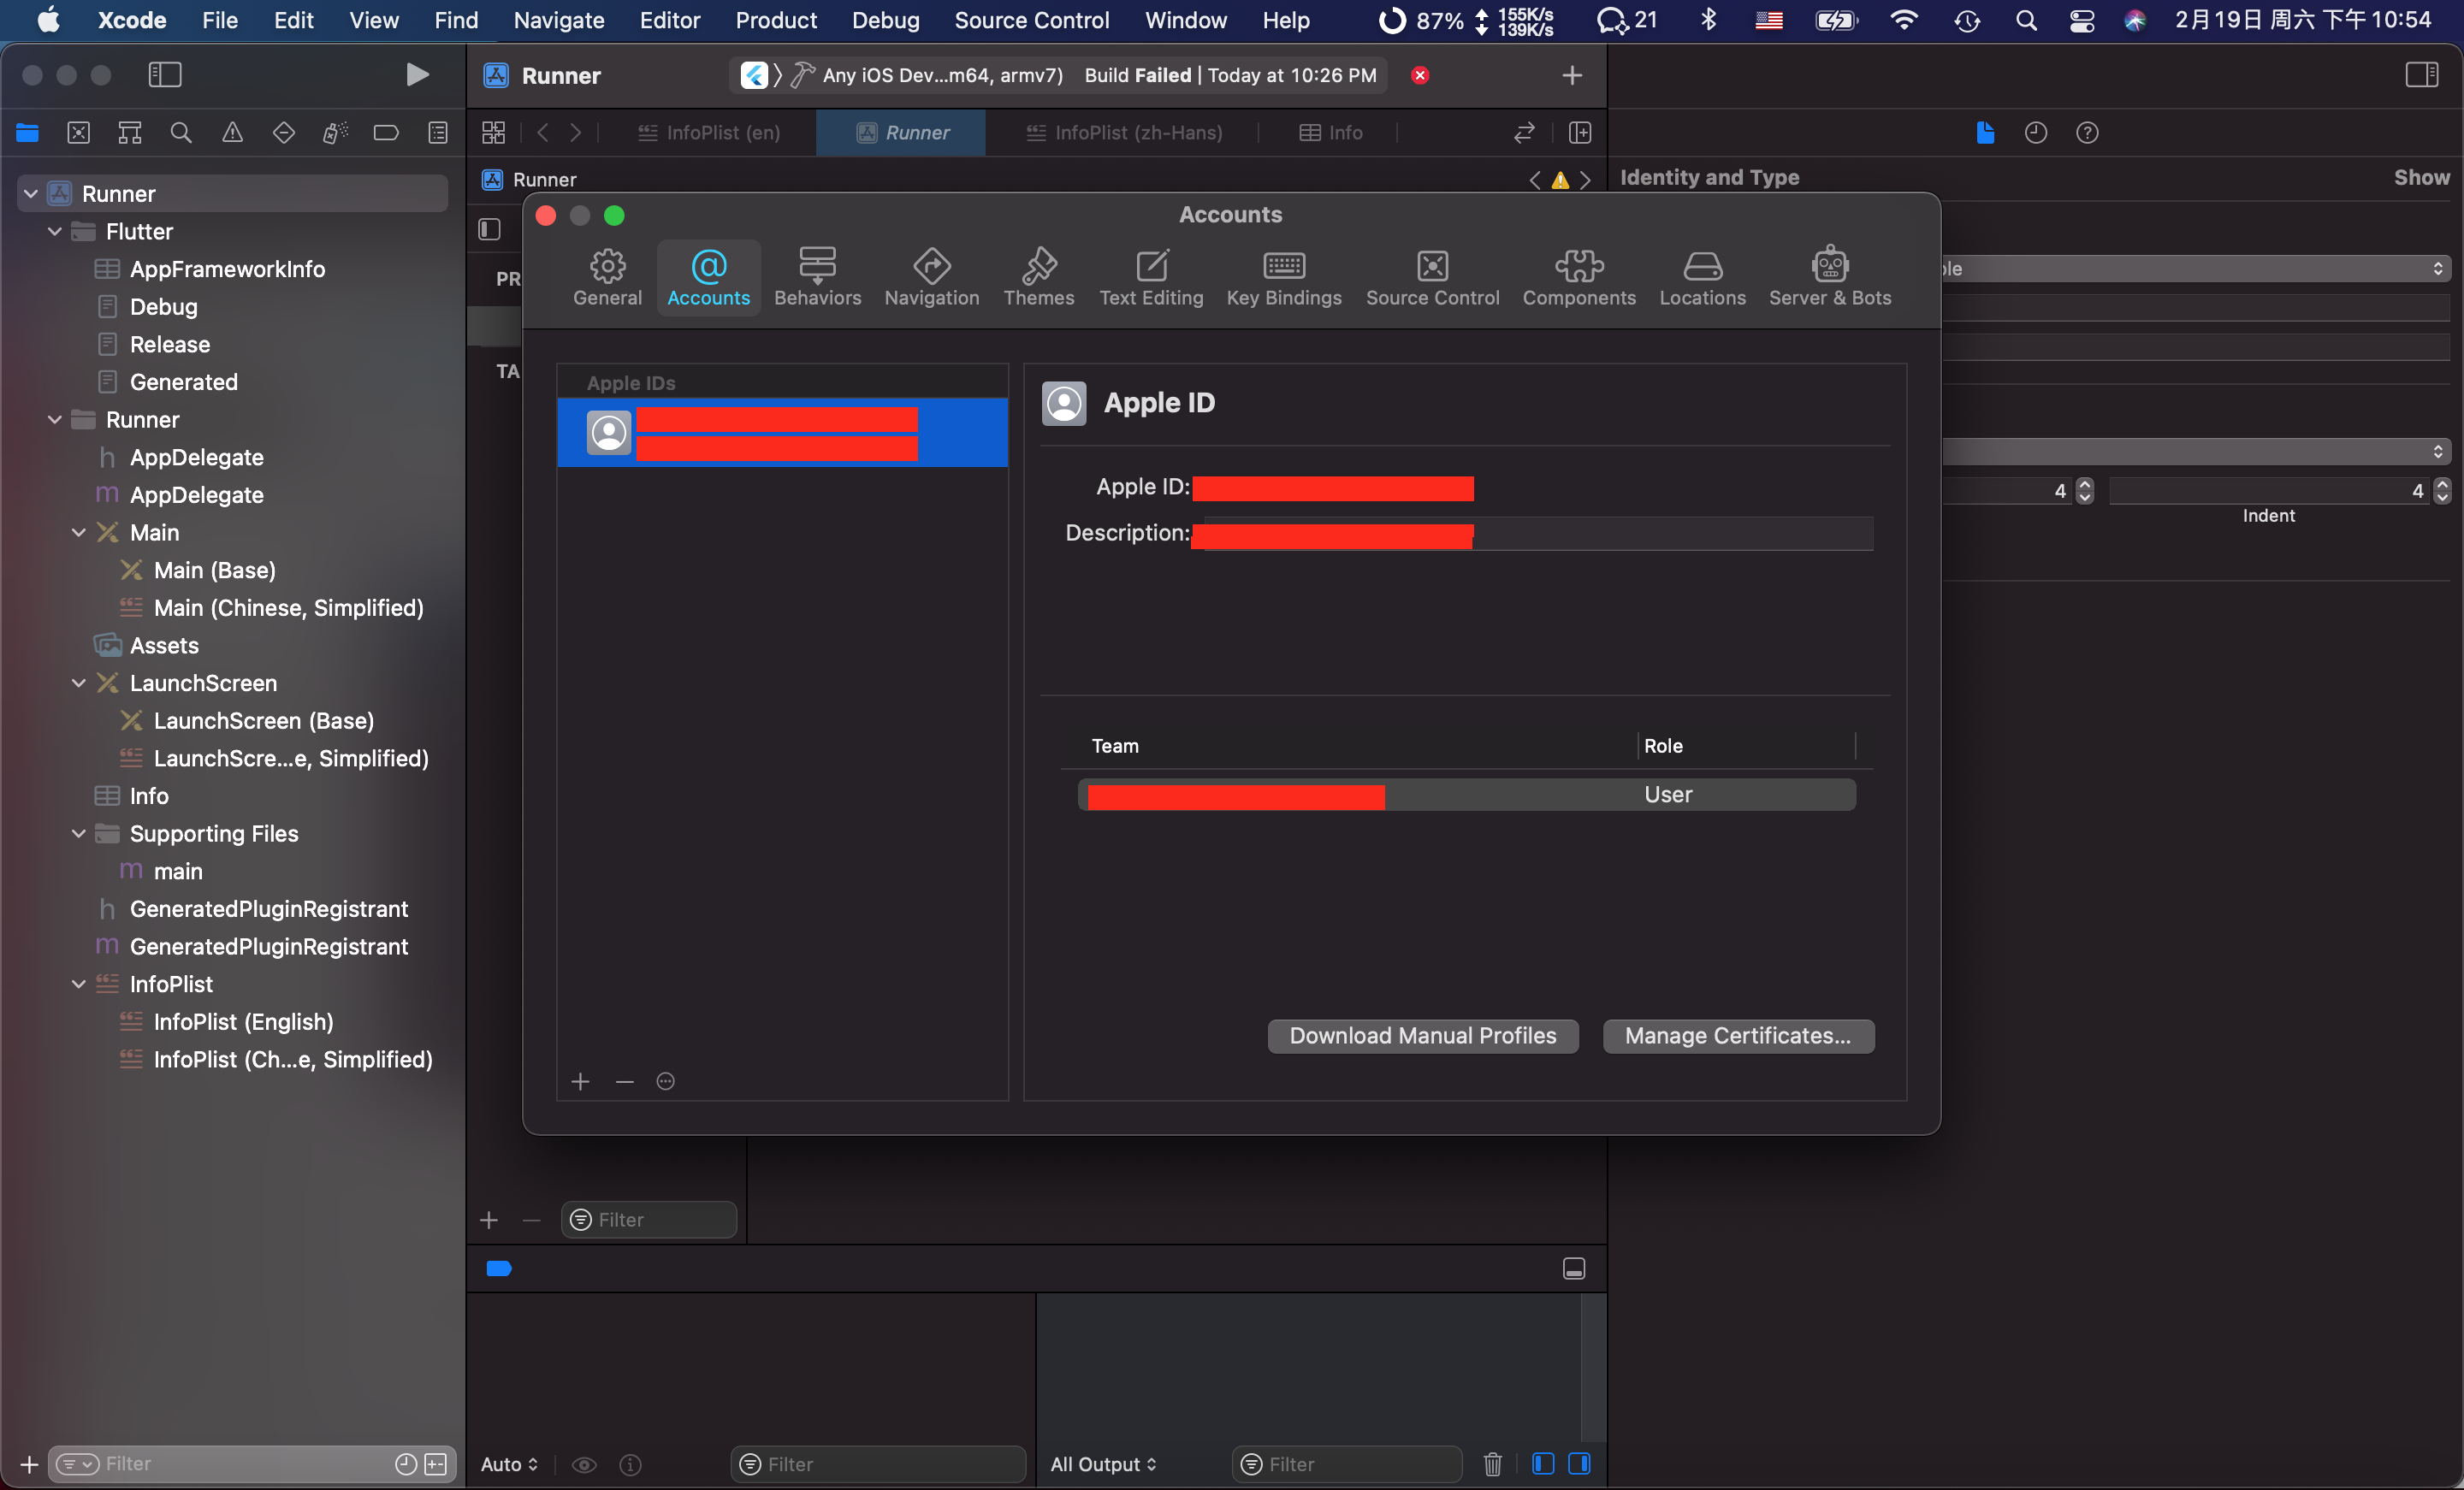
5. 打开项目,在 Xcode 登陆开发者的账号
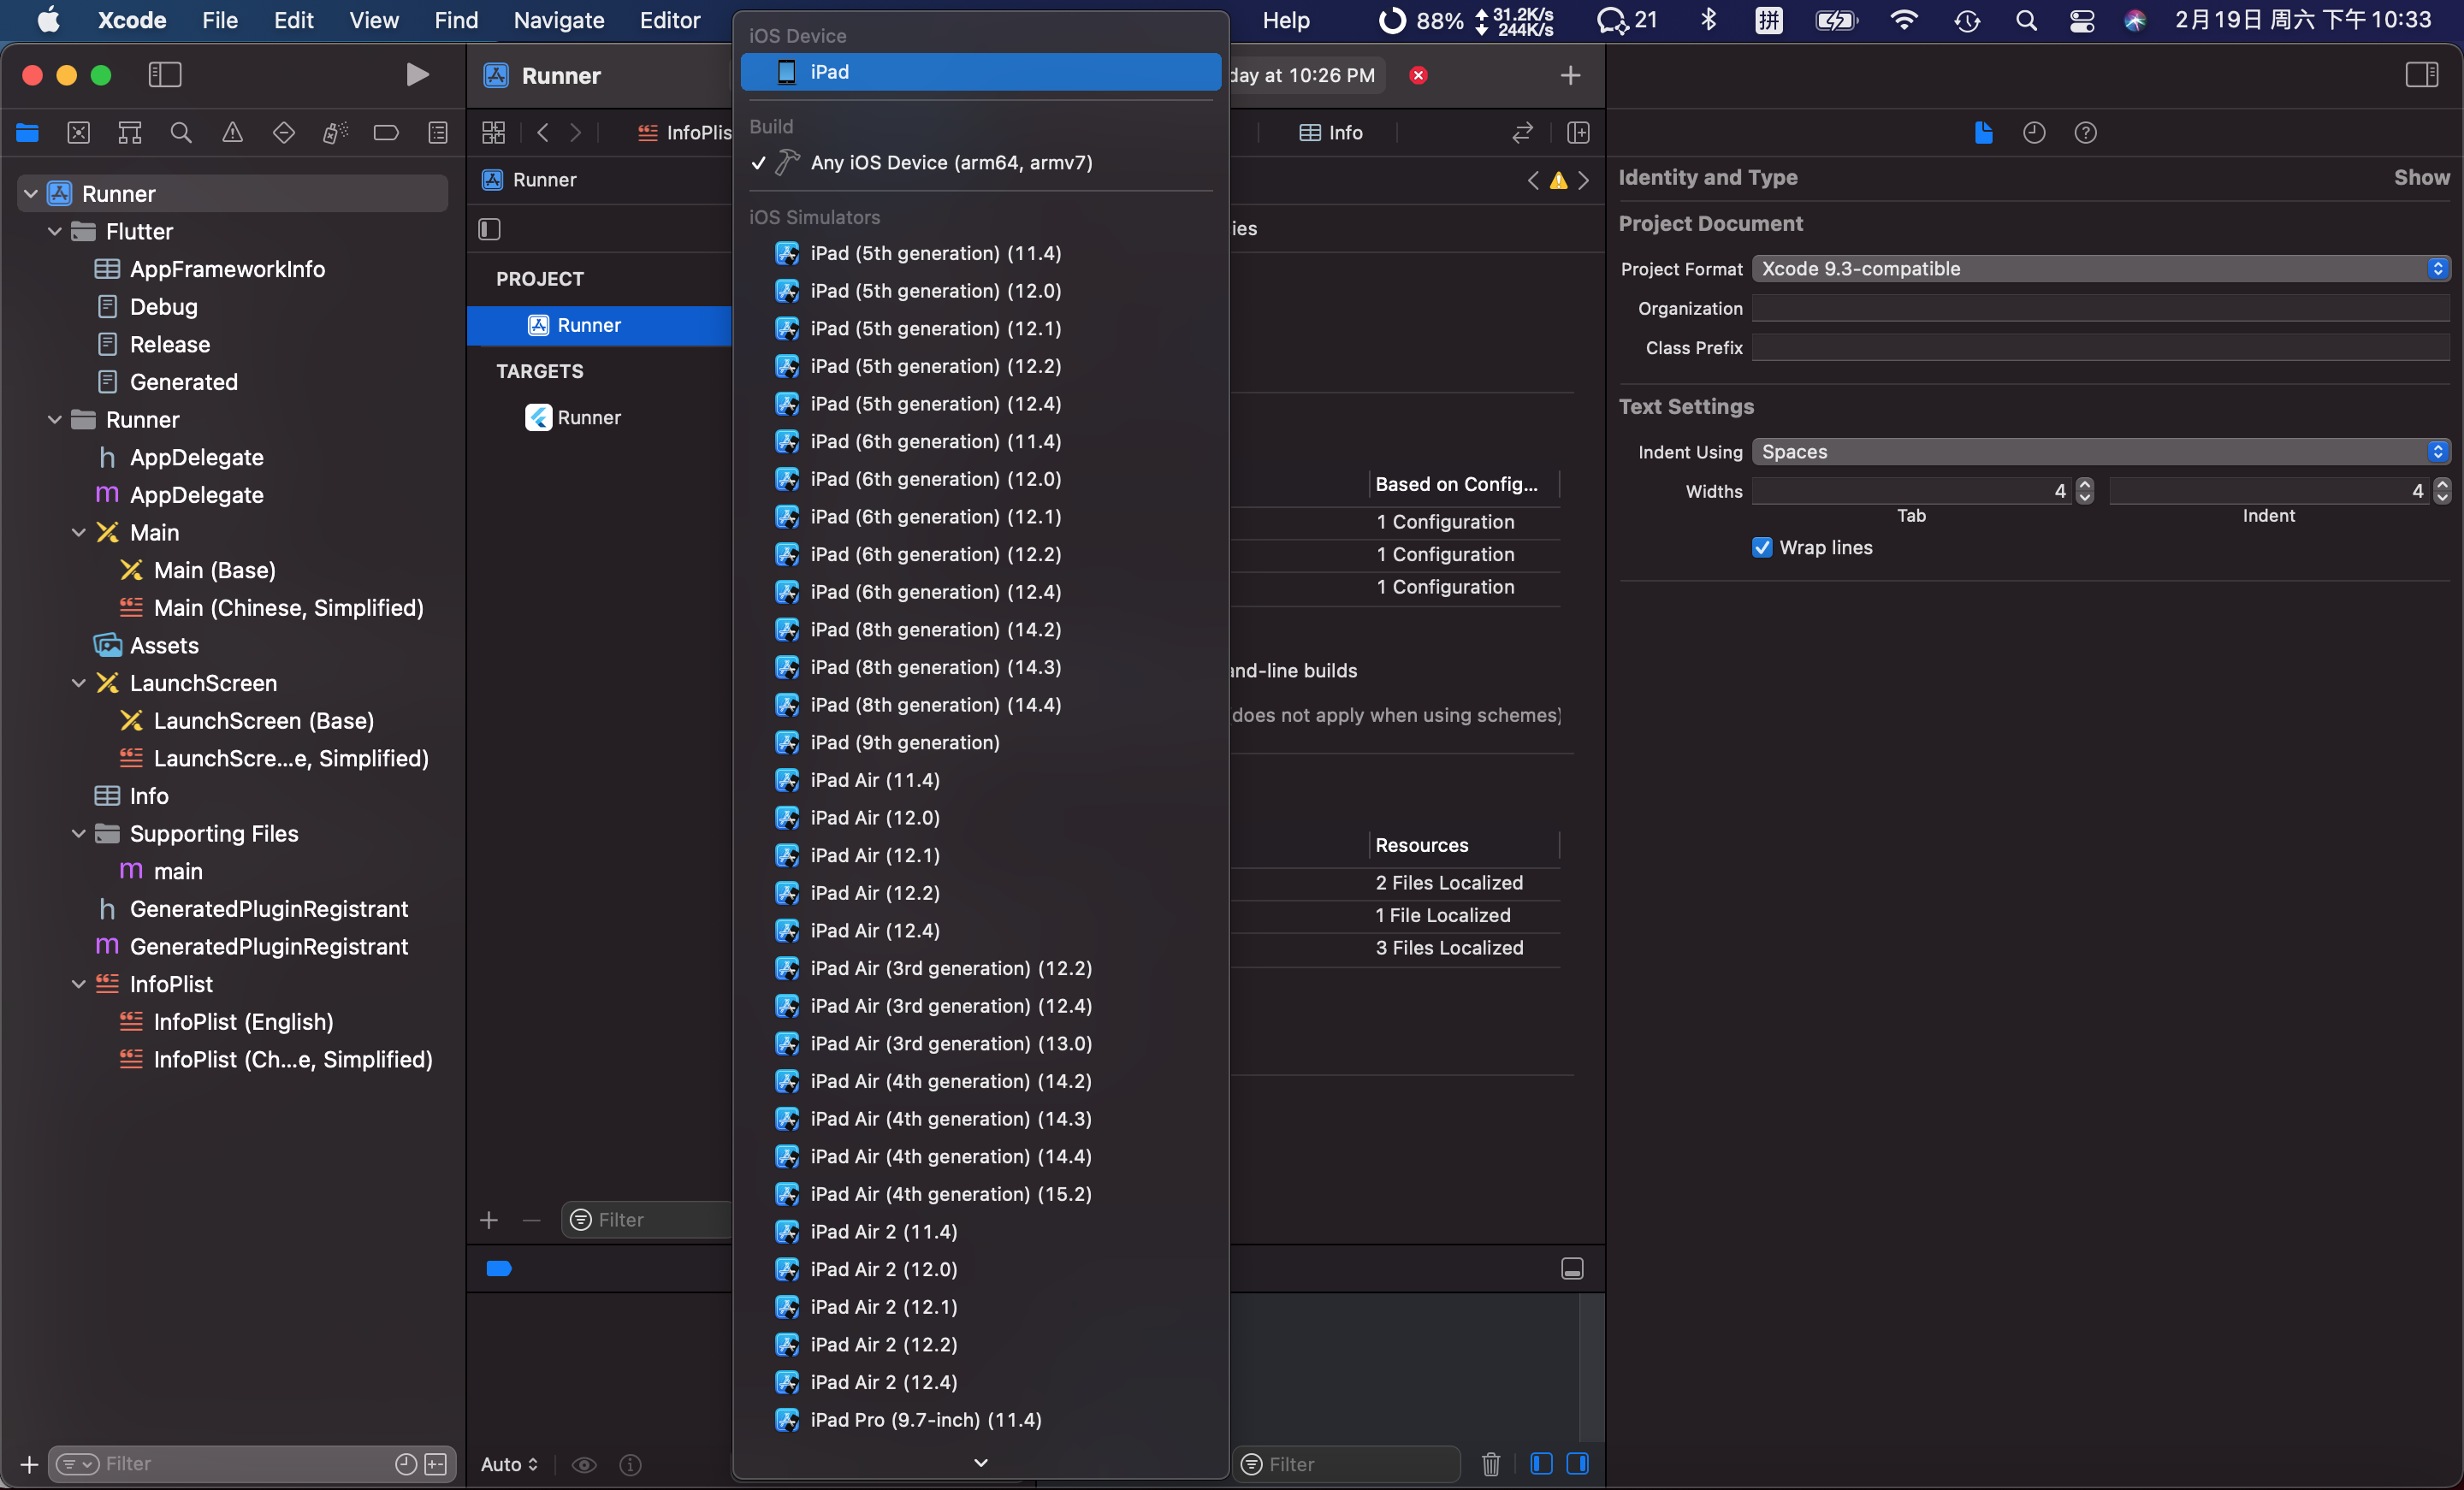
6. 在项目中选择调试设备,如下:
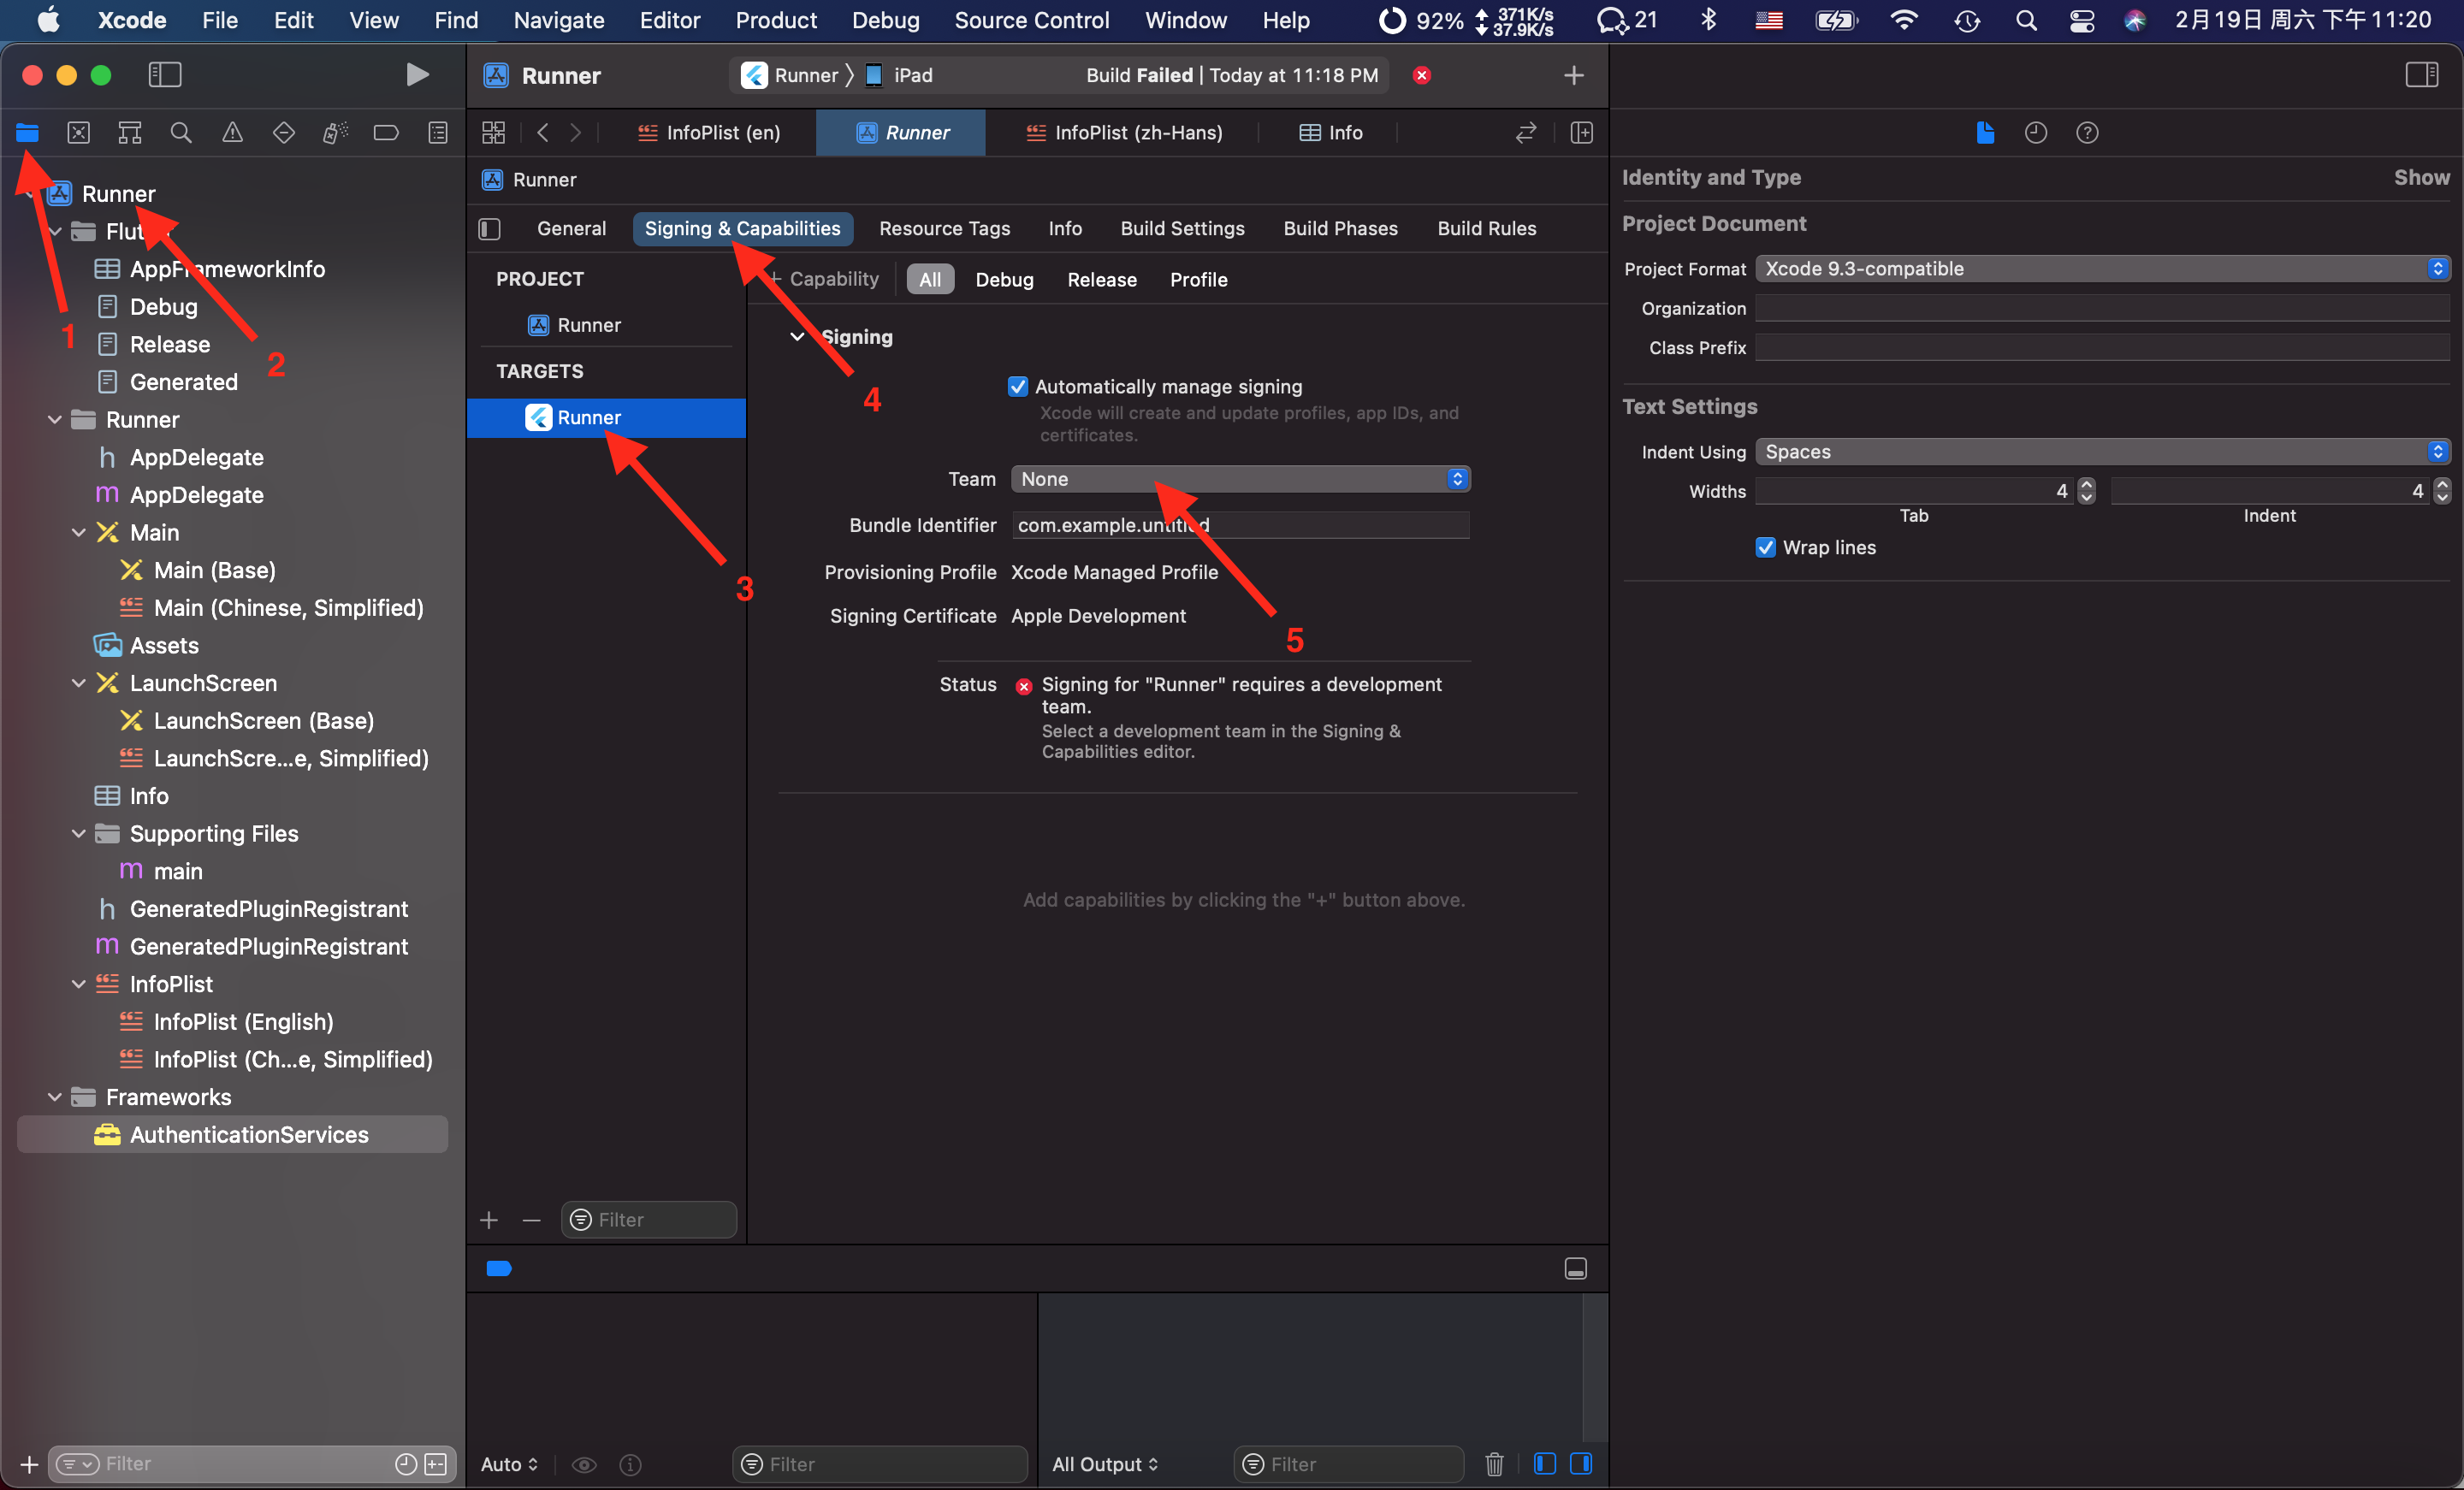
7. 在项目中配置签名账号,如下:
常见问题
1. 如果在选择后构建的时候报错
|
1 2 |
Failed to register bundle identifier The app identifier "com.example.untitled" cannot be registered to your development team because it is not available. Change your bundle identifier to a unique string to try again. |
如下图:
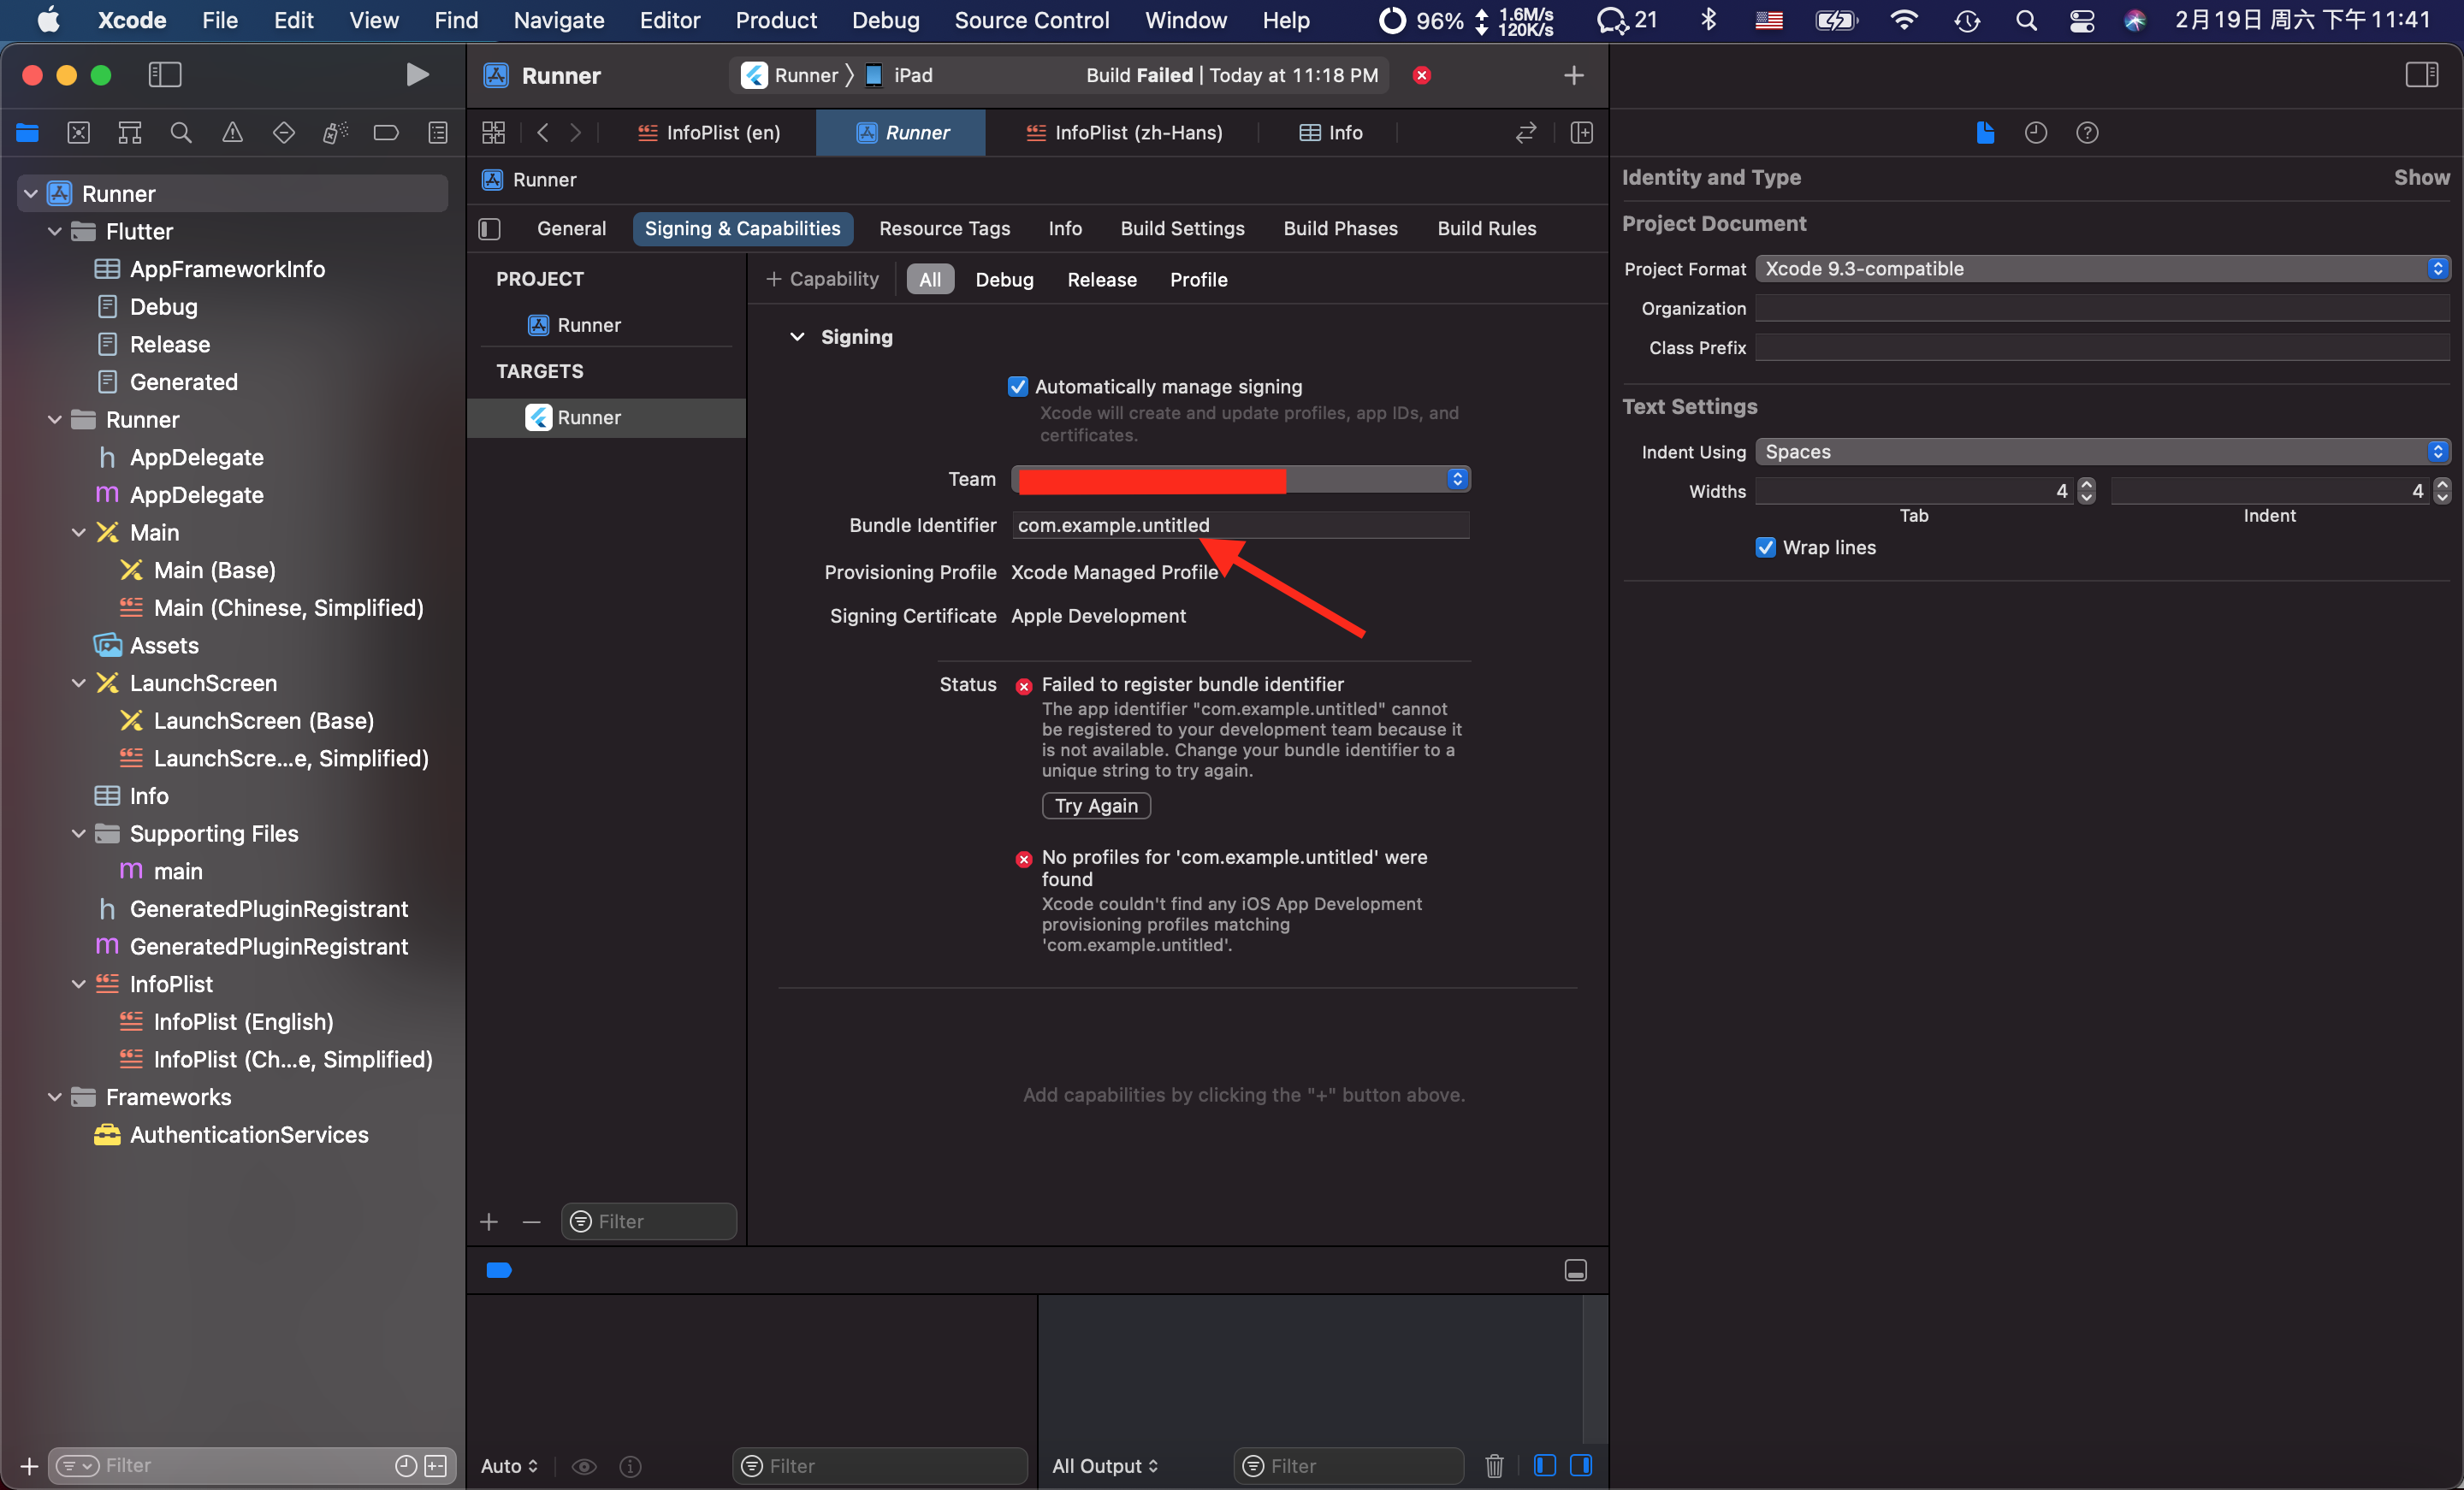
则修改一个有效的新的 Bundle identifier 即可,目前测试发现,一般 com.example 开头的 Bundle identifier 一定会失败。
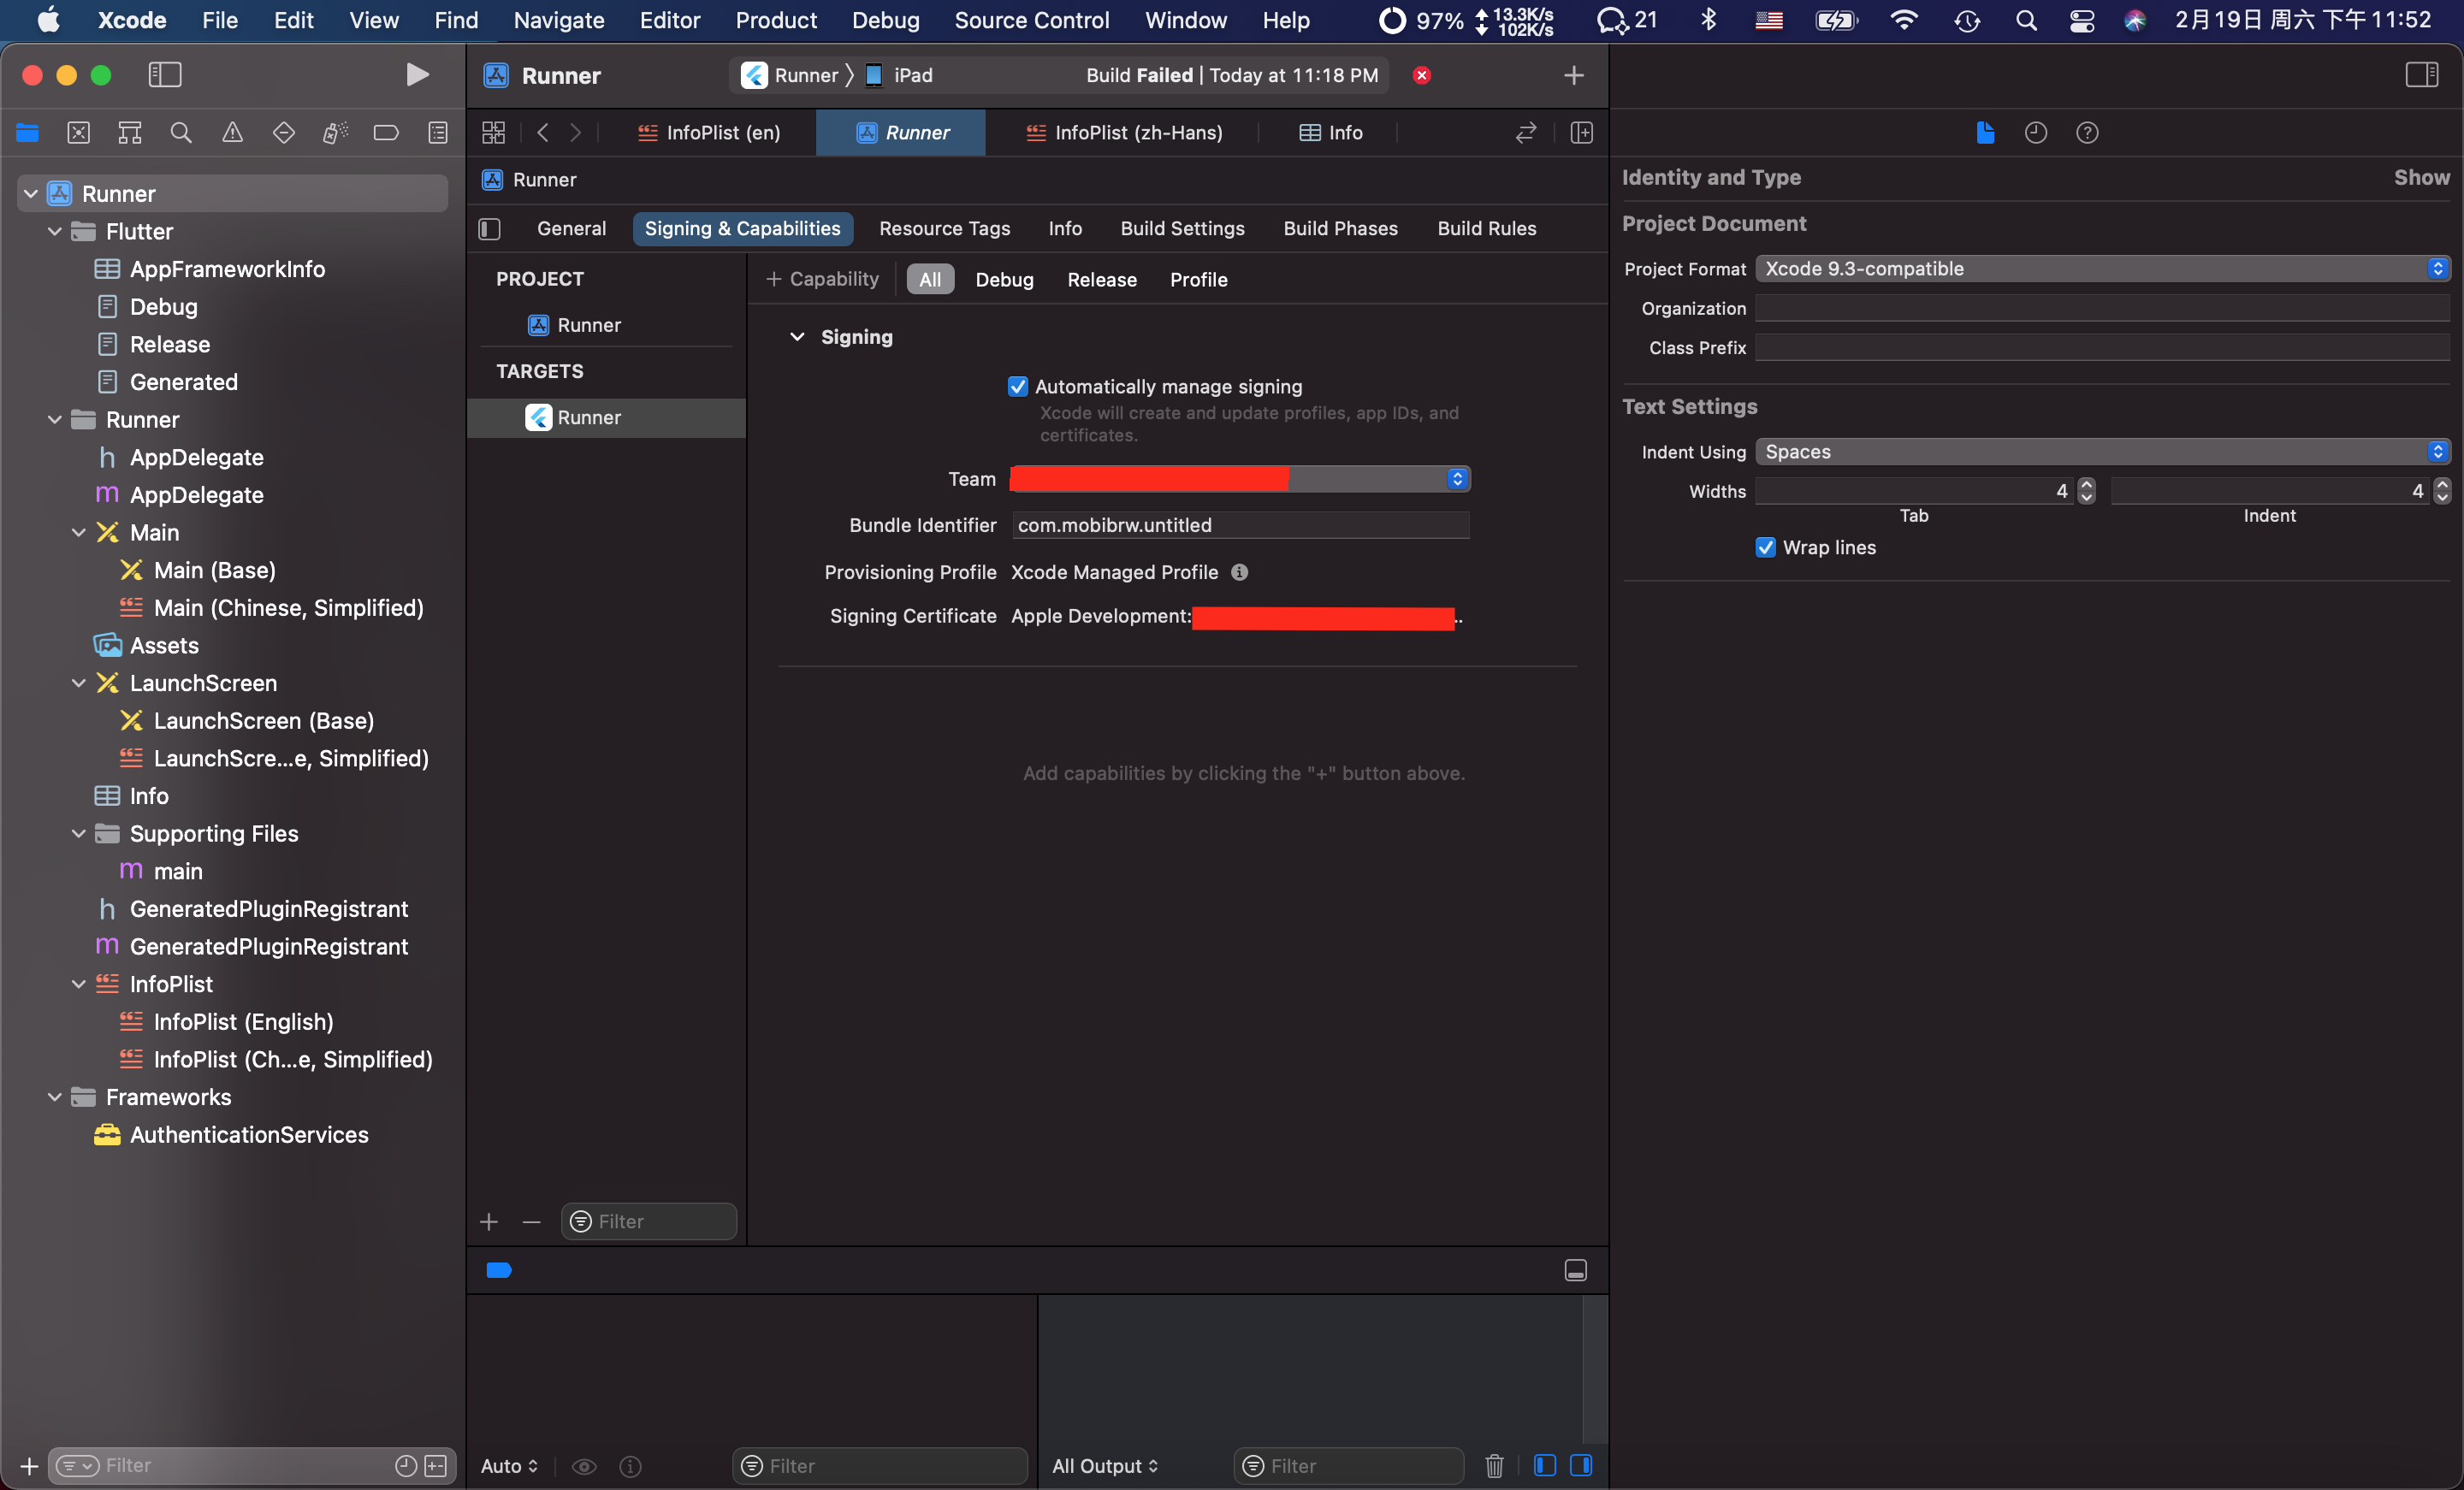
比如修改为 “com.mobibrw.untitled” , 如下图:
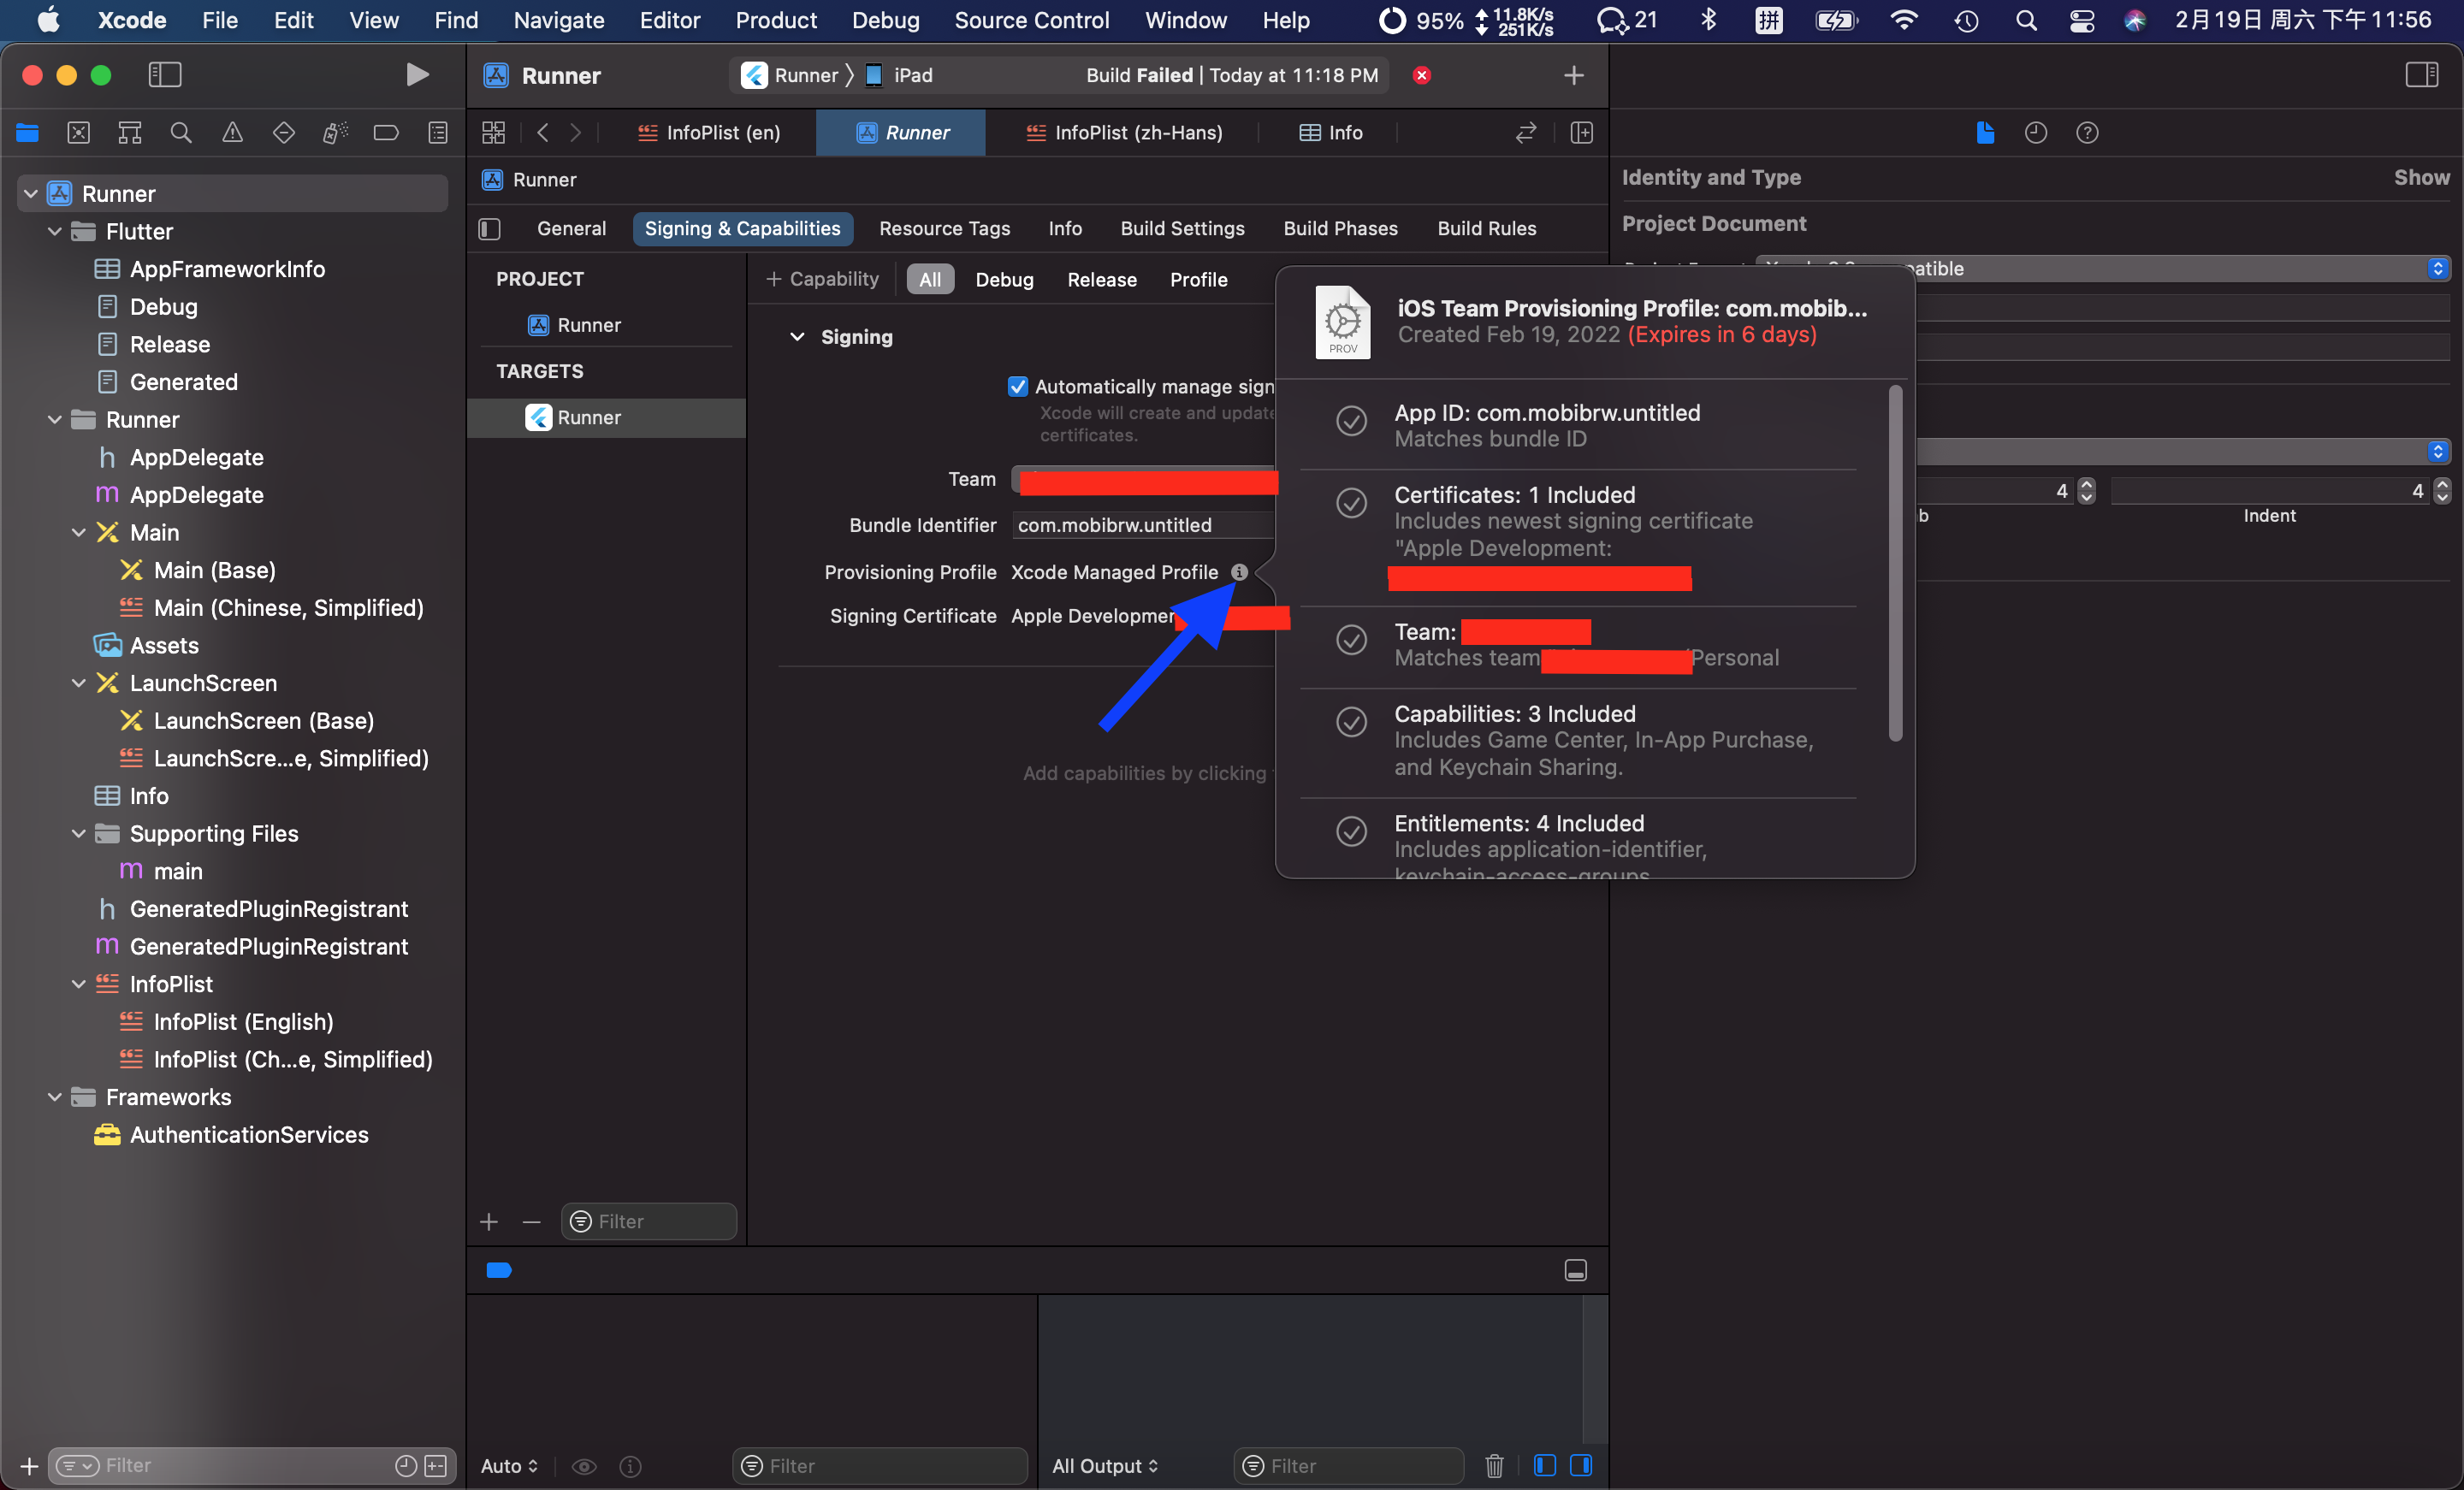
如果想查看签名的详情,可以点击箭头处查看,证书默认只有6天的有效期,如下图:
2. 如果在调试的时候报错:
|
1 2 3 4 5 |
Could not run build/ios/iphoneos/Runner.app on xxxxxxxxxxxxxxxxxxxxxxxxxxxxxxx. Try launching Xcode and selecting "Product > Run" to fix the problem: open ios/Runner.xcworkspace Error launching application on iPad. |
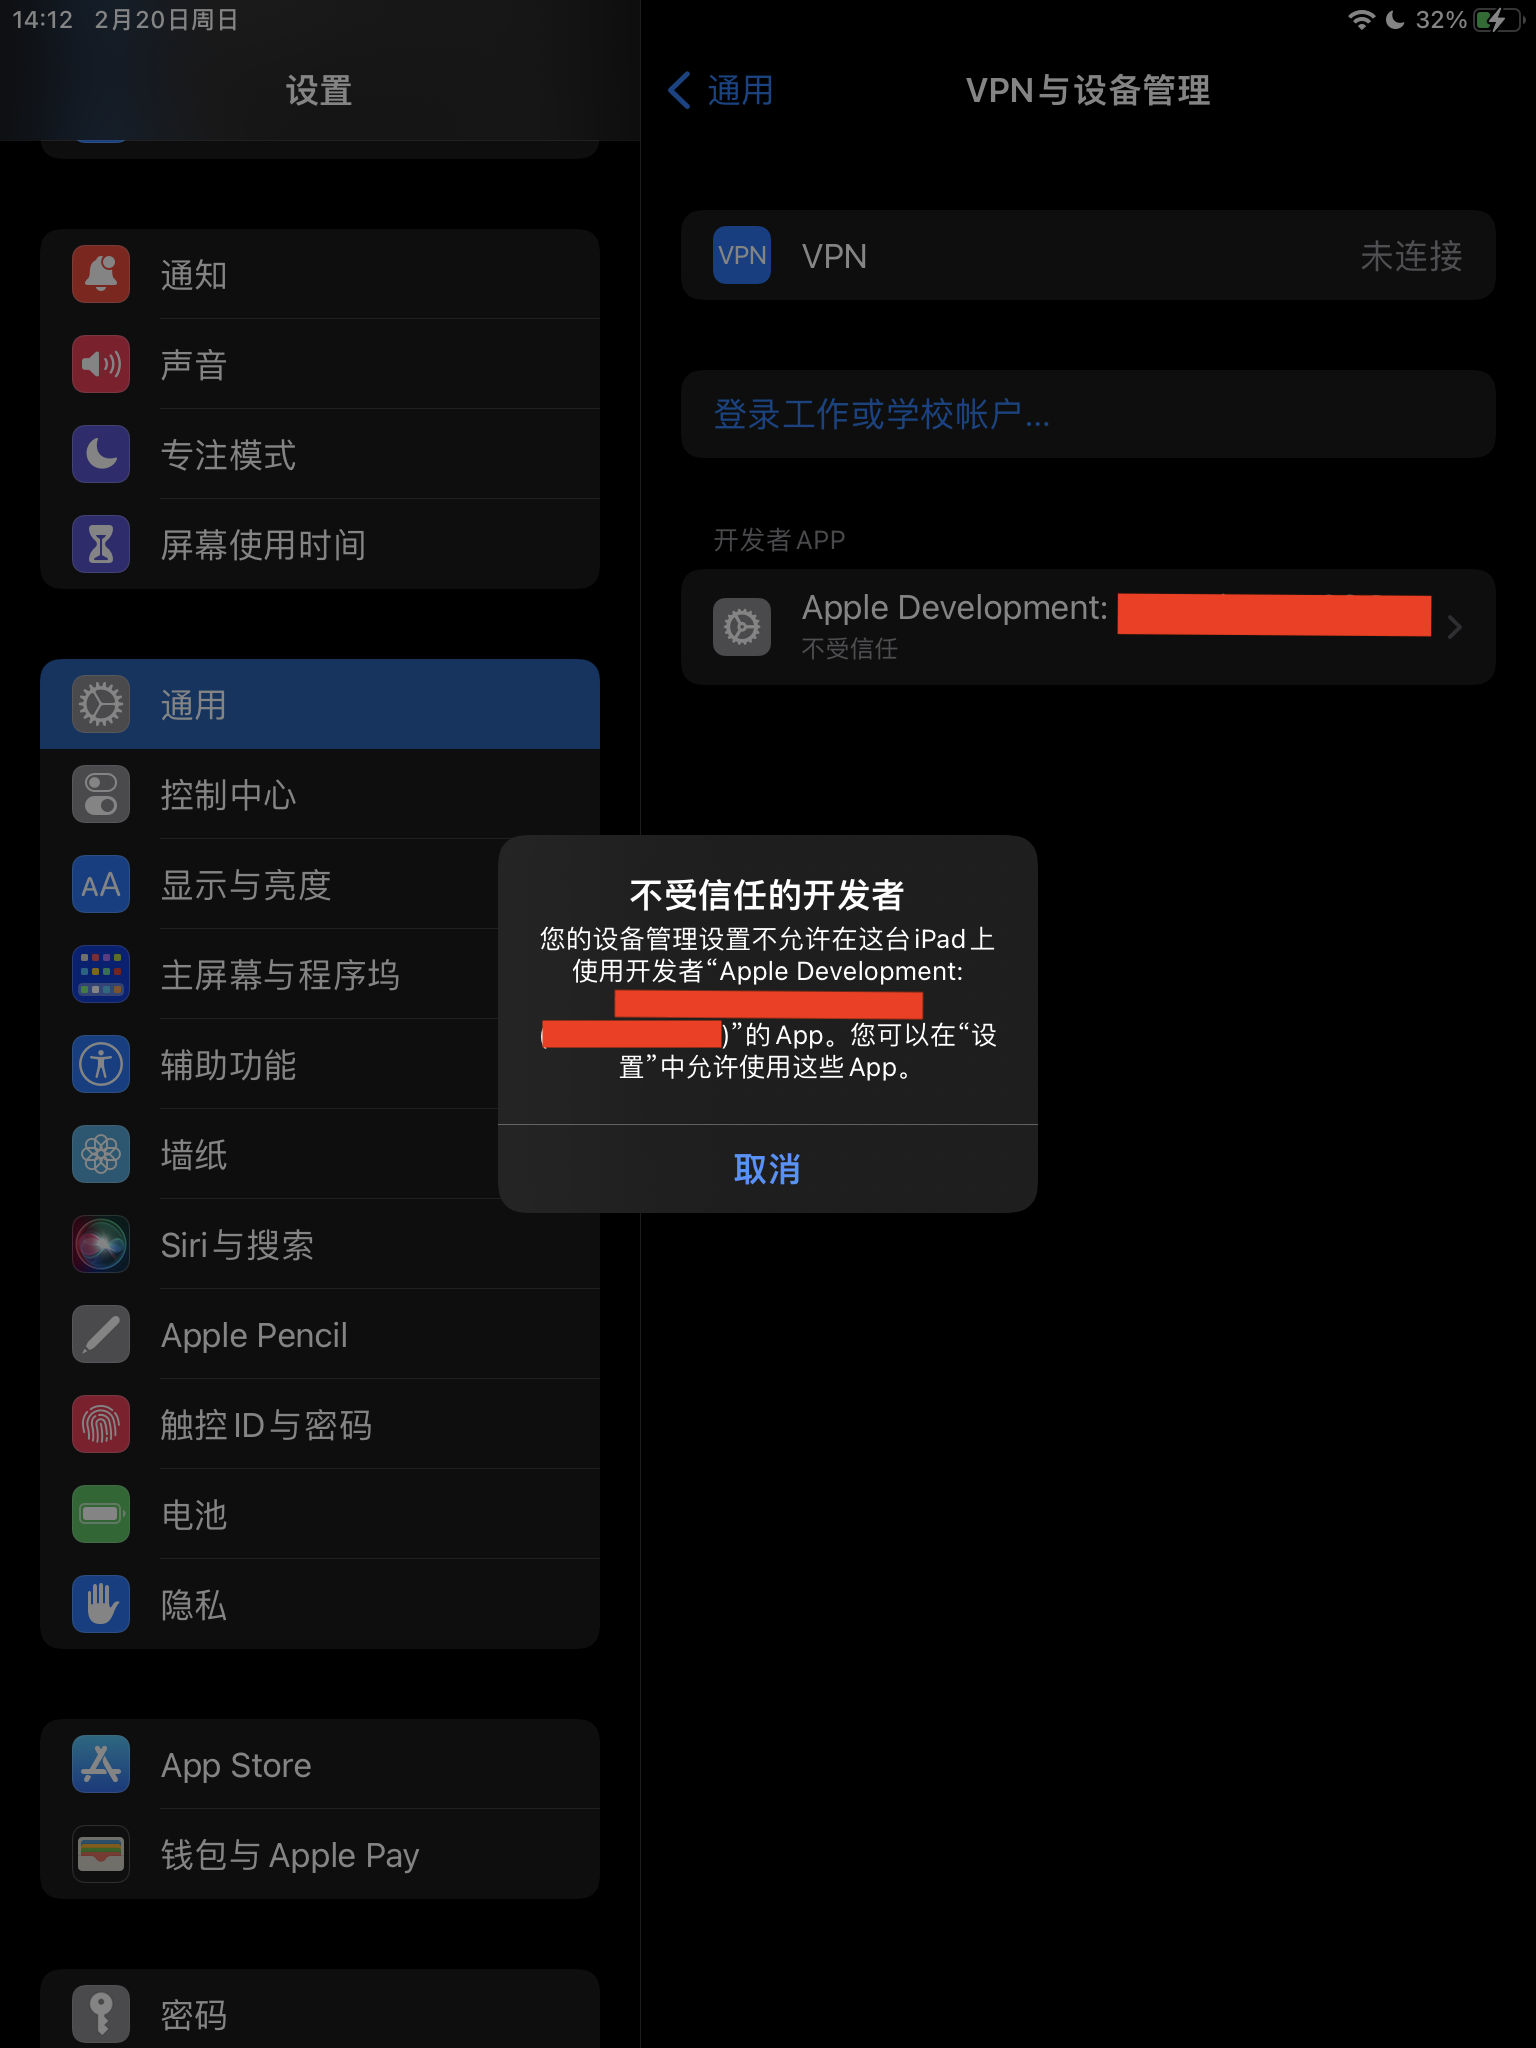
并且设备上弹出提示对话框,显示“不受信任的开发者”,如下图:
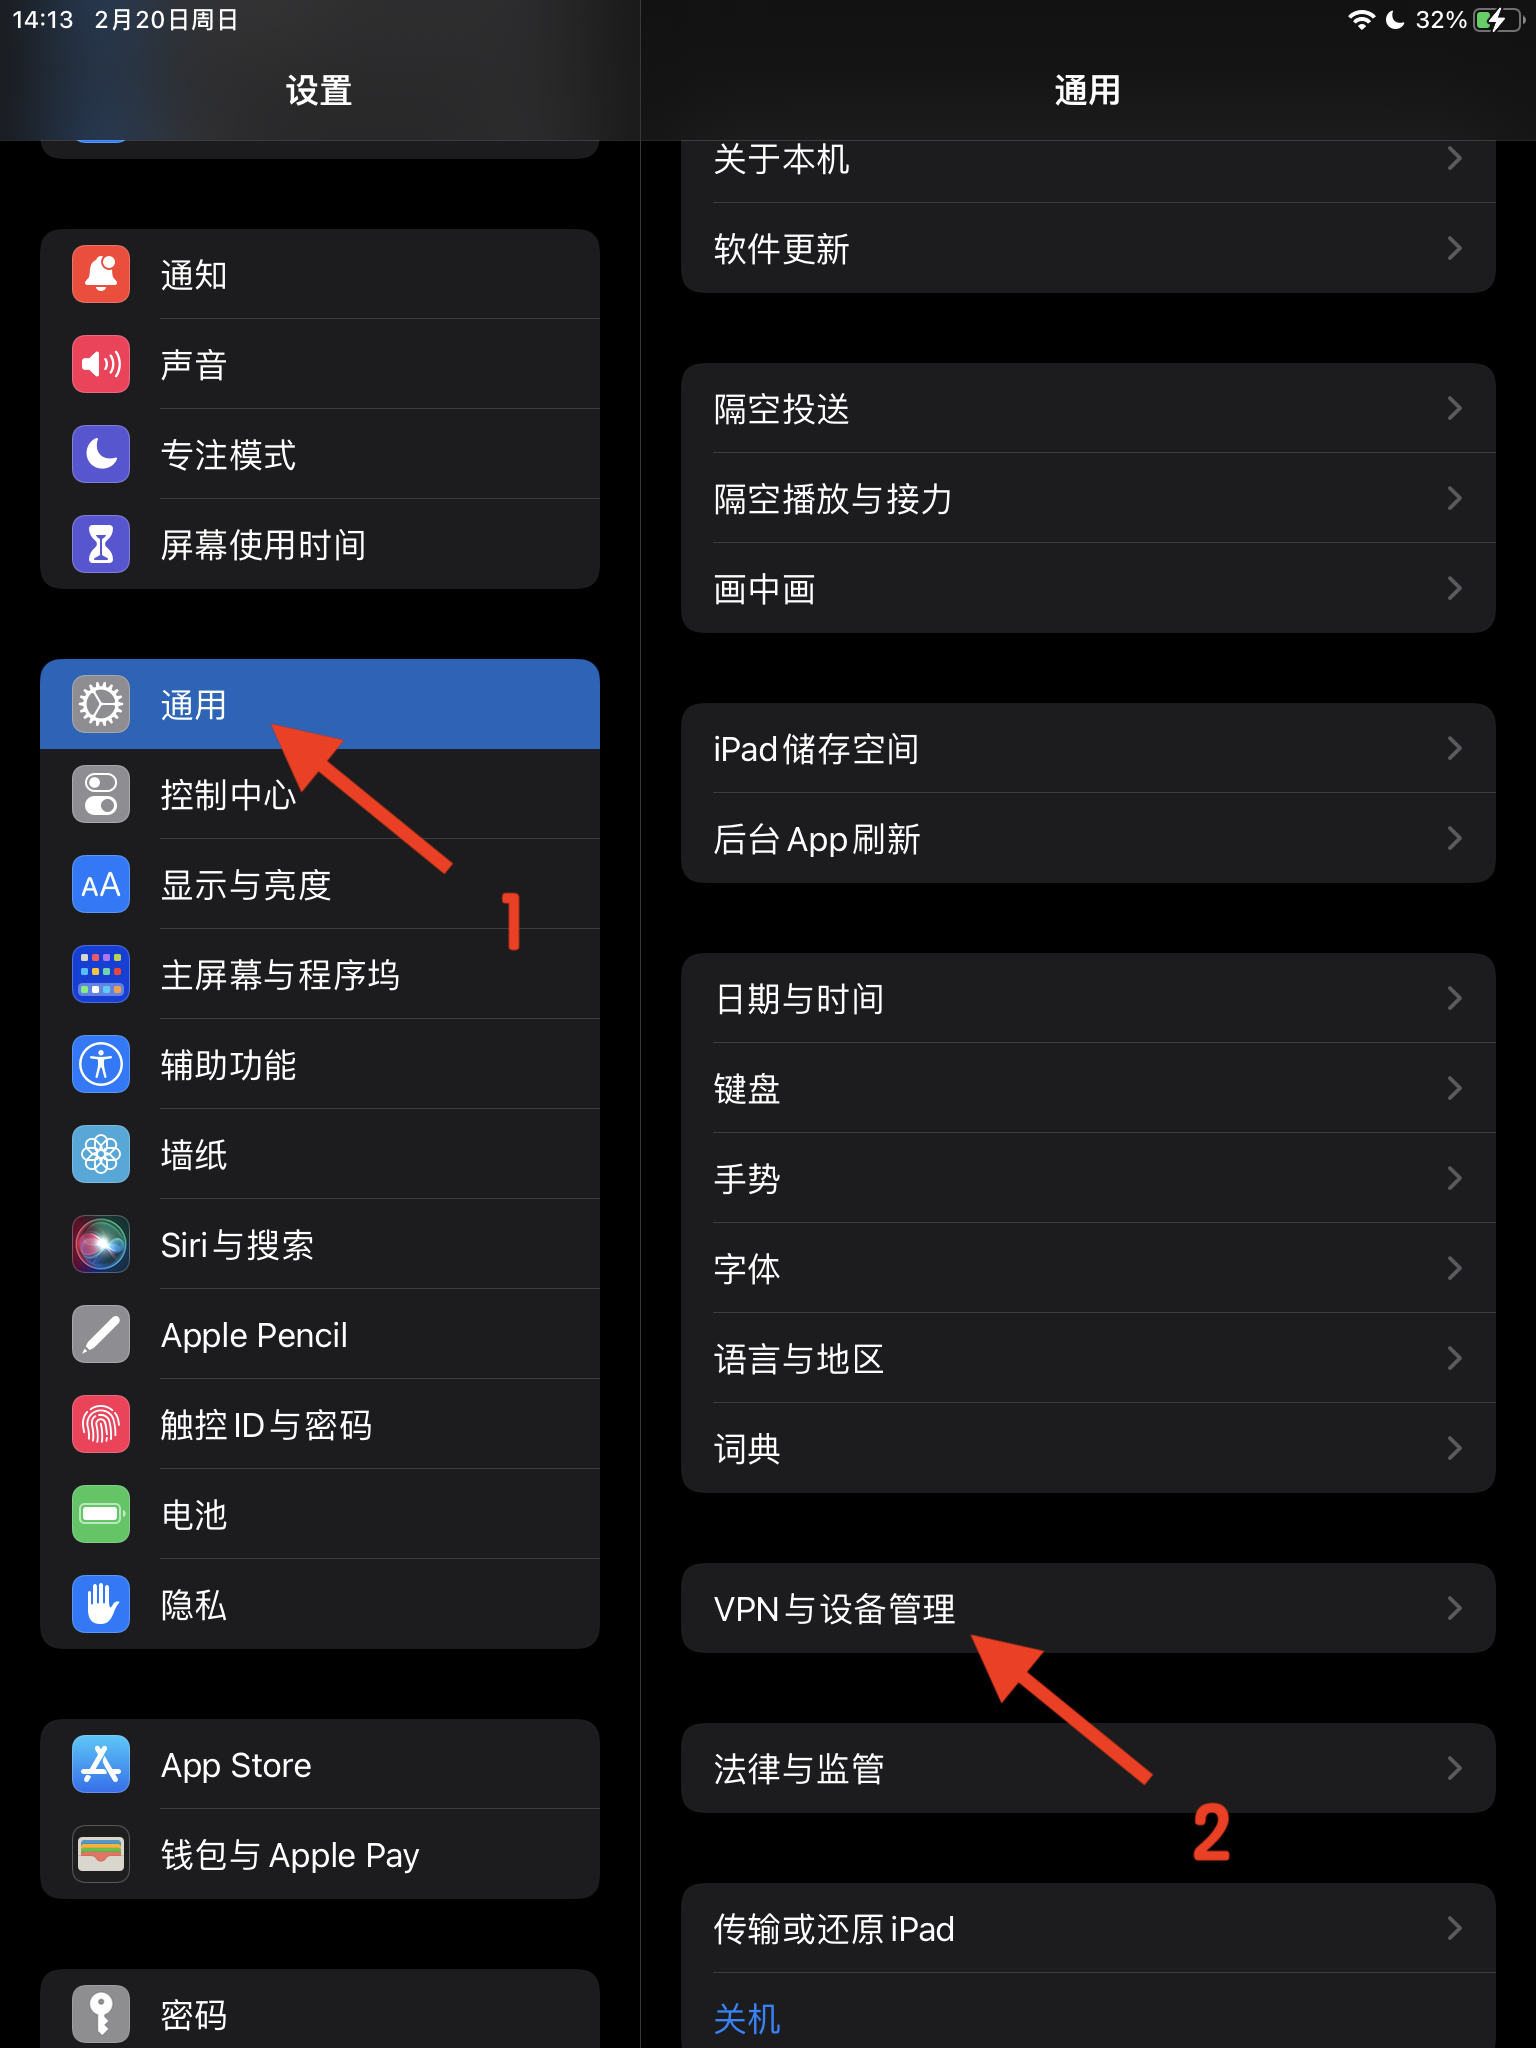
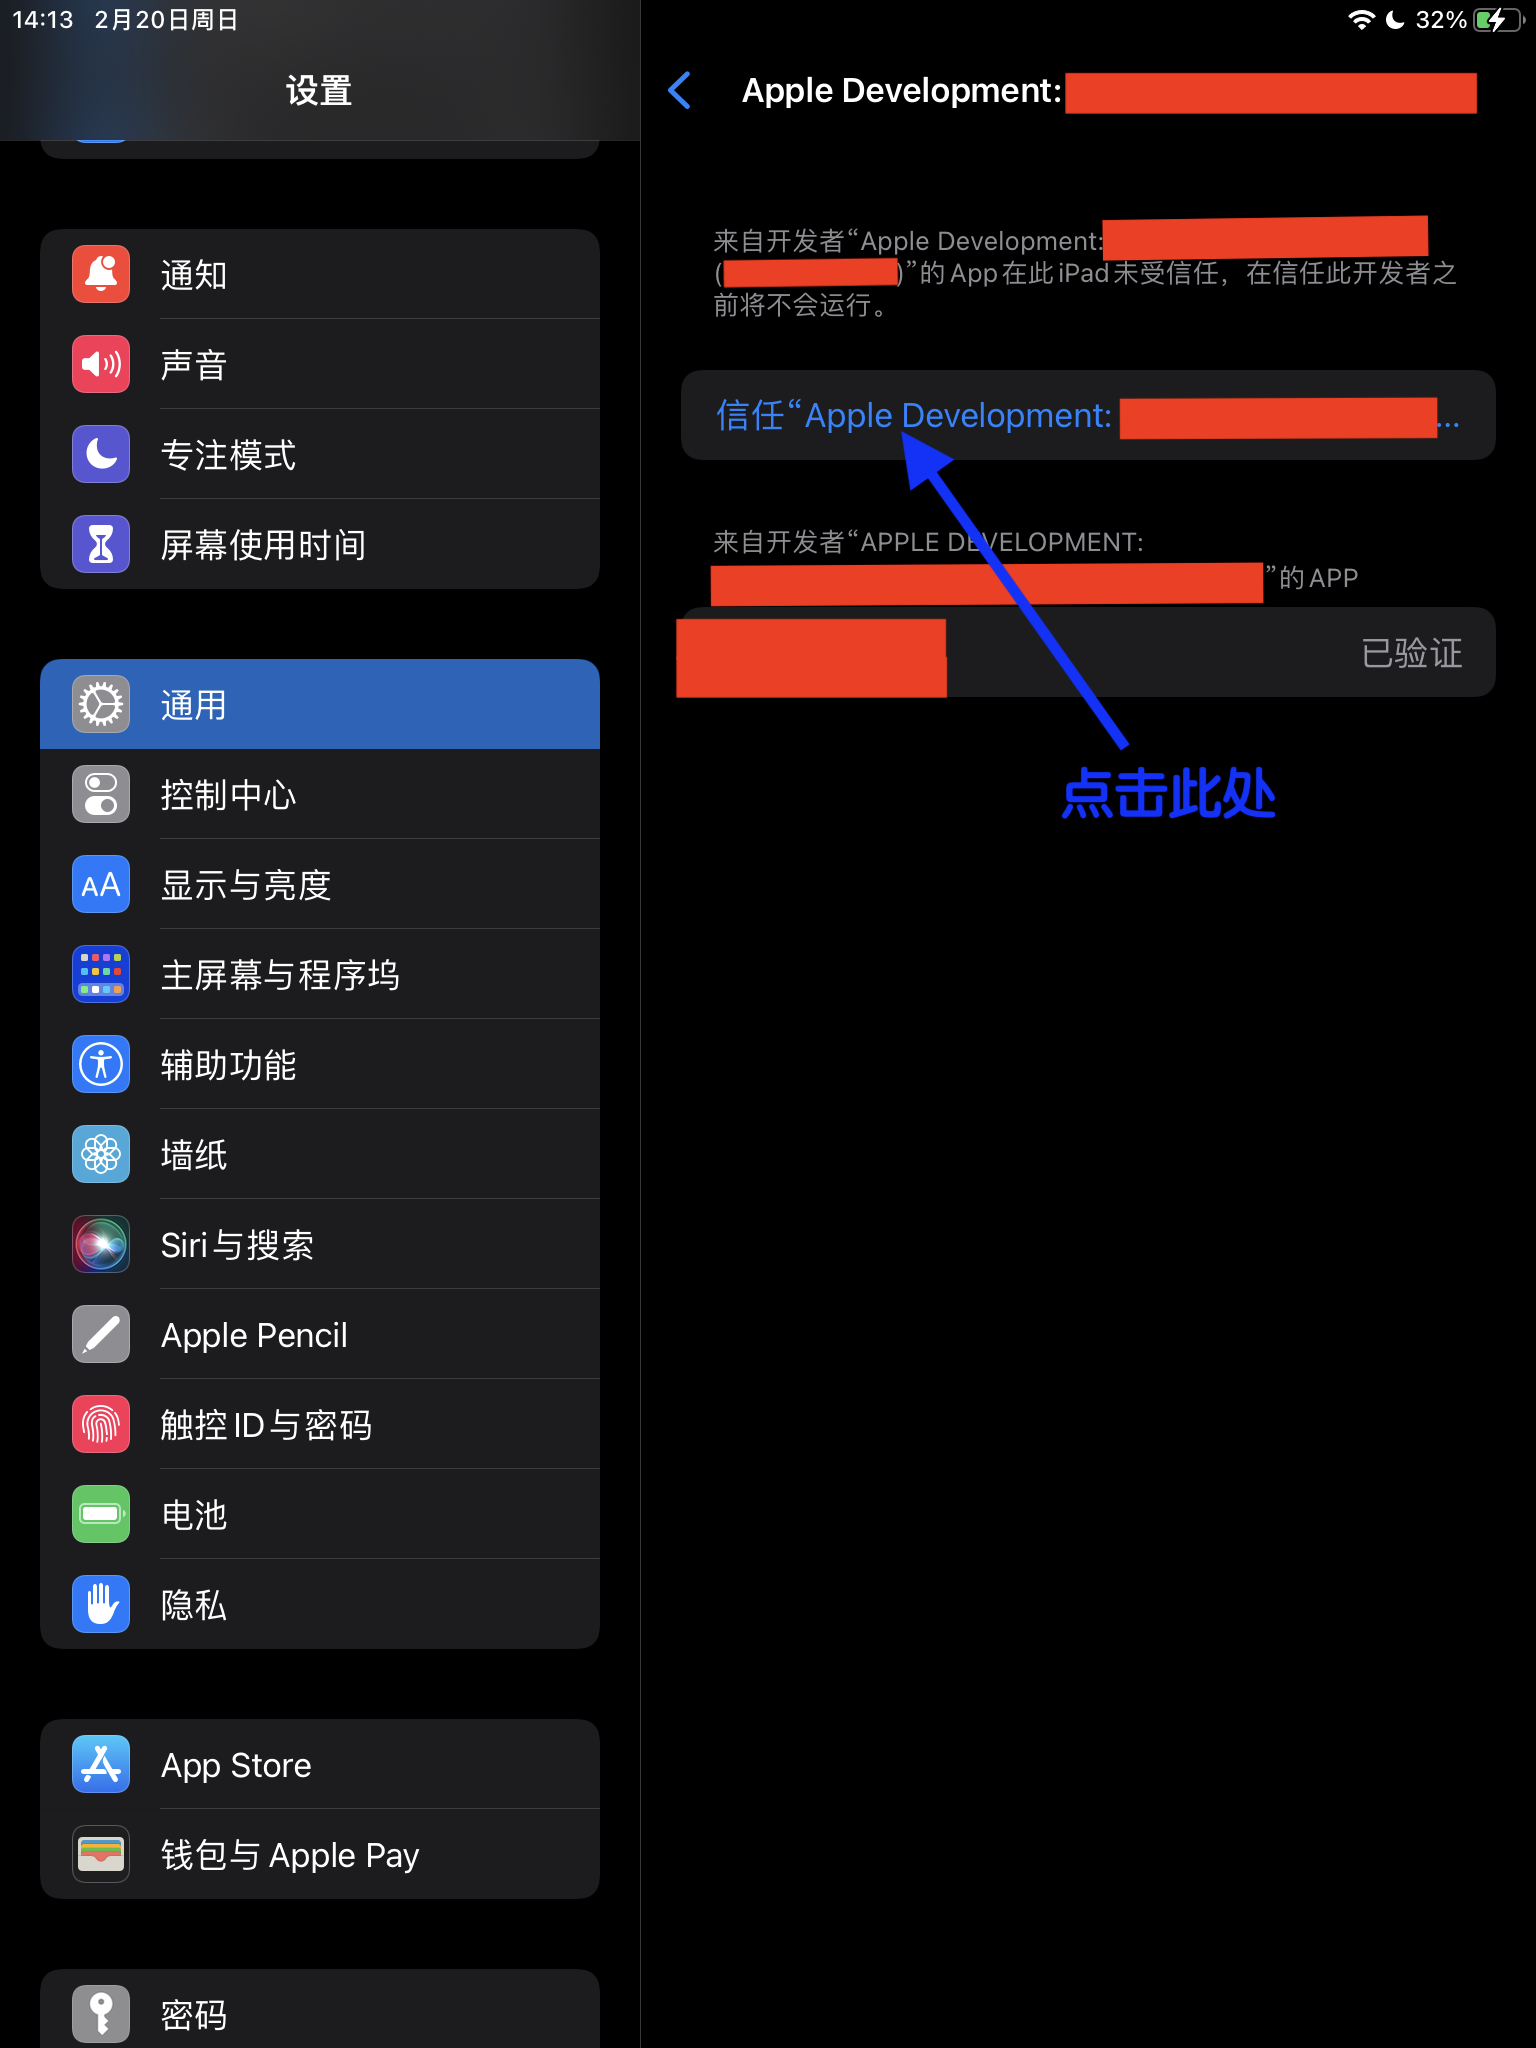
参考下图进行设置,如下:

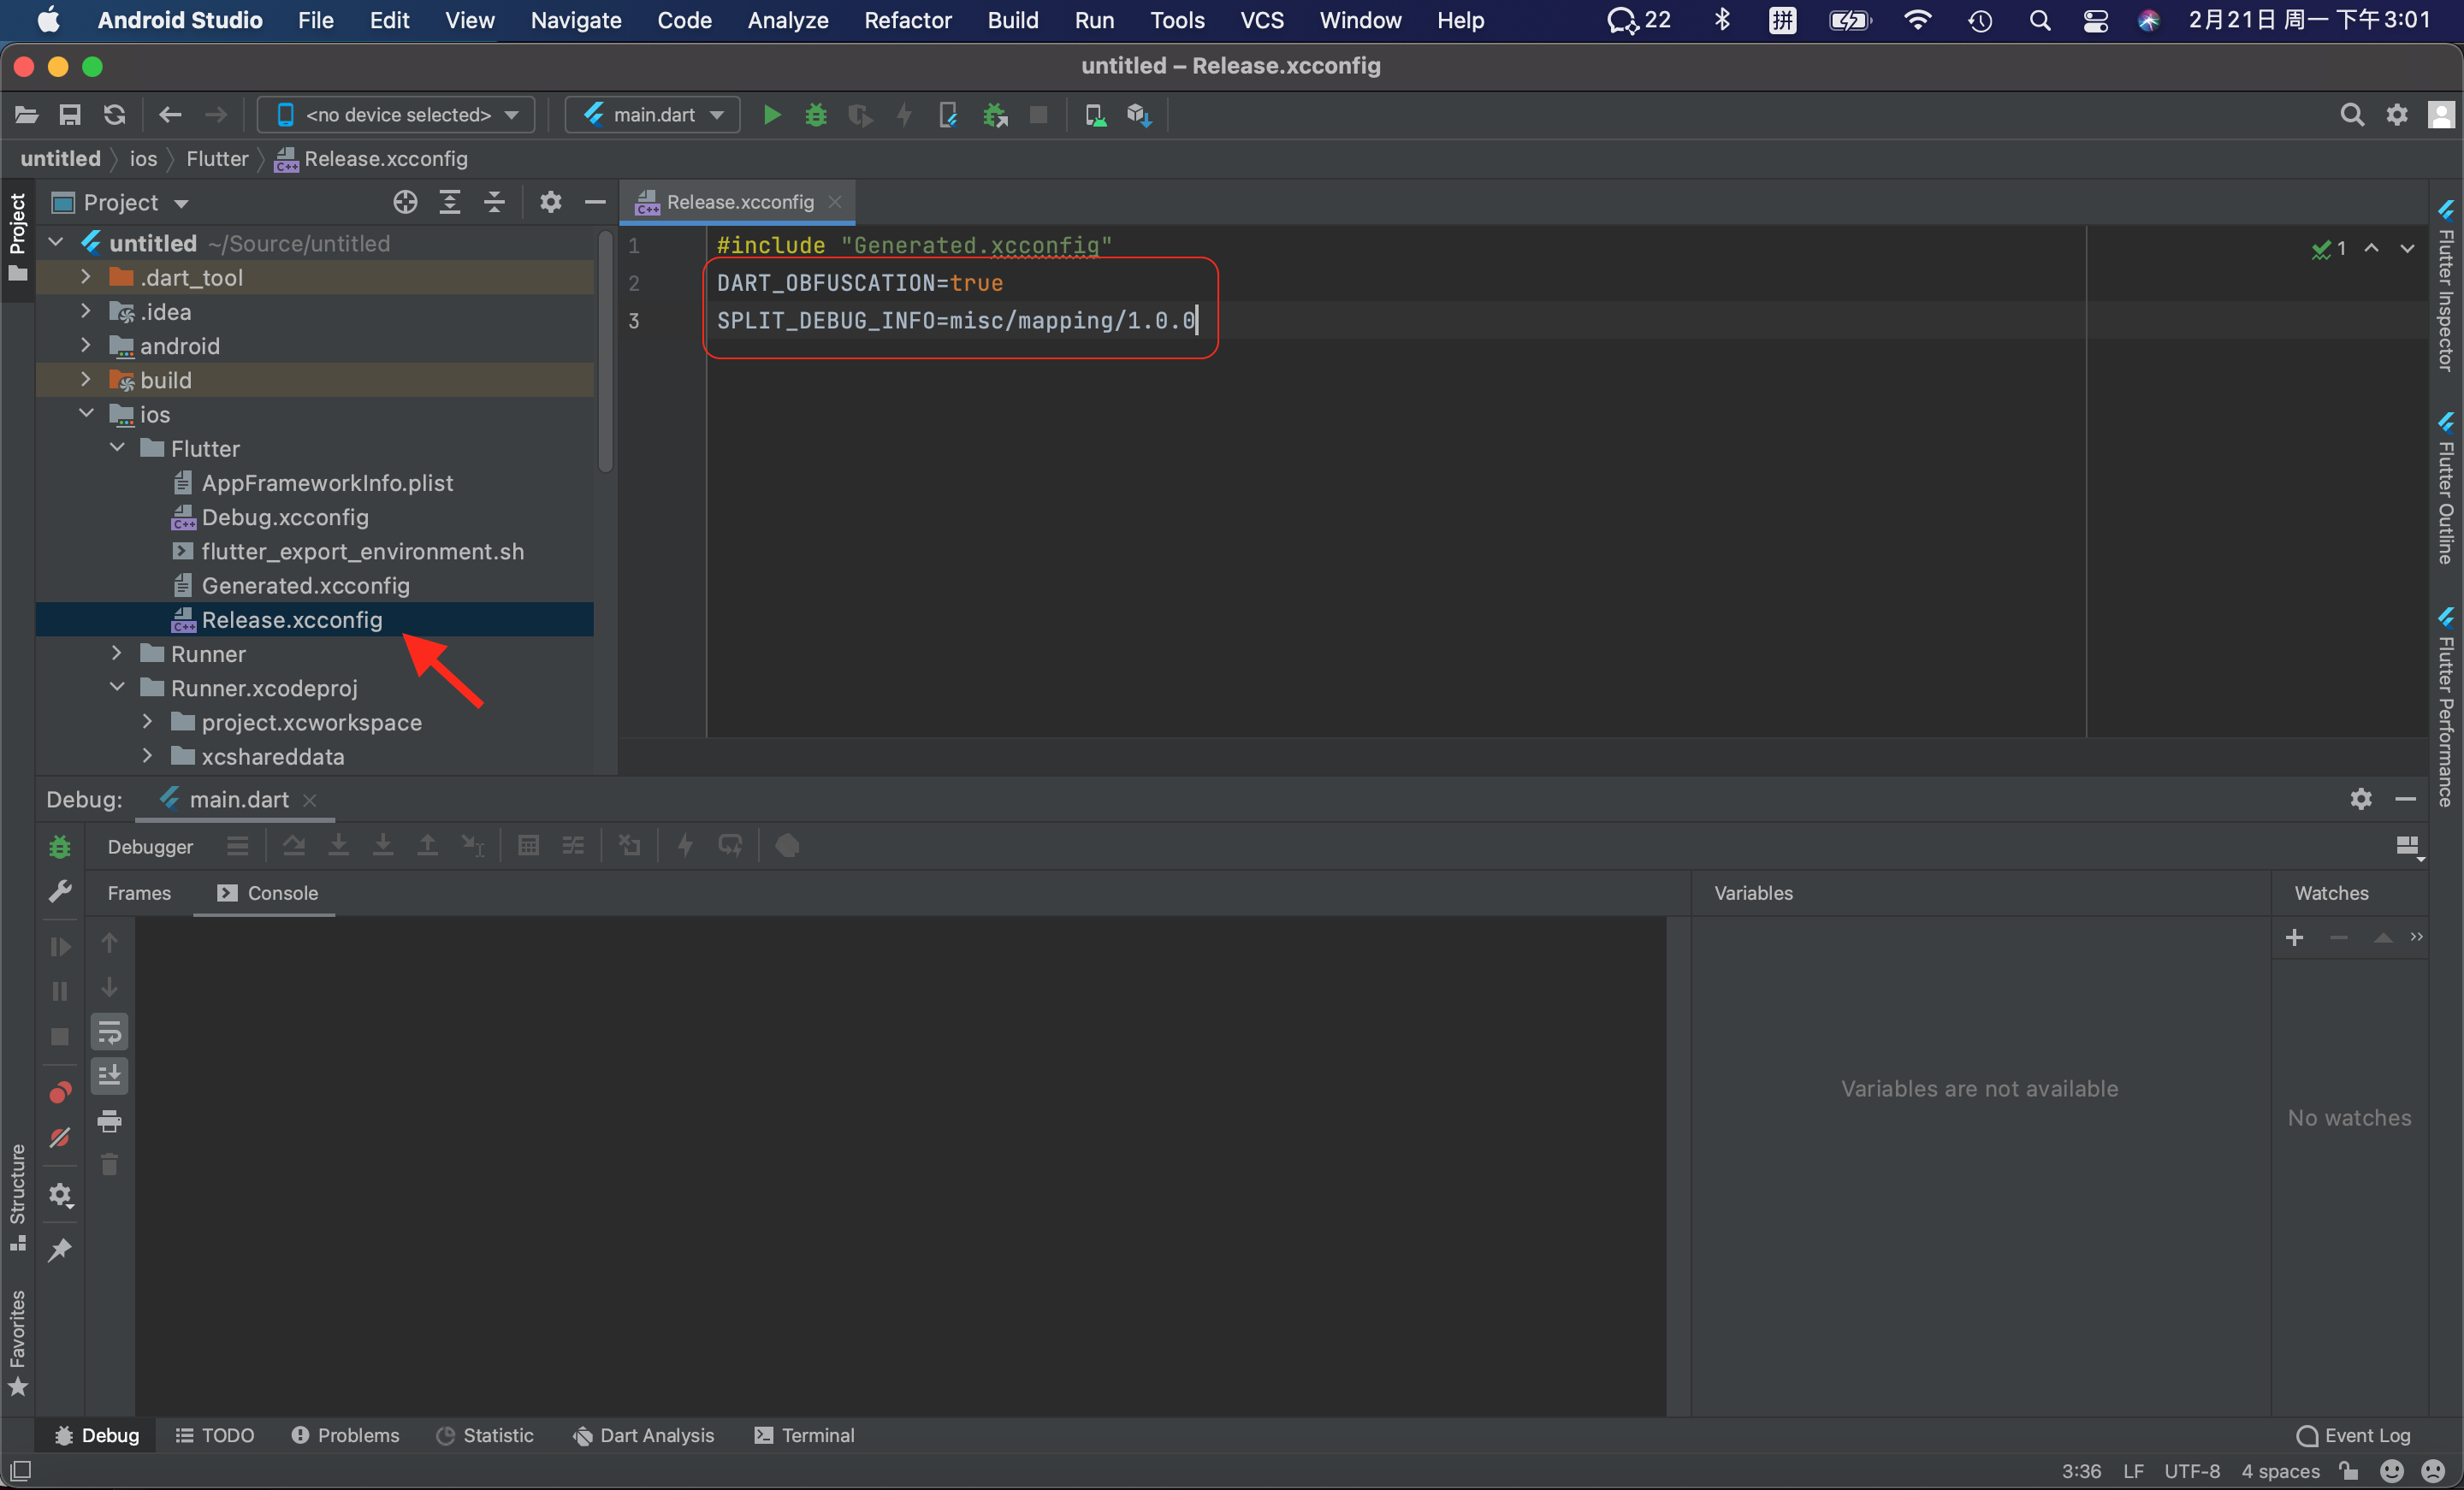
3. 代码混淆
对于 iOS 来说,可以通过在 iOS 的 Release.xcconfig 里增加
|
1 2 |
DART_OBFUSCATION=true SPLIT_DEBUG_INFO=misc/mapping/1.0.0 |
来实现代码混淆,如下图:
上面的配置对于通过 Add Flutter to existing app 实现集成的项目意义较大,可以在原项目的构建流程中自动集成混淆功能。
也可以通过命令行实现代码混淆功能,如下:
|
1 |
$ flutter build ios --obfuscate --split-debug-info=debug-info |
更详细的参考 Obfuscating Dart Code。
注意,官方版本的引擎已经实现符号分离,因此再次被压缩的空间已经不大。
一般情况下我们使用的是官方版本的引擎,如果需要调试 libflutter.so里面的符号,可以在flutter_infra页面直接下载带有符号表的SO文件,根据打包时使用的Flutter工具版本下载对应的文件即可。
比如2.8.1版本:
|
1 2 3 4 5 6 7 8 |
$ flutter --version # version命令可以看到Engine对应的版本 06afdfe54e Flutter 2.8.1 • channel stable • https://github.com/flutter/flutter.git Framework • revision 77d935af4d (3 周前) • 2021-12-16 08:37:33 -0800 Engine • revision 890a5fca2e Tools • Dart 2.15.1 $ cat `dirname $(which flutter)`/internal/engine.version # flutter安装目录下的engine.version文件也可以看到完整的版本信息 890a5fca2e34db413be624fc83aeea8e61d42ce6 890a5fca2e34db413be624fc83aeea8e61d42ce6 |
拿到引擎版本号后在https://console.cloud.google.com/storage/browser/flutter_infra_release/flutter/890a5fca2e34db413be624fc83aeea8e61d42ce6/ 看到该版本对应的所有构建产物,下载android-arm-release、android-arm64-release和android-x86目录下的symbols.zip。
4. 如果连接设备时候报错
|
1 |
This operation can fail if the version of the OS on the device is incompatible with the installed version of Xcode. You may also need to restart your mac and device in order to correctly detect compatibility. |
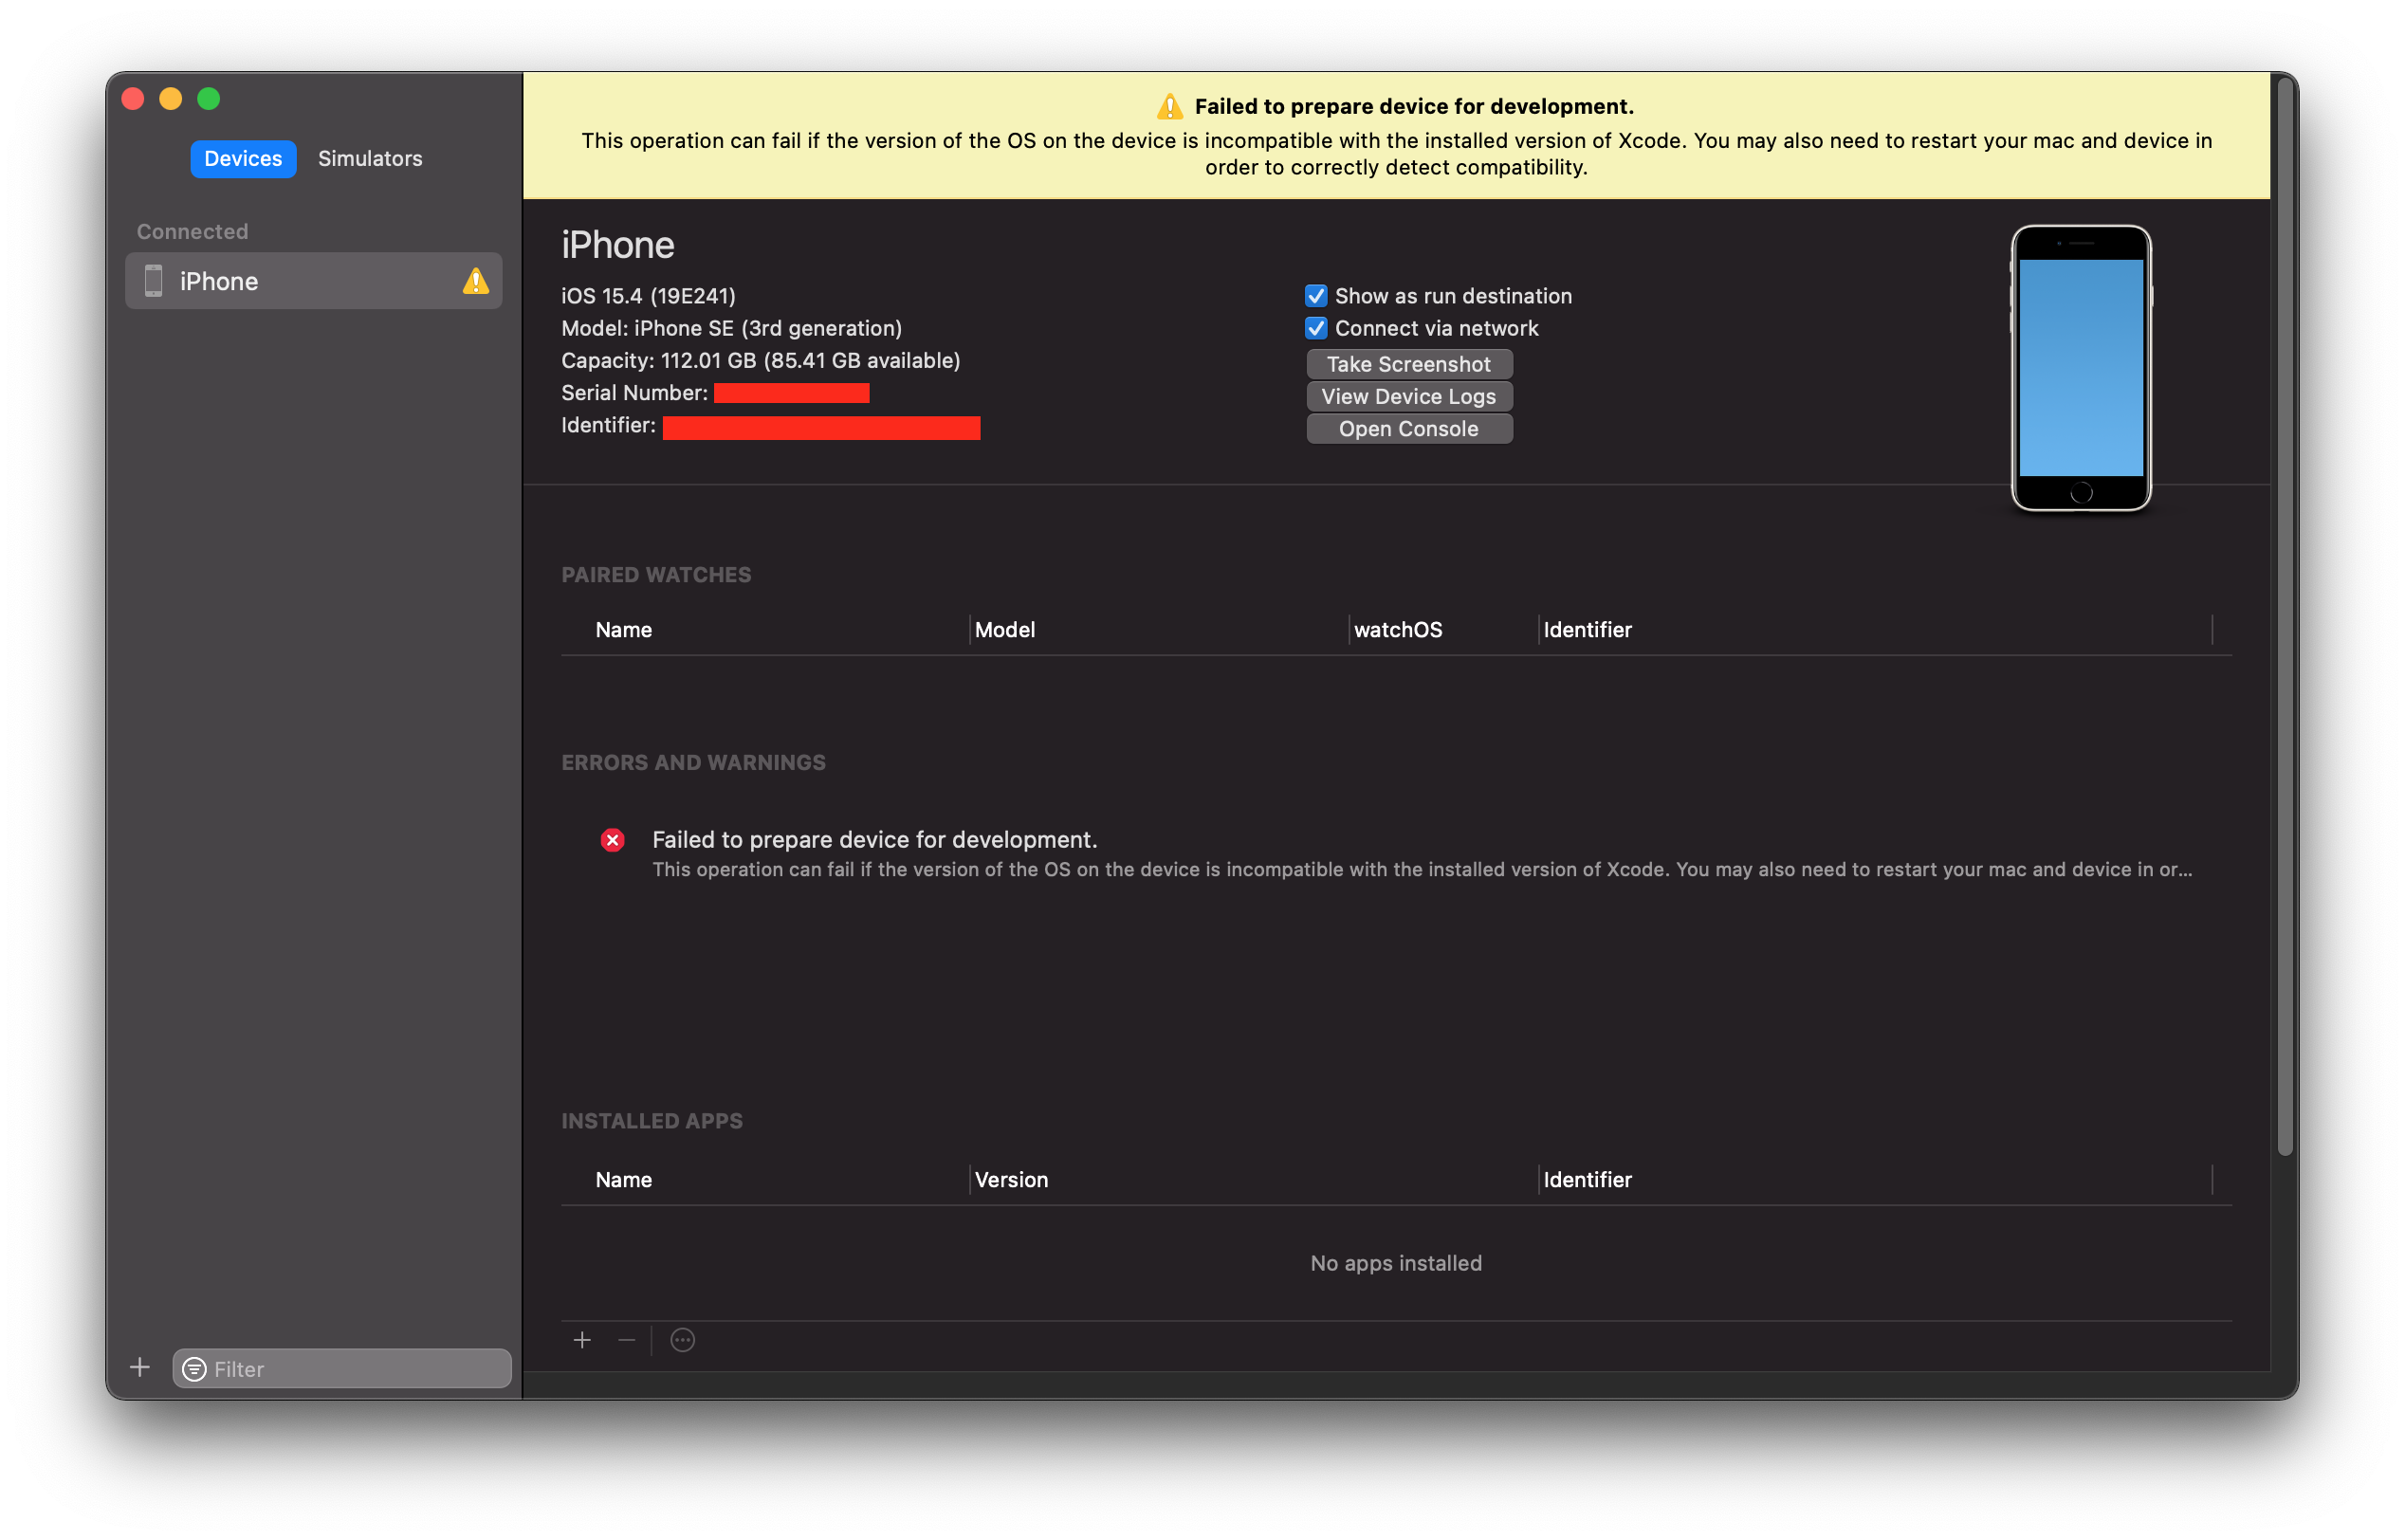
对于 iOS 15.4 系统的手机,需要 Xcode 13.3 以及以上的版本才能解决此问题。但是比较遗憾的是,Xcode 13.3 需要 macOS Monterey 12 系统。
然而 macOS Big Sur 11.6.5 只能安装 Xcode 13.2.1 。这种配置的情况下,可以从 iPhoneOSDeviceSupport 下载对应版本的 iPhoneOS DeviceSupport镜像,然后手工解压缩到
|
1 |
/Applications/Xcode.app/Contents/Developer/Platforms/iPhoneOS.platform/DeviceSupport/ |
完成之后,需要重启 Xcode 13.2 才能生效。
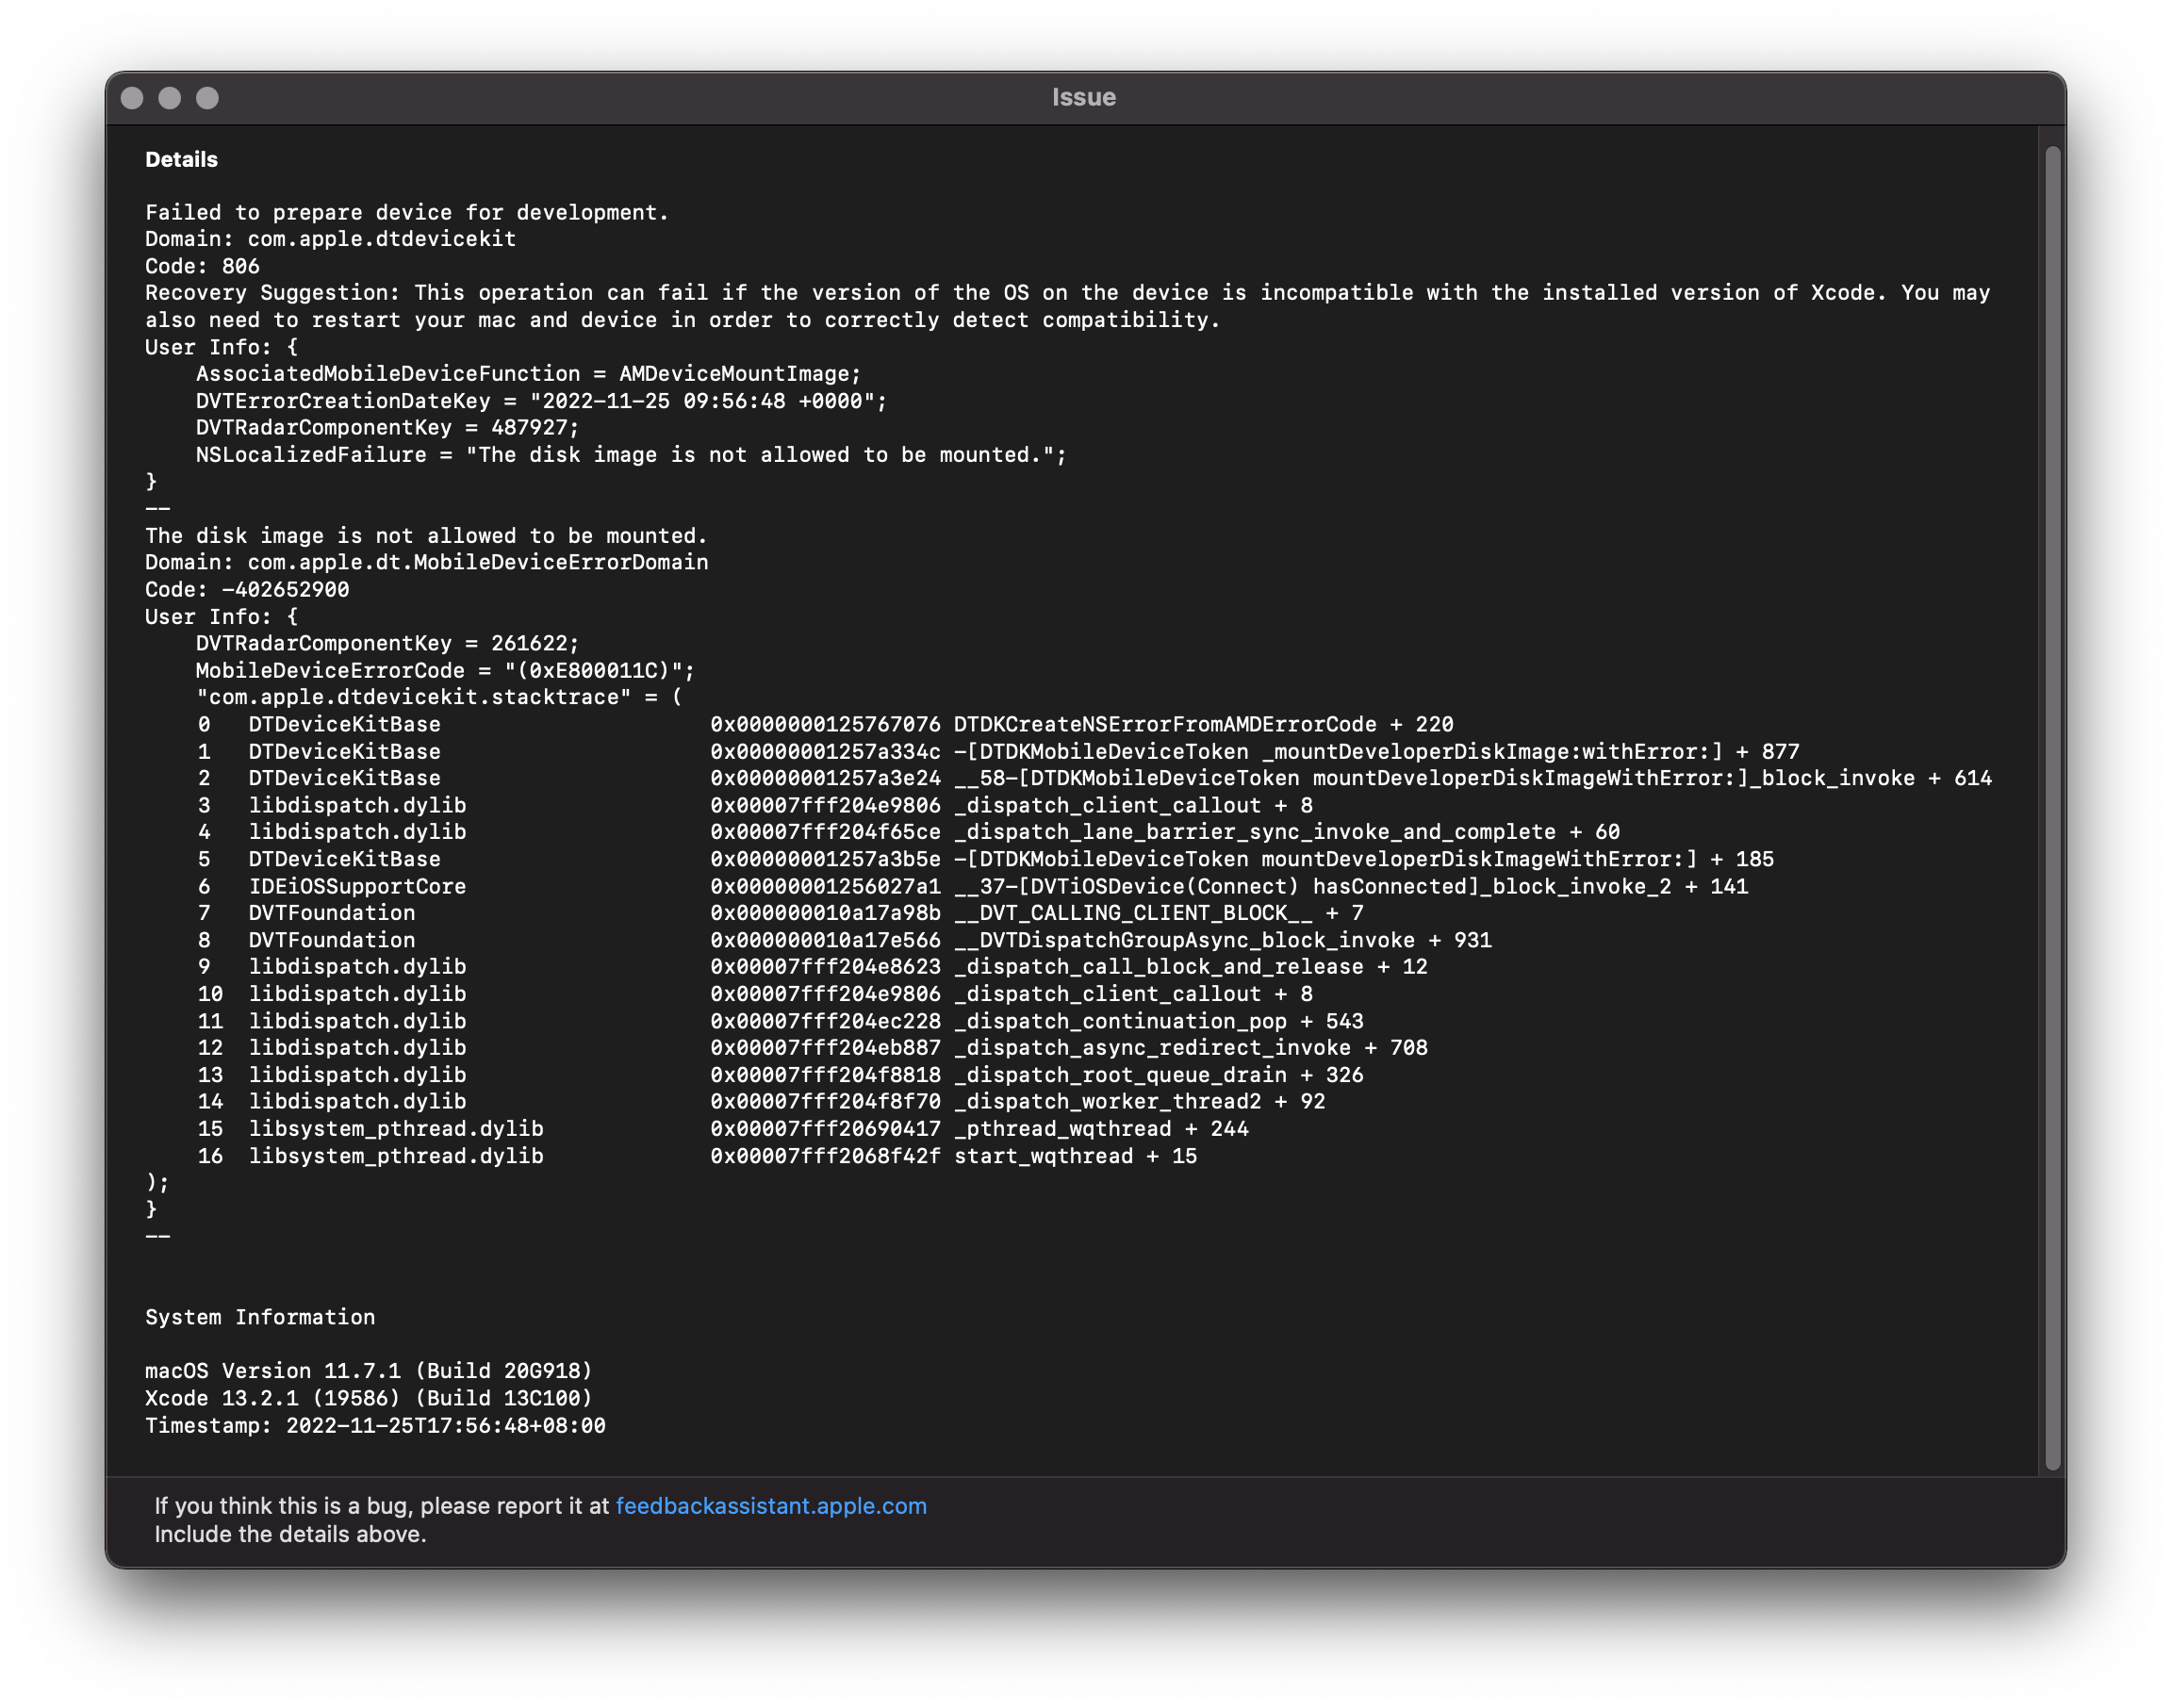
但是上述方法针对 iPhone SE 3 升级到 iOS 16.1.1系统是无效的,会出现如下报错信息:
|
1 2 3 4 5 6 7 8 9 10 11 12 13 14 15 16 17 18 19 20 21 22 23 24 25 26 27 28 29 30 31 32 33 34 35 36 37 38 39 40 41 42 43 44 45 46 47 |
Details Failed to prepare device for development. Domain: com.apple.dtdevicekit Code: 806 Recovery Suggestion: This operation can fail if the version of the OS on the device is incompatible with the installed version of Xcode. You may also need to restart your mac and device in order to correctly detect compatibility. User Info: { AssociatedMobileDeviceFunction = AMDeviceMountImage; DVTErrorCreationDateKey = "2022-11-25 09:56:48 +0000"; DVTRadarComponentKey = 487927; NSLocalizedFailure = "The disk image is not allowed to be mounted."; } -- The disk image is not allowed to be mounted. Domain: com.apple.dt.MobileDeviceErrorDomain Code: -402652900 User Info: { DVTRadarComponentKey = 261622; MobileDeviceErrorCode = "(0xE800011C)"; "com.apple.dtdevicekit.stacktrace" = ( 0 DTDeviceKitBase 0x0000000125767076 DTDKCreateNSErrorFromAMDErrorCode + 220 1 DTDeviceKitBase 0x00000001257a334c -[DTDKMobileDeviceToken _mountDeveloperDiskImage:withError:] + 877 2 DTDeviceKitBase 0x00000001257a3e24 __58-[DTDKMobileDeviceToken mountDeveloperDiskImageWithError:]_block_invoke + 614 3 libdispatch.dylib 0x00007fff204e9806 _dispatch_client_callout + 8 4 libdispatch.dylib 0x00007fff204f65ce _dispatch_lane_barrier_sync_invoke_and_complete + 60 5 DTDeviceKitBase 0x00000001257a3b5e -[DTDKMobileDeviceToken mountDeveloperDiskImageWithError:] + 185 6 IDEiOSSupportCore 0x00000001256027a1 __37-[DVTiOSDevice(Connect) hasConnected]_block_invoke_2 + 141 7 DVTFoundation 0x000000010a17a98b __DVT_CALLING_CLIENT_BLOCK__ + 7 8 DVTFoundation 0x000000010a17e566 __DVTDispatchGroupAsync_block_invoke + 931 9 libdispatch.dylib 0x00007fff204e8623 _dispatch_call_block_and_release + 12 10 libdispatch.dylib 0x00007fff204e9806 _dispatch_client_callout + 8 11 libdispatch.dylib 0x00007fff204ec228 _dispatch_continuation_pop + 543 12 libdispatch.dylib 0x00007fff204eb887 _dispatch_async_redirect_invoke + 708 13 libdispatch.dylib 0x00007fff204f8818 _dispatch_root_queue_drain + 326 14 libdispatch.dylib 0x00007fff204f8f70 _dispatch_worker_thread2 + 92 15 libsystem_pthread.dylib 0x00007fff20690417 _pthread_wqthread + 244 16 libsystem_pthread.dylib 0x00007fff2068f42f start_wqthread + 15 ); } -- System Information macOS Version 11.7.1 (Build 20G918) Xcode 13.2.1 (19586) (Build 13C100) Timestamp: 2022-11-25T17:56:48+08:00 |
针对这种情况,解决方法就是找一台 macOS Monterey 12.6 以及更高版本系统设备,安装 Xcode 14.0/Xcode 14.1 或者更高的版本,插上手机,然后 在 Xcode 中打开 Window -> Devices and Simulators,然后等待系统配置完成。
接下来,根据提示,找到手机上的 “设置” -> "隐私与安全性" 滑动到最下面,打开 “开发者模式”。(此处注意,在没有 Xcode 配置之前,这个 “开发者模式” 大概率是不可见的,只有一个“锁定模式”,等 Xcode 配置完成之后,就可以看到这个 “开发者模式” 了)。
也可以尝试,参照 VirtualBox 7.0.4安装macOS Monterey 12.6.1 安装虚拟机解决上述问题。
如果出现无法成功把 USB 设备映射进入虚拟机,则可以尝试参考 USB basics and troubleshooting 的步骤进行操作。
需要记住的是,如果主机是 USB 3.0 的设备,那么选择 USB 类型的时候也要选择 USB 3.0 否则大概率连接不上。
根据官方的说明是最好不要使用外接的 USB HUB ,但是目前测试发现,有时候通过 USB HUB 连接设备反而能解决上述问题。
比如我的 macBook Pro 2013 在手机直连的情况下,一直映射设备失败,但是通过 ORICO 的 USB 3.0 HUB(VIA芯片),倒是能成功映射设备。
怀疑在设备直连 iPhone 的情况下,使用了某些 Apple 的专有协议,导致 VirtualBox 无法进行模式切换。
参考链接
- 苹果开发者 获取关于会员资格、开发和分发的详细信息
- 选择会员资格
- Build and release an iOS app
- iOS开发笔记:SDK for iOS15.4 #XCode13
- 2022 【iOS 真机调试支持包】 已更新至iOS 16.1 正式版,Xcode 14 支持iOS 16.1、iOS15.7. iOS DeviceSupport 设备真机调试支持包
- “Cannot Debug iOS Wirelessly on Mac with Flutter (VS Code)”
- PSA: Do not update your development devices to iOS 18.4
- Flutter on latest iOS
我也遇到同樣的error,導致放不到iphone測試
DVTRadarComponentKey = 487927;
NSLocalizedFailure = "The disk image is not allowed to be mounted.";
做法:
1. Download iCareFone
2. 右下角 quick access 選developer mode
3. iphone之後就會出現developer mode 選項
4. 成功裝App