Ubuntu 22.04 (x64)树莓派4B(Raspberry Pi 4B)源代码编译

树莓派上的操作


树莓派使用的系统是通过 Raspberry Pi Imager 安装的 2023-05-03-raspios-bullseye-armhf.img.xz

1.升级到最新版内核保证与下载的内核源码版本一致

$ sudo rpi-update

2.升级完整后重启

$ sudo reboot

3.查看内核版本

$ uname -r

4.把最新版本的内核配置保存到.config中,以备以后编译内核使用

$ sudo modprobe configs

文件被存储到了/proc/config.gz中。

目前最新版本是 6.1.12,当前内核启动默认会切换到 64位内核了,即使安装的是32位系统镜像也是这样。

如果想从32位内核启动,那么需要在 config.txt 中配置 arm_64bit

继续阅读Ubuntu 22.04 (x64)树莓派4B(Raspberry Pi 4B)源代码编译

树莓派3B+/4B报告“low voltage warning”

需求场景

用的好好的树莓派,有一天连接VNC,发现桌面任务栏一直提示

low voltage warning,please check your power supply

如下图:

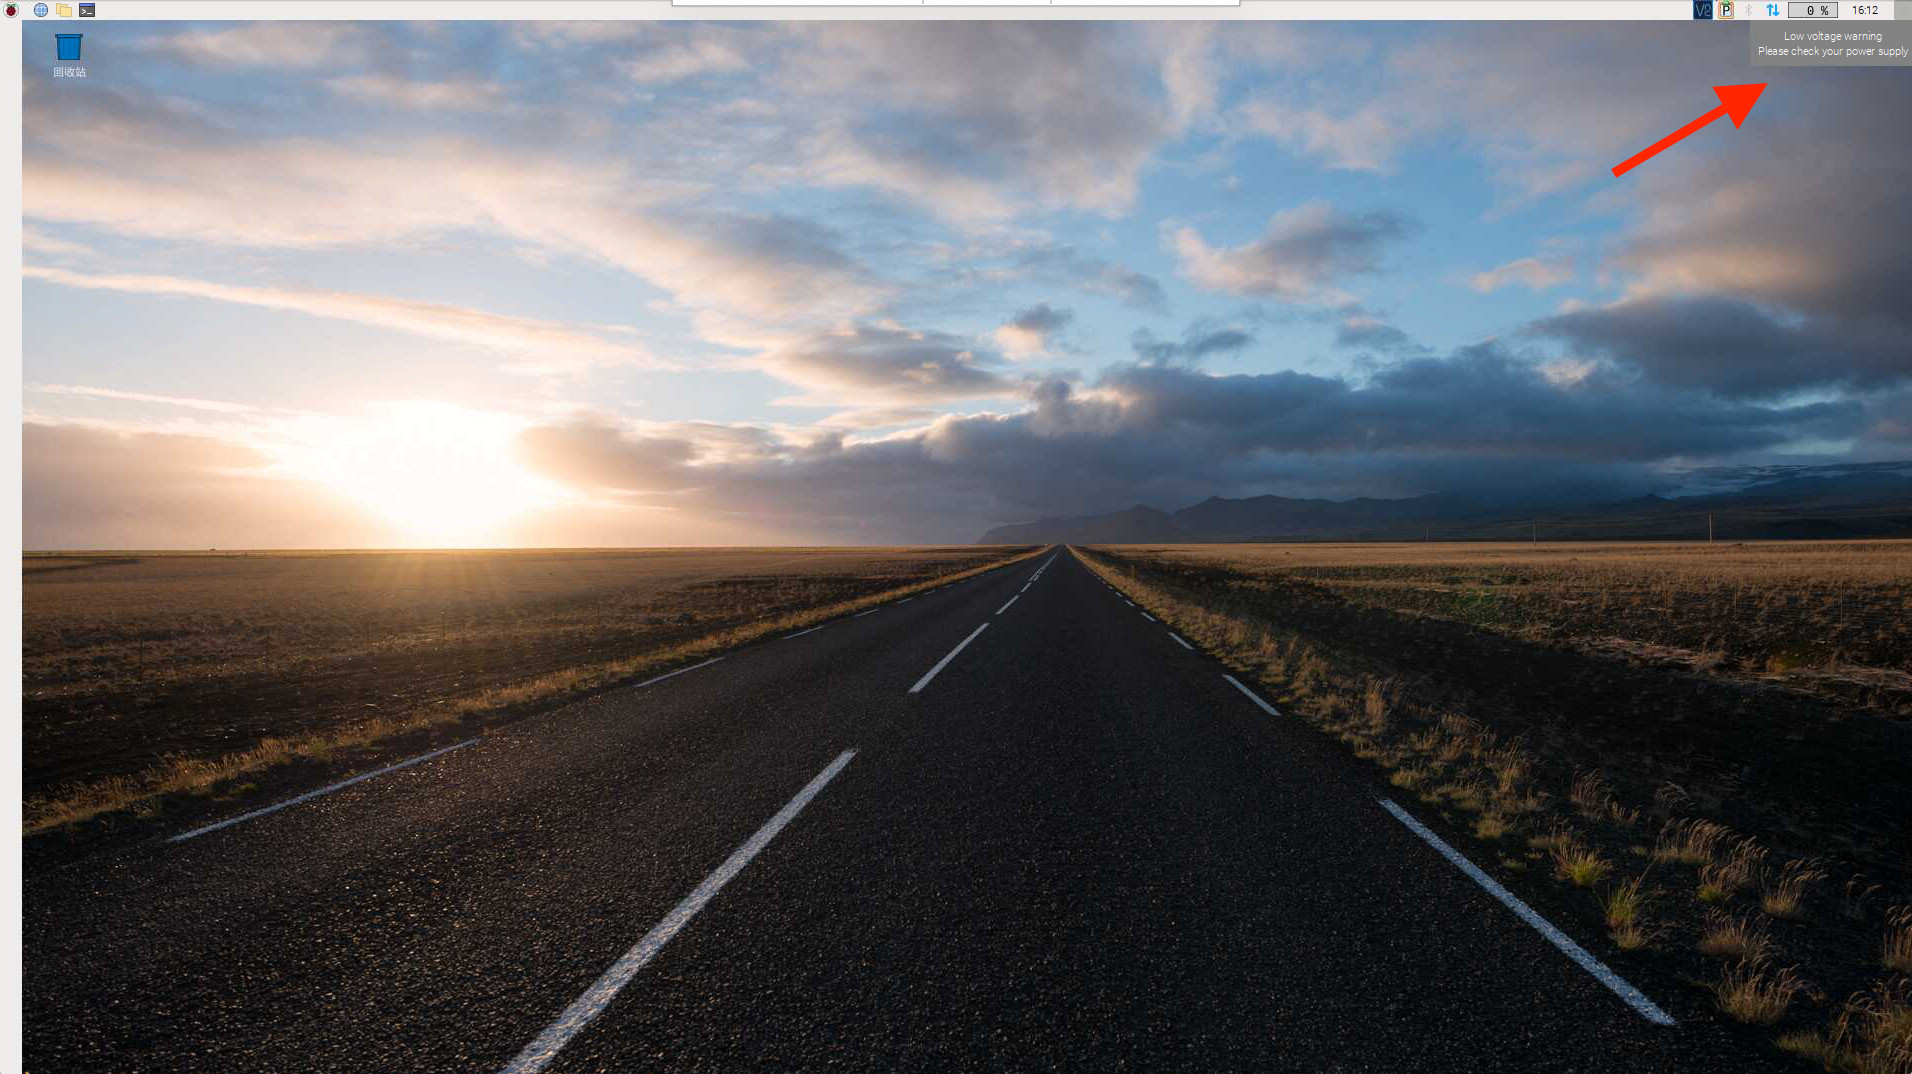
看样子是供电不足,可是树莓派的负载并不高啊。

解决方案

搜了一大圈基本都是说电源的问题,现在使用的电源是以前小米2/小米Note手机自带的电源。经过反复测试,发现跟温度有关,冬天的时候问题不大,到了夏天,由于老式电源转换效率低,大量电能被转换成了热量,导致长时间充电后,温度上升很快,引起降压,断电后过一段时间就可以了,但是一旦温度上升到一定程度,问题依旧。

后来买了个努比亚大白20W氮化镓充电器之后,就不会报告这个错误了。氮化镓的充电器转化效率更高,升温更少,并且更耐高温。

由于这个提示只有在连接显示器或VNC连接时才能在GUI桌面任务栏看到,如果是SSH登录就看不到了,非常的不方便。最好是能够通过命令判断是否电压不足。

具体的脚本详见 https://gist.github.com/maxme/d5f000c84a4313aa531288c35c3a8887

通过此脚本可以查看CPU和电压不足的问题。不过每次登录之后需要手动运行,实在不方面。而且脚本中采用了while循环需要手动中断脚本。所以可以把代码中的while循环去掉,并且在SSH登录的时候执行命令病输出到登录信息上。

注意电压充足的情况下,输出电压为1.2V,而不是 5V,主板的5V是没办法通过脚本直接测量的。我们只能通过脚本测量CPU、内存控制器、内存输入输出、内存本身的电压,主板电压只能用万用表来测量。

效果如下,具体方式参考 ubuntu修改ssh登录提示信息

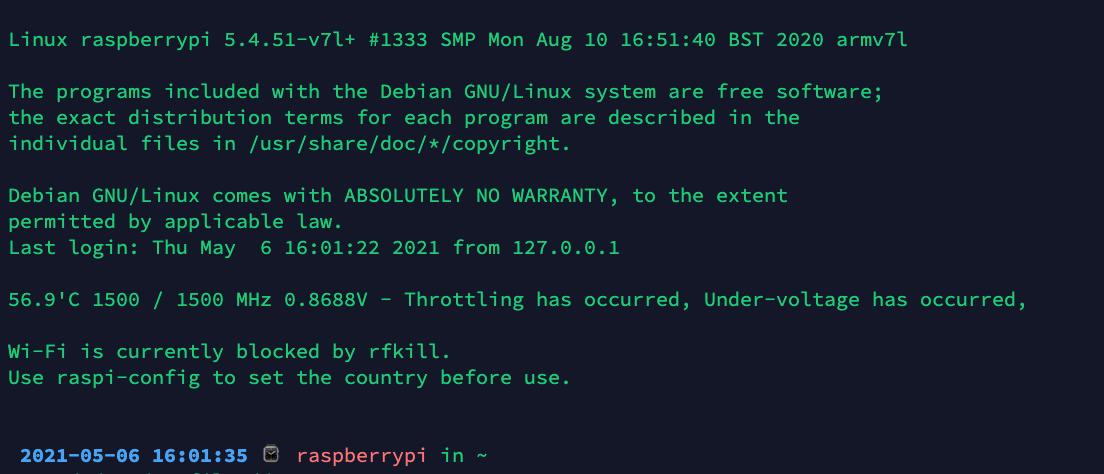
修改后的raspberry-power-supply-check.sh代码如下:

#!/bin/bash
function throttleCodeMask {
  perl -e "printf \"%s\", $1 & $2 ? \"$3\" : \"$4\""
}
function throttledToText {
  throttledCode=$1
  throttleCodeMask $throttledCode 0x80000 "Soft temperature limit has occurred, " ""
  throttleCodeMask $throttledCode 0x40000 "Throttling has occurred, " ""
  throttleCodeMask $throttledCode 0x20000 "Arm frequency capping has occurred, " ""
  throttleCodeMask $throttledCode 0x10000 "Under-voltage has occurred, " ""
  throttleCodeMask $throttledCode 0x8 "Soft temperature limit active, " ""
  throttleCodeMask $throttledCode 0x4 "Currently throttled, " ""
  throttleCodeMask $throttledCode 0x2 "Arm frequency capped, " ""
  throttleCodeMask $throttledCode 0x1 "Under-voltage detected, " ""
}
temp=$(vcgencmd measure_temp | cut -f2 -d=)
real_clock_speed=$(vcgencmd measure_clock arm | awk -F"=" '{printf ("%0.0f", $2 / 1000000); }' )
sys_clock_speed=$(awk '{printf ("%0.0f",$1/1000); }' </sys/devices/system/cpu/cpu0/cpufreq/scaling_cur_freq)
voltage=$(vcgencmd measure_volts | cut -f2 -d= | sed 's/000//')
throttled_text=$(throttledToText $(vcgencmd get_throttled | cut -f2 -d=))
echo "$temp $sys_clock_speed / $real_clock_speed MHz $voltage - $throttled_text"

参考链接


树莓派Raspberry Pi 3B+

参数一览

  • SoC:新版BCM2837B0,4 Core Cortex A53 64Bit V8,频率1.4GHz
  • RAM:1GB LPDDR2内存(我的是ELPIDA尔必达的颗粒)
  • LAN:千兆以太网接口,最高理论速率480Mbps(USB2.0总线),支持802.3az、9KB巨型帧、POE
  • WLAN&Bluetooth:Cypress CYW43455,模块化,支持2.4GHz/5GHz,802.11a/b/g/n/ac,Bluetooth 4.2
  • ROM:MicroSD Card(TF卡)
  • Other Port:HDMI x1、Ethernet x1、USB 2.0 x4,PowerIn(MicroUSB) x1,3.5mm Audio x1,Jumper x1,Camera Socket x1,Display Output Socket x1

继续阅读树莓派Raspberry Pi 3B+

树莓派固件更新 rpi-update

1 简介

rpi-update是一个用于更新树莓派固件的工具,可以通过apt get install rpi-update来安装

一般来说直接执行下面的命令就可以更新固件(扯淡,基本不可能好吗):

sudo rpi-update

2 跳过自更新

rpi-update启动时会更新自己,如果报以下错误:

!!! Failed to download update for rpi-update! 
!!! Make sure you have ca-certificates installed and that the time is set correctly

可以尝试一下他说的方法来解决:

#安装CA证书(感谢评论区指正)
sudo apt-get install ca-certificates

#同步时间
sudo apt-get install ntpdate
sudo ntpdate -u ntp.ubuntu.com

如果都不行,直接跳过算了,反正也可以用apt来更新这个工具,没必要让他更新自己。

跳过自更新,直接更新固件的方法:

sudo UPDATE_SELF=0 rpi-update

3 【究极方法】本地更新

即使跳过自更新,下载速度也太慢,还经常断流。可以考虑本地更新:

先在PC上下载固件(可以用一下魔法上网):

curl -L https://github.com/Hexxeh/rpi-firmware/archive/master.tar.gz -o master.tar.gz

然后用scp传到树莓派上的/root目录下,之后ssh连上树莓派:

# 切换到root用户(第一次切到root记得用sudo passwd root激活)
su

# 进入.rpi-firmware目录并解压(如果没有该目录,就创建一个)
mkdir /root/.rpi-firmware
cd /root/.rpi-firmware && tar -xvzf /root/master.tar.gz

# 【注】这一步是我自己加的,可能是遇到了特殊情况。
# 检查一下当前目录中是否有*.elf文件,如果没有,就说明那些文件
# 在当前目录下的一个叫rpi-firmware-master的子目录下
# 把里面的文件全拷贝到当前目录中(/root/.rpi-firmware)
cp -r ./rpi-firmware-master/* ./

# 执行本地更新
UPDATE_SELF=0 SKIP_DOWNLOAD=1 rpi-update

# 重启
reboot

4 检查

对于树莓派4的一个检查方法:

ls -la /opt/vc/lib

看该目录下是否有libEGL.solibGLESv2.so这两个库,更新前这两个库都是没有的。

如果这两个库出现了,并且是真正的库而不是软链接,就说明更新大概可能也许成功了吧。

参考链接


树莓派固件更新(rpi-update)的那些坑

树莓派国内源

树莓派官方源列表:http://www.raspbian.org/RaspbianMirrors

一下是国内部分:

Asia China Tsinghua University Network Administrators http://mirrors.tuna.tsinghua.edu.cn/raspbian/raspbian/

Unreachable as of 15-may-2015

Asia China Dalian Neusoft University of Information http://mirrors.neusoft.edu.cn/raspbian/raspbian  
Asia China Cohesion Network Security Studio (CNSS)

http://raspbian.cnssuestc.org/raspbian/ 
rsync://raspbian.cnssuestc.org/raspbian

 
Asia China Unique Studio of Huazhong University of Science and Technology

(http|rsync)://mirrors.hustunique.com/raspbian/raspbian

 
Asia China University of Science and Technology of China

(http|rsync)://mirrors.ustc.edu.cn/raspbian/raspbian/

 
Asia China SUN YAT-SEN University http://mirror.sysu.edu.cn/raspbian/  
Asia China Zhejiang University http://mirrors.zju.edu.cn/raspbian/raspbian/  
Asia China Open Source Software Association of Chinese Academy of Sciences http://mirrors.opencas.cn/raspbian/raspbian/  
Asia China Chongqing University http://mirrors.cqu.edu.cn/Raspbian/raspbian/  

重庆大学树莓派源:

wheezy:

deb http://mirrors.cqu.edu.cn/Raspbian/raspbian wheezy main contrib non-free rpi
deb-src http://mirrors.cqu.edu.cn/Raspbian/raspbian/ wheezy main contrib non-free rpi

jessie:

deb http://mirrors.cqu.edu.cn/Raspbian/raspbian jessie main contrib non-free rpi
deb-src http://mirrors.cqu.edu.cn/Raspbian/raspbian/ jessie main contrib non-free rpi

中国科技大学树莓派源:

jessie:

deb http://mirrors.ustc.edu.cn/raspbian/raspbian jessie main contrib non-free rpi

浙江大学

deb http://mirrors.zju.edu.cn/raspbian/raspbian/ wheezy main contrib non-free rpi
deb-src http://mirrors.zju.edu.cn/raspbian/raspbian/ wheezy main contrib non-free rpi

参考链接


树莓派国内源

树莓派OS历史版本下载

树莓派系统是基于Debian系统进行的定制,历史版本下载地址为 http://downloads.raspberrypi.org/raspbian/images/

2012-07-15-wheezy-raspbian
2012-08-16-wheezy-raspbian
2012-09-18-wheezy-raspbian
2012-10-28-wheezy-raspbian
2012-12-15-wheezy-raspbian
2012-12-16-wheezy-raspbian
2013-02-09-wheezy-raspbian
2013-05-25-wheezy-raspbian-shrunk
2013-05-25-wheezy-raspbian
2013-07-26-wheezy-raspbian
raspbian-2013-09-16
raspbian-2013-09-27
raspbian-2013-10-07
raspbian-2013-12-24
raspbian-2014-01-09
raspbian-2014-06-22
raspbian-2014-09-12
raspbian-2014-12-25
raspbian-2015-02-02
raspbian-2015-02-17
raspbian-2015-05-07
Debian 7(Wheezy)
raspbian-2015-09-28
raspbian-2015-11-24
raspbian-2016-02-08
raspbian-2016-02-09
raspbian-2016-02-29
raspbian-2016-03-18
raspbian-2016-05-13
raspbian-2016-05-31
raspbian-2016-09-28
raspbian-2016-11-29
raspbian-2017-01-10
raspbian-2017-02-27
raspbian-2017-03-03
raspbian-2017-04-10
raspbian-2017-06-23
raspbian-2017-07-05
Debian 8 (Jessie)
raspbian-2017-08-17
raspbian-2017-09-08
raspbian-2017-12-01
raspbian-2018-03-14
raspbian-2018-04-19
raspbian-2018-06-29
raspbian-2018-10-11
raspbian-2018-11-15
raspbian-2019-04-09
Debian 9 (Stretch)
raspbian-2019-06-24
raspbian-2019-07-12
Debian 10(Buster)

Lite版本下载地址为 http://downloads.raspberrypi.org/raspbian_lite/images/

参考链接


树莓派历史版本下载

树莓派4B使用ARM Compute Library运行AlexNet

# Install Build Tools 
$ pip install scons 

# Reload Environment
$ source ~/.profile

# Clone Compute Library 
$ git clone https://github.com/Arm-software/ComputeLibrary.git 

# or wget https://www.mobibrw.com/wp-content/uploads/2019/10/ComputeLibrary.zip

# Enter ComputeLibrary folder 
$ cd ComputeLibrary  

# Build the library and the examples 
$ scons Werror=1 debug=0 asserts=0 neon=1 opencl=1 examples=1 os=linux arch=armv7a -j4 

# Run on the Raspberry Pi
$ export LD_LIBRARY_PATH=build/ 

# Download AlexNet

# Install unzip
$ sudo apt-get install unzip

# Download the zip file with the AlexNet model, input images and labels
$ wget https://armkeil.blob.core.windows.net/developer/developer/technologies/Machine%20learning%20on%20Arm/Tutorials/Running%20AlexNet%20on%20Pi%20with%20Compute%20Library/compute_library_alexnet.zip

# or wget https://www.mobibrw.com/wp-content/uploads/2019/10/compute_library_alexnet.zip

# Create a new folder
$ mkdir assets_alexnet

# Unzip
$ unzip compute_library_alexnet.zip -d assets_alexnet

$ PATH_ASSETS=./assets_alexnet 

$ ./build/examples/graph_alexnet 0 $PATH_ASSETS  $PATH_ASSETS/go_kart.ppm $PATH_ASSETS/labels.txt

继续阅读树莓派4B使用ARM Compute Library运行AlexNet