ubuntu 16.04 LTS更改机器名后执行sudo提示"sudo: 无法解析主机:xx-ubuntu: 连接超时"。
出现这种问题是hosts文件没有配置好所导致的,linux无法解析到您的主机地址,解决方案如下:
|
1 |
$ sudo vim /etc/hosts |
打开文件以后,将其中的:
|
1 |
127.0.1.1 xxx(旧主机名) |
修改为新的主机名。
ubuntu 16.04 LTS更改机器名后执行sudo提示"sudo: 无法解析主机:xx-ubuntu: 连接超时"。
出现这种问题是hosts文件没有配置好所导致的,linux无法解析到您的主机地址,解决方案如下:
|
1 |
$ sudo vim /etc/hosts |
打开文件以后,将其中的:
|
1 |
127.0.1.1 xxx(旧主机名) |
修改为新的主机名。
使用open函数的时候,如果在第二个参数中使用了O_CREAT,就必须添加第三个参数:创建文件时赋予的初始权。
|
1 2 3 4 5 6 |
In function ‘open’, inlined from ‘test_detector_ffmpeg’ at ./src/ff_darknet.c:421:15: /usr/include/x86_64-linux-gnu/bits/fcntl2.h:50:4: error: call to ‘__open_missing_mode’ declared with attribute error: open with O_CREAT or O_TMPFILE in second argument needs 3 arguments __open_missing_mode (); ^ compilation terminated due to -Wfatal-errors. |
建议使用如下参数创建文件:
|
1 2 |
//0755 fd = open(file_path,O_CREAT | O_APPEND | O_WRONLY,S_IRWXU|S_IRUSR|S_IXUSR|S_IROTH|S_IXOTH); |
ubuntu 16.04 LTS启动Eclipse Neno.3报错"An error has occurred. See the log file",具体如下图所示:
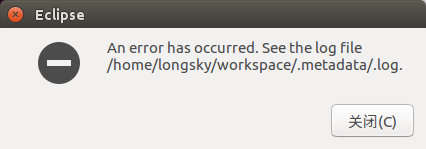
继续阅读ubuntu 16.04 LTS启动Eclipse Neno.3 报错"An error has occurred. See the log file"
Ubuntu 16.04/14.04.5上已经可以简化到直接用命令行来安装Nvidia CUDA驱动了,不需要以往的繁琐操作,只是安装的版本比较老,但是目前已经足够使用了。
|
1 |
$ sudo apt install nvidia-cuda-toolkit |
安装的版本目前是Nvidia CUDA 7.5(Ubuntu 16.04)/Nvidia CUDA 5.5(Ubuntu 14.04.5)版本,最新的Nvidia CUDA 8.0版本还是需要从Nvidia官网下载,然后手工安装才行。
Deep learning is the new big trend in machine learning. It had many recent successes in computer vision, automatic speech recognition and natural language processing.
The goal of this blog post is to give you a hands-on introduction to deep learning. To do this, we will build a Cat/Dog image classifier using a deep learning algorithm called convolutional neural network (CNN) and a Kaggle dataset.
This post is divided into 2 main parts. The first part covers some core concepts behind deep learning, while the second part is structured in a hands-on tutorial format.
In the first part of the hands-on tutorial (section 4), we will build a Cat/Dog image classifier using a convolutional neural network from scratch. In the second part of the tutorial (section 5), we will cover an advanced technique for training convolutional neural networks called transfer learning. We will use some Python code and a popular open source deep learning framework called Caffe to build the classifier. Our classifier will be able to achieve a classification accuracy of 97%.
By the end of this post, you will understand how convolutional neural networks work, and you will get familiar with the steps and the code for building these networks.
The source code for this tutorial can be found in this github repository.
继续阅读A Practical Introduction to Deep Learning with Caffe and Python
Caffe is certainly one of the best frameworks for deep learning, if not the best.
Let’s try to put things into order, in order to get a good tutorial :).
First install Caffe following my tutorials on Ubuntu or Mac OS with Python layers activated and pycaffe path correctly set export PYTHONPATH=~/technologies/caffe/python/:$PYTHONPATH.
继续阅读Deep learning tutorial on Caffe technology : basic commands, Python and C++ code.
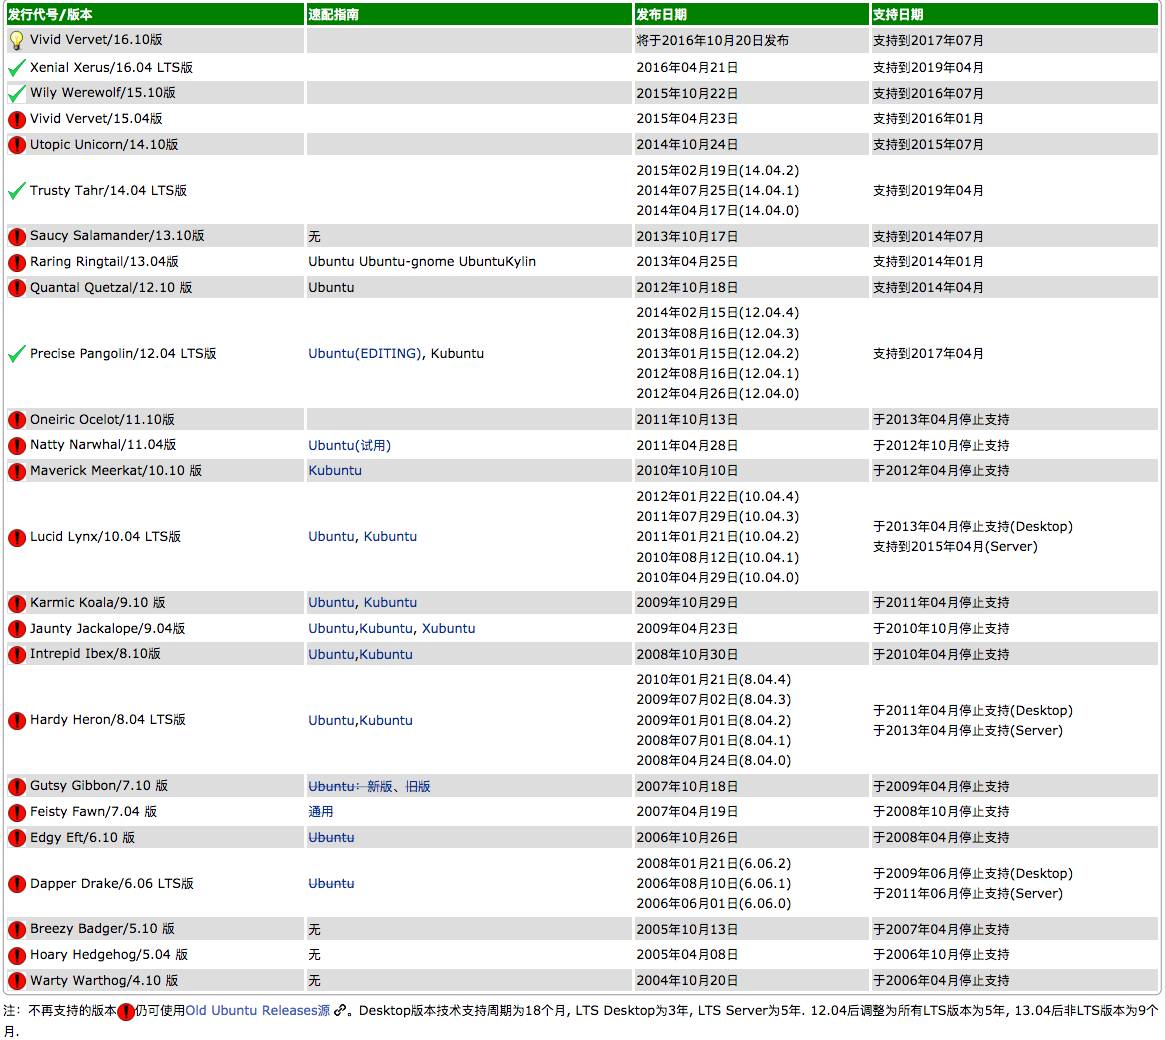
更加详细的信息参考链接:Ubuntu速配指南,Ubuntu release end of life
在执行macOS Sierra (10.12.4)下Caffe通过Python接口加载binaryproto格式的均值文件的时候,最后报告错误:
|
1 2 3 4 5 6 7 8 |
Traceback (most recent call last): File "analysis_memnet.py", line 29, in <module> detector = caffe.Detector(model_def, pretrained_model, mean=means) File "/Users/Source/caffe/distribute/python/caffe/detector.py", line 46, in __init__ self.transformer.set_mean(in_, mean) File "/Users/Source/caffe/distribute/python/caffe/io.py", line 259, in set_mean raise ValueError('Mean shape incompatible with input shape.') ValueError: Mean shape incompatible with input shape. |
这个错误发生的原因是由于memnet提供的均值文件是256*256的,但是提供的配置文件却是227*227的,导致在io.py里面的代码在进行判断的时候发生异常。调整源代码中的python/caffe/io.py里面的代码:
|
1 2 3 4 5 6 7 8 9 10 11 12 13 14 15 16 17 18 19 20 21 22 23 24 25 |
def set_mean(self, in_, mean): """ Set the mean to subtract for centering the data. Parameters ---------- in_ : which input to assign this mean. mean : mean ndarray (input dimensional or broadcastable) """ self.__check_input(in_) ms = mean.shape if mean.ndim == 1: # broadcast channels if ms[0] != self.inputs[in_][1]: raise ValueError('Mean channels incompatible with input.') mean = mean[:, np.newaxis, np.newaxis] else: # elementwise mean if len(ms) == 2: ms = (1,) + ms if len(ms) != 3: raise ValueError('Mean shape invalid') if ms != self.inputs[in_][1:]: raise ValueError('Mean shape incompatible with input shape.') self.mean[in_] = mean |
调整为:
|
1 2 3 4 5 6 7 8 9 10 11 12 13 14 15 16 17 18 19 20 21 22 23 24 25 26 27 28 29 |
def set_mean(self, in_, mean): """ Set the mean to subtract for centering the data. Parameters ---------- in_ : which input to assign this mean. mean : mean ndarray (input dimensional or broadcastable) """ self.__check_input(in_) ms = mean.shape if mean.ndim == 1: # broadcast channels if ms[0] != self.inputs[in_][1]: raise ValueError('Mean channels incompatible with input.') mean = mean[:, np.newaxis, np.newaxis] else: # elementwise mean if len(ms) == 2: ms = (1,) + ms if len(ms) != 3: raise ValueError('Mean shape invalid') if ms != self.inputs[in_][1:]: in_shape = self.inputs[in_][1:] m_min, m_max = mean.min(), mean.max() normal_mean = (mean - m_min) / (m_max - m_min) mean = resize_image(normal_mean.transpose((1,2,0)),in_shape[1:]).transpose((2,0,1)) * (m_max - m_min) + m_min #raise ValueError('Mean shape incompatible with input shape.') self.mean[in_] = mean |
调整完成后,需要重新编译Caffe:
|
1 2 3 4 |
$ make clean $ make $ make pycaffe $ make distribute |
macOS Sierra (10.12.4)下Caffe通过Python接口加载均值文件的时候,都是加载的.npy格式的文件,这个格式是Python存储的格式,跟我们经常下载到的.binaryproto格式的均值文件是不同的,这样就导致了加载问题。
.binaryproto是Google的Protocol Buffer序列化后的数据,而.npy格式是Python的numpy模块序列化后的数据。
之所以会出现两种不同的存储格式,目前猜测是由于目前Python 3不能很好的支持Protocol Buffer导致的。
Python下是不能直接加载.binaryproto格式的数据的,必须进行一次转换才行,示例代码如下:
|
1 2 3 4 5 6 7 8 9 10 11 12 13 14 15 16 17 18 19 20 21 22 23 24 25 26 27 |
#coding=utf-8 #加载必要的库 import numpy as np import sys,os #设置当前目录 caffe_root = '/Users/Source/caffe/distribute/' sys.path.append(caffe_root + 'python') import caffe os.chdir(caffe_root) memnet_root = '/Users/Source/caffe/' model_def =memnet_root + 'models/memnet/deploy.prototxt' pretrained_model=memnet_root + 'models/memnet/memnet.caffemodel' means_file=memnet_root + 'models/memnet/mean.binaryproto' caffe.set_mode_cpu() blobProto=caffe.io.caffe_pb2.BlobProto() binProtoFile=open(means_file,'rb') blobProto.ParseFromString(binProtoFile.read()) means = caffe.io.blobproto_to_array(blobProto)[0] binProtoFile.close() # Make detector. detector = caffe.Detector(model_def, pretrained_model, mean=means) |
参照 macOS Sierra (10.12.3)编译Caffe 编译成功 Caffe 后,开始尝试使用 Caffe 的 Python 接口,执行如下命令:
|
1 |
$ make pycaffe |
|
1 |
import caffe |
|
1 |
Segmentation fault: 11 |