# Super Grub Disk Main Configuration file
# Copyright (C) 2009,2010,2011,2012,2013,2014,2015 Adrian Gibanel Lopez.
#
# Super Grub Disk is free software: you can redistribute it and/or modify
# it under the terms of the GNU General Public License as published by
# the Free Software Foundation, either version 3 of the License, or
# (at your option) any later version.
#
# Super Grub Disk is distributed in the hope that it will be useful,
# but WITHOUT ANY WARRANTY; without even the implied warranty of
# MERCHANTABILITY or FITNESS FOR A PARTICULAR PURPOSE. See the
# GNU General Public License for more details.
#
# You should have received a copy of the GNU General Public License
# along with Super Grub Disk. If not, see <http://www.gnu.org/licenses/>.
# Configure gfxterm, but allow it to be disabled by holding shift during boot.
# gfxterm is required to display non-ASCII translations.
loadfont "$prefix/unifont.pf2"
if keystatus --shift; then
disable_gfxterm=true
# export disable_gfxterm is needed so that the setting will persist even after
# a "configfile /boot/grub/main.cfg" (which is what language_select.cfg does after
# you select a new language)
export disable_gfxterm
# The following strings are intentionally not made translateable.
echo "It has been detected that the shift key was held down. Because of this SG2D"
echo "will use VGA text mode rather than gfxterm. This will cause display problems"
echo "when using some non-English translations."
echo
echo "Press escape to continue to the main menu"
sleep --interruptible 9999
fi
if [ "$disable_gfxterm" != true ]; then
insmod all_video
gfxmode=640x480
if terminal_output --append gfxterm
then
terminal_output --remove console
fi
fi
# Export the variables so that they persist when loading a new menu.
export menu_color_normal
export menu_color_highlight
export menu_color_background
export bwcolor
function set_sgd_colors {
if [ "$bwcolor" = "yes" ]; then
menu_color_normal=white/black
menu_color_highlight=black/white
menu_color_background=black/white
else
menu_color_normal=white/brown
menu_color_highlight=white/blue
menu_color_background=yellow/cyan
fi
}
set_sgd_colors
# Set secondary_locale_dir to the directory containing SG2D specific mo files.
# This makes grub aware of translations for SG2D specific strings.
secondary_locale_dir="${prefix}/sgd_locale/"
insmod part_acorn
insmod part_amiga
insmod part_apple
insmod part_bsd
insmod part_gpt
insmod part_msdos
insmod part_sun
insmod part_sunpc
function process_main_option {
set option_cfg="$1"
source "${option_cfg}"
menuentry "${option_title}" "${option_cfg}" {
set chosen=""
export chosen
set sourced_cfgs="${2}"
export sourced_cfgs
configfile "${prefix}/processoption.cfg"
}
}
function process_option {
set option_cfg="$1"
source "${option_cfg}"
menuentry "${finaloption_tab_str}${option_title}" "${option_cfg}" {
set chosen=""
export chosen
set sourced_cfgs="${2}"
export sourced_cfgs
configfile "${prefix}/processoption.cfg"
}
}
function process_enable {
set option_cfg="$1"
set forced_prefix="$2"
if [ "$forced_prefix" = "rootmenu" ]; then
menu_prefix_str=""
else
menu_prefix_str="${finaloption_tab_str}"
fi
source "${option_cfg}"
menuentry "${menu_prefix_str}${option_title}" "${option_cfg}" {
set chosen=""
export chosen
set sourced_cfgs="${2}"
export sourced_cfgs
configfile "${prefix}/processenable.cfg"
}
}
function submenu_title {
menuentry "${secondoption_prefixtab_str}${chosen}${secondoption_postfixtab_str}" {
sleep 1s
}
}
# Timeout for menu
set timeout=10
# Set default boot entry as Entry number 2 (counting from 0)
set default=2
# Init Super Grub2 Disk variables
insmod regexp
regexp -s "sg2d_dev_name" '^\((.*)\).*$' "$prefix"
rmmod regexp
export sg2d_dev_name
# Get the version number for this Super GRUB2 Disk release
source "${prefix}/version.cfg"
# Get design variables
source "${prefix}/design.cfg"
menuentry " ====---==- Super Grub2 Disk $sgrub_version -==---==== " {
# Set pager=1 so ls output doesn't scroll past the top of the screen
# but restore $pager to its previous value when finished
set oldpager="${pager}"
set pager=1
cat /boot/grub/AUTHORS
cat /boot/grub/COPYING
set pager="${oldpager}"
unset oldpager
echo $"Press escape to return to the main menu"
sleep --interruptible 9999
}
process_main_option "${prefix}/language_select.cfg"
process_enable "${prefix}/gen8.cfg" rootmenu
# Everything
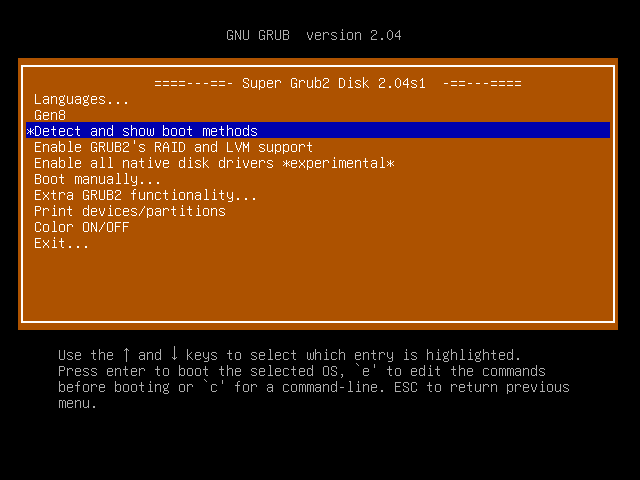
menuentry $"Detect and show boot methods" {
configfile "${prefix}/everything.cfg"
}
process_enable "${prefix}/enableraidlvm.cfg" rootmenu
process_enable "${prefix}/enablenative.cfg" rootmenu
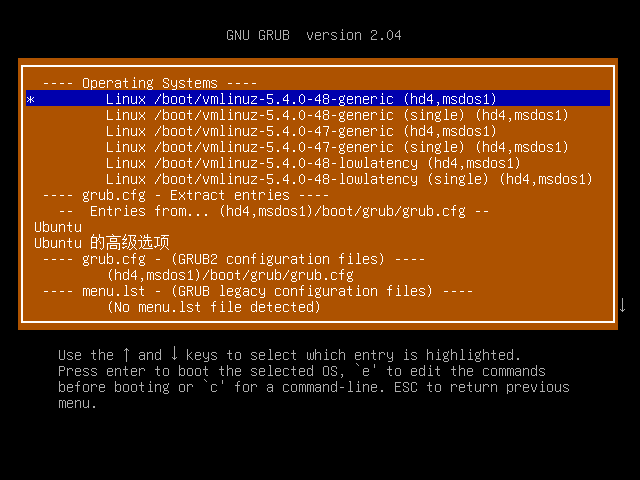
submenu $"Boot manually""${three_dots_str}" {
submenu_title
process_option "${prefix}/osdetect.cfg"
process_option "${prefix}/cfgextract.cfg"
process_option "${prefix}/cfgdetect.cfg"
process_option "${prefix}/menulstdetect.cfg"
process_option "${prefix}/grubdetect.cfg"
process_option "${prefix}/diskpartchainboot.cfg"
process_option "${prefix}/autoiso.cfg"
source "${prefix}/return.cfg"
}
submenu $"Extra GRUB2 functionality""${three_dots_str}" {
submenu_title
process_enable "${prefix}/enablelvm.cfg"
process_enable "${prefix}/enableraid.cfg"
process_enable "${prefix}/enableencrypted.cfg"
process_enable "${prefix}/enablenative.cfg"
process_enable "${prefix}/enableserial.cfg"
process_enable "${prefix}/searchfloppy.cfg"
process_enable "${prefix}/searchcdrom.cfg"
process_enable "${prefix}/searchsgd.cfg"
source "${prefix}/return.cfg"
}
menuentry $"Print devices/partitions" {
# Set pager=1 so ls output doesn't scroll past the top of the screen
# but restore $pager to its previous value when finished
set oldpager="${pager}"
set pager=1
ls -l
set pager="${oldpager}"
unset oldpager
echo $"Press escape to return to the main menu"
sleep --interruptible 9999
}
menuentry $"Color ON/OFF" {
if [ "$bwcolor" = 'yes' ]; then
bwcolor=no
else
bwcolor=yes
fi
set_sgd_colors
}
submenu $"Exit""${three_dots_str}" {
submenu_title
process_option "${prefix}/halt.cfg"
process_option "${prefix}/reboot.cfg"
source "${prefix}/return.cfg"
}
# If it exists, source $prefix/sgd_custom.cfg. This follows the same idea as
# grub-mkconfig generated grub.cfg files sourcing $prefix/custom.cfg, though
# it's less needed here since one could add custom code to this file directly
# whereas their distro might automatically overwrite /boot/grub/grub.cfg on
# kernel upgrades. The main motivation for adding this was the vmtest script
# which I use heavily during Super GRUB2 Disk development, but this feature
# might also be useful to others.
if [ -e "$prefix/sgd_custom.cfg" ]; then
source "$prefix/sgd_custom.cfg"
fi