简介
有些软件可能要求系统的 Glibc 高于某个版本才可以正常运行。如果您的 Glibc 低于要求的版本,为了运行这些软件,您就不得不升级您的 Glibc 了 。您可以寻找已经编译好的 rpm 包或者使用源代码的方式升级 Glibc。
使用源代码方式升级 Glibc 是需要小心考虑的事情,因为整个系统几乎所有应用程序都依赖于原有的动态库,升级的时候,执行"make install"命令会打断旧的动态库链接,改为指向新的库文件。在这个过程中,不同的链接指向新旧不同版本的库文件,很容易导致系统崩溃,崩溃后,一般是无法重新启动的。
笔者使用的Linux发行版本是Mandriva Linux release 2006.0,其Glibc版本是2.3.5,内核版本是2.6.12-12mdk。由于某些需要,笔者必须升级原来的Glibc到更高的版本。经过实 践,成功使用源代码的方式安全地把Glibc从2.3.5升级到2.6。使用相同的方法,也能成功升级到Glibc2.4或Glibc2.5。成功升级 后,还可以在新旧不同版本的Glibc之间自由切换。
如果您需要阅读有关升级Glibc的文档,可以阅读Glibc 2 HOWTO文档,该文论述了如何从libc5升级到libc6,但是现在的Linux发行版的Glibc都已经使用libc6,更多的需要是在libc6 的范围内,从低版本升级到更高的版本。另外您可以阅读Linux From Scratch项目有关如何安装Glibc的文档。笔者认为最有必要阅读的是Glibc源程序目录树下的INSTALL和FAQ文档,INSTALL详细 描述了有关各编译选项的具体作用,FAQ回答了很多具体的问题。
升级Glibc的流程
为了安全升级Glibc,在升级前必须做好详细的部署和备份,即使是升级失败,系统也要能够还原为原来的状态。升级Glibc失败后,一般是无法重新启动系统的,必须使用另外一个可以启动计算机的Linux系统启动,挂载升级失败的根文件系统,恢复系统的Glibc为原来的状态。因此,准备另外一个可以启动 的Linux系统,是必需的。
准备好另外一个可以启动的Linux系统后,接下来的工作是编译Glibc。编译前要执行"configure"命令,用户可以根据自己的需要,加入不同的编译选项,编译选项在INSTLL文件里有详细的说明。如果是升级当前的Glibc, 必须使用--prefix=/usr选项,该选项指定当前即将编译的Glibc作为系统的标准动态库,安装的时候,Glibc会修改/lib,/usr等 目录下的文件和链接。如果--prefix不是指向/usr,譬如--prefix=/glibc, 安装的时候,Glibc只会在/glibc目录下生成目录,文件以及链接,安装后的Glibc不会成为系统的标准动态库。如果不指定 --prefix,Glibc缺省认为--prefix=/usr/local,安装后的Glibc也不会成为系统的标准动态库。编译Glibc的时候需 要使用Linux内核的头文件,如果内核的头文件太旧,执行"make"的时候,可能会失败,这时可以在configure的时候,使用--with- headers选项指定新内核的头文件的所在目录。笔者的Mandriva Linux release 2006.0的内核头文件就不能令Glibc2.6成功编译,但是却能令Glibc2.4和Glibc2.5成功编译,使用--with-headers 指向新内核的头文件后,Glibc2.6也能成功编译,下文将会有详细叙述。
Glibc安装的时候,会直接修改/lib,/usr/lib等目录下的文件和链接,为了在升级失败的情况下能够恢复系统的Glibc为原来状态,在安装新版本的Glibc之前必须对一些重要目录进行备份,至于哪些目录需要做备份,下文将会有叙述。
备份好重要目录后就可以安装Glibc了,必须由root用户执行make install命令,不同的Linux发行版,可能会有不同的结果。笔者使用的Mandriva Linux release 2006.0在这个过程中会出现错误,并且输入任何命令都无效,重新启动也无法再次进入Linux系统。出现的这样的错误是由于Coreutils的命令 都是依赖于/usr/tls/目录下的链接文件,这些链接文件都指向原来的Glibc动态库文件,而/lib/ld-linux.so.2已经被改为指向 新版本的Glibc动态库文件了,这些重要链接分别指向新旧不同版本的库文件,导致了执行Coreutils的命令无效。这个时候,就要用另外一个 Linux系统启动,把/usr/tls/目录下的链接修改为指向新版本的Glibc的库文件。
经过上述修改,重新启动计算机,如果能重新 进入原Linux系统,表明到目前为止升级过程都是正确的。这个时候,要再执行一次"make install"重新安装Glibc,正常情况下,这次不会出现任何错误,安装结束的时候,Glibc会给出安装成功的消息。如果修改/lib/tls /下的链接后重新启动计算机仍然不能进入原Linux系统,表明这次升级失败,只能再次使用另外一个Linux系统启动,挂载升级失败的根文件系统,把先前备份好的重要目录恢复为原来的名字,经过这样的恢复,一般是可以重新启动升级失败的Linux系统的。
升级的最后一步是执行"make localedata/install-locales"命令安装时区和地区数据库。
图一:升级Glibc的流程图
注意
本文介绍的方法在升级过程中会出现一次链接错误,系统无法输入命令,重新启动也无法进入Linux,必须使用另外一个Linux系统启动,并挂载原根文件系 统,修正在升级过程中产生的错误链接,然后才能继续升级。因此在升级之前,一定要先确保拥有另外一个可启动的Linux系统。此外,还要备份下文将会论述 的一些重要目录,如果最终升级失败,需要用另外一个Linux系统启动,恢复原Linux系统的Glibc为原来的版本。
建议在升级之前,详细阅读Glibc源代码包内的INSTALL和FAQ文件。
升级过程
本文假设进行编译的用户名字是xyz,用户目录是/home/xyz/,所有源代码都在/home/xyz/build/目录下编译。所有源代码压缩包都已 经拷贝到/home/xyz/build/目录下。升级Glibc的Linux系统的根文件系统使用hda5分区,其文件系统格式为xfs。
1 准备另外一个可启动的Linux系统
准备另外一个可启动的Linux系统的方法有很多,可以在硬盘上安装另外一个Linux发行版,可以在DOS环境下使用loadlin.exe启动一个 Linux系统,最简单的方式是使用Live CD,从光驱启动。无论使用什么形式,它都必须能挂载需要升级Glibc的根文件系统。
如果选择Live CD启动,Knoppix是一个很好的选择。您可以从Knoppix的网站下载iso文件,烧制成启动CD,也可以把Knoppix的系统文件拷贝到硬盘 上,在DOS环境下,执行loadlin.exe启动。笔者使用了Knoppix 5.0.1,制作成Live CD启动。参考资料有介绍如何使用 Knoppix 进行系统恢复。
2 编译
Glibc的编译安装与一般的软件很类似,都是要经过configure,make和make install三个阶段。Glibc不能在源代码目录下编译,必须在一个空目录下编译。
编译Glibc是需要内核头文件的,笔者的Mandriva Linux release 2006.0的内核版本是2.6.12-12mdk,可以直接使用该版本内核的头文件升级到Glibc2.4 和Glibc2.5。如果升级到Glibc2.6,在make过程中,会出现以下错误:
|
|
libc_pic.os: In function `sync_file_range': : undefined reference to `.Lpseudo_end' collect2: ld returned 1 exit status |
这是由于2.6.12-12mdk的内核头文件太旧,为了顺利编译Glibc2.6,必须使用新的内核头文件。
2.1 编译Glibc2.4或Glibc2.5
如果要升级Glibc到2.4或2.5,configure的时候只需要--prefix=/usr一个选项,意思是该Glibc将会作为系统的标准动态库。
以升级到Glibc2.5为例,执行以下命令进行编译:
|
|
$ cd ~/build $ tar xjf glibc-2.5.tar.bz2 $ mkdir glibc-2.5-build $ cd glibc-2.5-build $ ../glibc-2.5/configure --prefix=/usr $ make |
glibc-2.5.tar.bz2是Glibc2.5的源代码压缩包,执行"tar xjf glibc-2.5.tar.bz2"命令后,在~/build/目录下产生了glibc-2.5目录树,Glibc2.5的源代码就在这个目录里面。 Glibc不能在源代码目录下编译,因此执行了"mkdir glibc-2.5-build"命令,生成glibc-2.5-build目录,编译Glibc2.5时产生的文件,保存在这个目录下。如果顺利,将会成功编译,不会出现错误信息。
2.2 编译Glibc2.6
如果您打算升级到 Glibc2.6,使用版本为2.6.12-12mdk的内核头文件是不能成功编译的,必须使用新的内核头文件。configure的时候使用 --with-headers选项指向新的内核头文件的目录。Glibc的FAQ文档明确指出最好使用最新版本的内核头文件,而且编译时需要的内核头文件 的版本不需要与当前正在运行的内核版本一致。笔者试验了版本为linux-2.6.20.7和linux-2.6.18两个版本的内核头文件,编译时系统 运行的内核版本是2.6.12-12mdk,都可以成功编译Glibc2.6。
为了使用新版本的内核头文件,解开新版本的内核压缩包后,在源代码目录下执行"make menuconfig",这将会进入内核的设置页面,不需要作任何处理,直接退出并保存。然后执行"make",不需要等待make完毕,一开始看到
|
|
SYMLINK include/asm -> include/asm-i386 |
就可以按下ctrl+c停止编译内核。执行"make"的目的是在内核源代码目录树内生成一些重要的文件和软链接,其中在include/目录下产生一个名为asm的软链接指向asm-i386目录,没有这个链接,Glibc2.6是无法编译的。
假设使用linux-2.6.20.7的内核头文件,执行以下命令:
|
|
$ cd ~/build $ tar xjf linux-2.6.20.7.tar.bz2 $ cd linux-2.6.20.7 $ make menuconfig $ make |
linux-2.6.20.7.tar.bz2是2.6.20.7版本的Linux内核源代码压缩包,执 行"tar xjf linux-2.6.20.7.tar.bz2"命令后,将会产生linux-2.6.20.7目录,Linux内核的源代码都在这个目录下,其中内核头 文件在linux-2.6.20.7/include/下。确保linux-2.6.20.7/include/asm已经产生后,就可以停止内核的编 译,然后进行Glibc2.6的编译:
|
|
$ cd ~/build $ tar xjf glibc-2.6.tar.bz2 $ mkdir glibc-2.6-build $ cd glibc-2.6-build $ ../glibc-2.6/configure --prefix=/usr --with-headers=~/build/linux-2.6.20.7/include $ make |
glibc-2.6.tar.bz2是Glibc2.6的源代码压缩包,执行"tar xjf glibc-2.6.tar.bz2"命令后,在~/build/目录下产生了glibc-2.6目录树。
如果您的系统当前运行的内核已经升级到比较新的版本,例如2.6.20.7,configure的时候,就不需要--with-headers选项了,与 Glibc2.4或Glibc2.5的configure命令一样,只需要--prefix=/usr选项就可以了,但是前提条件是/lib /modules/uname -r/source指向内核的源程序目录,您可以用以下命令查看它指向哪里:
|
|
$ ls -l /lib/modules/`uname -r`/ |
3.make install前的准备工作
3.1 哪些目录需要备份?
安装Glibc前必须备份好原来的系统动态库,一旦安装失败,使用另外一个Linux系统启动,挂载升级失败的根文件系统,还原Glibc为原来的状态。可是哪些目录需要备份?Glibc在安装的时候,将会修改哪个目录下的文件?
Glibc 在安装时可以指定install_root选项,命令Glibc把该选项指向的目录作为根,文件都安装到这个目录下,通过观察Glibc在这个目录里生成了什么目录和文件,我们就可以知道Glibc在安装的时候到底会修改哪些目录了。假设安装到~/build/system_fake_root上:
|
|
$ cd ~/build $ cd glibc-2.6-build $ make install install_root=~/build/system_fake_root |
安装后:
|
|
$ ls ~/build/system_fake_root etc/ lib/ sbin/ usr/ |
可以看出,Glibc的make install命令会修改/etc,/lib,/sbin和/usr目录下的文件。这里最重要的是/lib和/usr。一般来说/usr目录下有很多文件,占用硬盘空间很大,实际也不需要对整个/usr目录备份,使用以下命令查看Glibc会修改/usr/下的哪些目录:
|
|
$ ls ~/build/system_fake_root/usr bin/ include/ info/ lib/ libexec/ sbin/ share/ |
经分析,笔者选择了备份/lib,/usr/lib,/usr/include,/usr/sbin和/usr/bin。您当然可以备份更多的目录,不过笔者发现备份上述5个目录已经可以恢复系统的Glibc为原来的版本了。
3.2 备份目录
使用su命令切换为root。执行:
|
|
# cp -a /lib /lib.2.3.5 # cd /usr # cp -a lib lib.2.3.5 # cp -a bin bin.2.3.5 # cp -a sbin sbin.2.3.5 # cp -a include include.2.3.5 |
经过以上步骤,就备份了以后还原用的目录。备份的目录名字使用原目录名后加上.2.3.5后缀,目的是区分不同的Glibc版本目录。
3.3 如何还原系统的Glibc
如果升级最终失败,导致系统无法启动,就必须使用另外一个Linux系统启动,还原上述备份的目录为原来的名字。以笔者的系统为例,升级失败的根文件系统使用hda5分区,其文件系统格式为xfs,将被挂载到/mnt/m1目录。使用Knoppix 5.0.1 Live CD启动后,打开一个控制台,执行"su"命令切换为root用户,执行以下命令
|
|
# cd /mnt # mkdir m1 # mount -t xfs /dev/hda5 /mnt/m1 # cd /mnt/m1 # rm -fr lib # mv lib.2.3.5 lib # cd usr # rm -fr lib bin sbin include # mv lib.2.3.5 lib # mv bin.2.3.5 bin # mv sbin.2.3.5 sbin # mv include.2.3.5 include |
执行上述命令后,Glibc已经被恢复为原来的版本,系统应该可以正常启动。
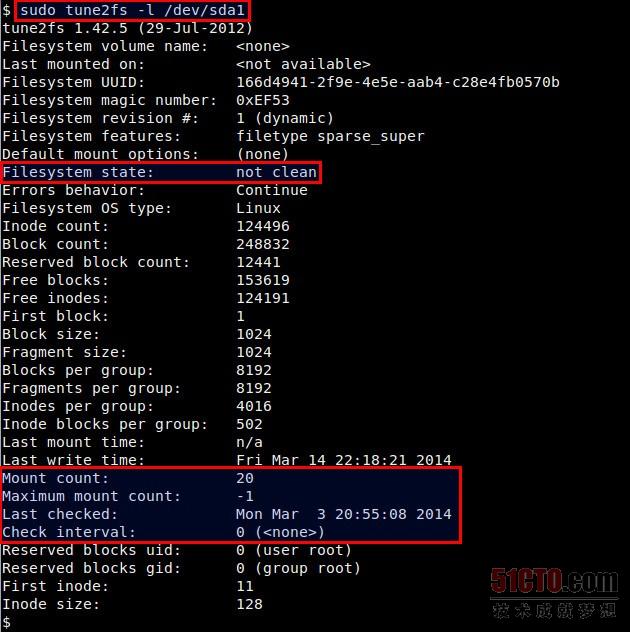
3.4 如何知道当前的Glibc版本
Mandriva Linux release 2006.0的动态库是Glibc2.3.5。执行"/lib/libc.so.6"可以知道当前的Glibc是什么版本:
1 2 3 4 5 6 7 8 9 10 11 12 13 14 15 16 17 18 19 |
$ /lib/libc.so.6 GNU C Library stable release version 2.3.5, by Roland McGrath et al. Copyright (C) 2005 Free Software Foundation, Inc. This is free software; see the source for copying conditions. There is NO warranty; not even for MERCHANTABILITY or FITNESS FOR A PARTICULAR PURPOSE. Compiled by GNU CC version 4.0.1 (4.0.1-2mdk for Mandriva Linux release 2006.0). Compiled on a Linux 2.6.12 system on 2005-08-30. Available extensions: GNU libio by Per Bothner crypt add-on version 2.1 by Michael Glad and others linuxthreads-0.10 by Xavier Leroy BIND-8.2.3-T5B NIS(YP)/NIS+ NSS modules 0.19 by Thorsten Kukuk Glibc-2.0 compatibility add-on by Cristian Gafton libthread_db work sponsored by Alpha Processor Inc Thread-local storage support included. For bug reporting instructions, please see: <http://www.gnu.org/software/libc/bugs.html>. |
从以上输出可以看到,当前系统的Glibc版本是2.3.5,使用Gcc4.0.1编译,编译时运行的Linux内核版本是2.6.12。
Glibc的FAQ文档给出以下程序用于查看当前的Glibc的版本:
|
|
#include <stdio.h> #include <gnu/libc-version.h> int main (void) { puts (gnu_get_libc_version ()); return 0; } |
把上述程序写到chk_lib_v.c文件,执行以下命令编译:
|
|
gcc -o chk_lib_v chk_lib_v.c |
执行chk_lib_v后有以下输出:
3.5 注意Coreutils依赖的动态库情况
Mandriva Linux release 2006.0系统的/lib/目录下有个tls目录。该目录下的文件是能否成功升级Glibc到2.6的关键。使用ldd命令查看Coreutils的应用程序依赖的动态库情况可以发现:
|
|
$ ldd /bin/ls linux-gate.so.1 => (0xffffe000) librt.so.1 => /lib/tls/librt.so.1 (0xb7f60000) libtermcap.so.2 => /lib/libtermcap.so.2 (0xb7f5b000) libacl.so.1 => /lib/libacl.so.1 (0xb7f54000) libc.so.6 => /lib/tls/libc.so.6 (0xb7e26000) libpthread.so.0 => /lib/tls/libpthread.so.0 (0xb7e14000) /lib/ld-linux.so.2 (0xb7f89000) libattr.so.1 => /lib/libattr.so.1 (0xb7e10000) |
请注意上述的librt.so.1,libc.so.6和libpthread.so.0,它们都是位于/lib/tls/,而不是/lib/。换言之,ls的执行,依赖于/lib/tls目录下的某些动态链接库文件。tls是thread-local storage,当不同的线程使用同一个全局变量的时候,各线程将会在本地保留该变量的备份,查阅参考资料可以了解更多有关tls的信息。 Glibc2.4,Glibc2.5和Glibc2.6都支持tls。
/lib/tls/下有以下文件:
|
|
$ ls -l /lib/tls 总用量 1488 -rw-r--r-- 1 root root 1229976 8月 30 2005 libc-2.3.5.so lrwxrwxrwx 1 root root 13 5月 12 21:25 libc.so.6 -> libc-2.3.5.so -rw-r--r-- 1 root root 145176 8月 30 2005 libm-2.3.5.so lrwxrwxrwx 1 root root 13 5月 12 21:25 libm.so.6 -> libm-2.3.5.so -rw-r--r-- 1 root root 84987 8月 30 2005 libpthread-0.10.so lrwxrwxrwx 1 root root 18 5月 12 21:25 libpthread.so.0 -> libpthread-0.10.so -rw-r--r-- 1 root root 30620 8月 30 2005 librt-2.3.5.so lrwxrwxrwx 1 root root 14 5月 12 21:25 librt.so.1 -> librt-2.3.5.so -rw-r--r-- 1 root root 22108 8月 30 2005 libthread_db-1.0.so lrwxrwxrwx 1 root root 19 5月 12 21:25 libthread_db.so.1 -> libthread_db-1.0.so |
/lib/tls目录下的文件是一些很重要的动态库及软连接,其中包括libc.so.6,它们都是指向2.3.5版本的动态库文件。
4. 安装Glibc2.6
4.1 第一次make install
切换到root用户,执行make install就开始安装Glibc了:
|
|
$ cd ~/build $ cd glibc-2.6-build $ su # make install |
在安装过程中,将会出现如下错误:
|
|
/home/xyz/build/glibc-2.6-build/elf/sln /home/xyz/build/glibc-2.6-build/elf/symlink.list rm -f /home/xyz/build/glibc-2.6-build/elf/symlink.list rm: relocation error: /lib/tls/libc.so.6: symbol _dl_out_of_memory, \ version GLIBC_PRIVATE not defined in file ld-linux.so.2 with link time reference make[1]: *** [install-symbolic-link] Error 127 make[1]: Leaving directory `/home/xyz/build/glibc-2.6' make: *** [install] Error 2 |
安装失败后,输入任何命令都是无效的,系统只会重 复"relocation error: /lib/tls/libc.so.6: symbol _dl_out_of_memory, version GLIBC_PRIVATE not defined in file ld-linux.so.2 with link time reference"的错误信息,重新启动计算机在启动中就会失败,根本无法进入原Linux系统。
出现这样的错误的原因是 Coreutils的应用程序都依赖于/lib/tls/下的动态库,在make install的时候,/lib/ld-linux.so.2从原来指向ld-2.3.5.so被改为指向ld-2.6.so,但这个时候/lib /tls/libc.so.6指向的仍然是/lib/tls/libc-2.3.5.so。/lib/ld-linux.so.2和/lib/tls /libc.so.6各自指向不同版本的库文件导致了Coreutils的命令执行失败,从而make install也失败。
这个时候, 就要用另外一个Linux系统启动,挂载升级失败的根文件系统,把原根文件系统的/lib/tls/下的链接全部改为指向2.6版本的库文件,具体就是 /lib/tls/libc.so.6,/lib/tls/libm.so.6, /lib/tls/libpthread.so.0和/lib/tls/librt.so.1这4个软链接分别指向libc-2.6.so, libm-2.6.so,libpthread-2.6.so和librt-2.6.so。libthread_db.so.1仍然是指向 libthread_db-1.0.so,但这个时候/lib/libthread_db-1.0.so已经是Glibc2.6版本的了,原/lib /tls/libthread_db-1.0.so必须被替换为Glibc2.6版本的libthread_db-1.0.so。
笔者使用Knoppix 5.0.1 Live CD启动计算机,启动后,打开一个控制台,执行"su"命令切换为root,执行以下命令:
|
|
# cd /mnt # mkdir m1 # mount -t xfs /dev/hda5 /mnt/m1 # cd /mnt/m1/lib/tls # cp -f ../libthread_db-1.0.so . # cp ../libc-2.6.so . # cp ../libm-2.6.so . # cp ../libpthread-2.6.so . # cp ../librt-2.6.so . # ln -sf libc-2.6.so libc.so.6 # ln -sf libm-2.6.so libm.so.6 # ln -sf libpthread-2.6.so libpthread.so.0 # ln -sf librt-2.6.so librt.so.1 |
上述命令就是把原根文件系统/lib/下的libc- 2.6.so, libm-2.6.so,libpthread-2.6.so和librt-2.6.so拷贝到/lib/tls/下,并把/lib/tls /libc.so.6,/lib/tls/libm.so.6,/lib/tls/libpthread.so.0和/lib/tls /librt.so.1这4个软链接从原来指向2.3.5版本的库文件改为指向最新的2.6版本的库文件。原/lib/tls /libthread_db-1.0.so下的文件被/lib/libthread_db-1.0.so替换。
4.2 第二次make install
修改了/lib/tls/下的链接和文件后,就可以重新启动计算机,进入原Linux系统,这次将会正常启动,登陆后,执行Coreutils的命令,例如 ls,已经不会出现"relocation error: /lib/tls/libc.so.6: symbol _dl_out_of_memory, version GLIBC_PRIVATE not defined in file ld-linux.so.2 with link time reference"的错误信息。由于Glibc2.6没有彻底安装完毕,我们还要重新执行一次make install:
|
|
$ cd ~/build $ cd glibc-2.6-build $ su # make install |
这次make install将不会出现错误,如果安装成功,到最后会有以下信息提示:
|
|
Your new glibc installation seems to be ok. make[1]: Leaving directory `/home/xyz/build/glibc-2.6' |
执行/lib/libc.so.6查看Glibc的版本:
1 2 3 4 5 6 7 8 9 10 11 12 13 14 15 16 17 18 19 |
$ /lib/libc.so.6 GNU C Library stable release version 2.6, by Roland McGrath et al. Copyright (C) 2007 Free Software Foundation, Inc. This is free software; see the source for copying conditions. There is NO warranty; not even for MERCHANTABILITY or FITNESS FOR A PARTICULAR PURPOSE. Compiled by GNU CC version 4.0.1 (4.0.1-5mdk for Mandriva Linux release 2006.0). Compiled on a Linux >>2.6.12-12mdk<< system on 2007-05-26. Available extensions: crypt add-on version 2.1 by Michael Glad and others Native POSIX Threads Library by Ulrich Drepper et al BIND-8.2.3-T5B For bug reporting instructions, please see: <http://www.gnu.org/software/libc/bugs.html>. 执行chk_lib_v: $ ./chk_lib_v 2.6 |
这都表明当前系统的动态库已经使用了Glibc2.6。
如果把/lib/tls/下的链接改为指向2.6版本的库文件后,重新启动计算机仍然无法进入原Linux系统,就说明升级Glibc失败,只能再次使用另外一个Linux系统启动,恢复原系统的Glibc为原来的版本,请参考3.3节。
4.3 安装时区和地区数据库
虽然现在系统已经使用Glibc2.6,但是在X Window下,使用fcitx中文输入法的用户会发现按下ctrl+space不会弹出中文输入框。这是因为新的Glibc2.6还没安装时区和地区数据库。执行以下命令:
|
|
$ cd ~/build $ cd glibc-2.6-build $ su # make localedata/install-locales |
上述命令将会在/usr/lib/locale/下生成一个名为"locale-archive"的文件。重新启动X Window, 按下ctrl+space就可以调出中文输入框并输入中文了。
至此,升级Glibc完毕。笔者在升级到了Glibc2.6的Linux系统上使用了 VMware,Openoffice,Mplayer,Skype,Firefox,Thunderbird,Vim,Fcitx等一系列软件一段时间, 未发现由于升级了Glibc而导致的错误出现。
回到Glibc2.3.5 成功升级后,想在Glibc2.6和原来的Glibc2.3.5之间切换是很容易的。因为安装前对Glibc2.3.5的重要目录进行了备份,只需使用另 外一个Linux启动,挂载原Linux的根文件系统,把升级前备份好的/lib.2.3.5等目录的名字改为/lib等原来的名字即可。
使用Knoppix 5.0.1 Live CD启动,打开一个控制台,执行"su"命令切换为root,执行以下命令:
|
|
# cd /mnt # mkdir m1 # mount -t xfs /dev/hda5 /mnt/m1 # cd /mnt/m1 # mv lib lib.2.6 # mv lib.2.3.5 lib # cd usr # mv lib lib.2.6 # mv bin bin.2.6 # mv sbin sbin.2.6 # mv include include.2.6 # mv lib.2.3.5 lib # mv bin.2.3.5 bin # mv sbin.2.3.5 sbin # mv include.2.3.5 include |
重新启动,系统将会使用原来的Glibc2.3.5,Glibc2.6的目录备份为原目录名后加.2.6后缀。
总结
使用源代码升级Glibc,做好升级前的准备是最重要的。首先要准备好另外一个可以启动的,能挂载原根文件系统的Linux系统。其次是对/lib, /usr/lib,/usr/include,/usr/sbin,/usr/bin等目录进行备份。成功升级后,可以在高低两个版本的Glibc之间自 由切换。
升级前只要做好上述两个准备,升级系统的Glibc是安全的。
由于不同的Linux发行版的系统环境不一样,因此使用源代码升级Glibc的过程可能会有差异,为了成功升级,读者必须在升级过程中根据自己的系统的实际情况作相应的调整。
链接地址
http://www.ibm.com/developerworks/cn/linux/l-cn-glibc-upd/