pip是一个安装python库很方便的东西,类似yum,pip search pip install.
安装 pip
|
1 2 |
#https://github.com/pypa/get-pip $ curl https://bootstrap.pypa.io/get-pip.py | sudo python |
pip是一个安装python库很方便的东西,类似yum,pip search pip install.
安装 pip
|
1 2 |
#https://github.com/pypa/get-pip $ curl https://bootstrap.pypa.io/get-pip.py | sudo python |
Mac 10.9 版本下使用Gradle 编译 Android 项目,报告错误
|
1 |
Failure initializing default system SSL context |
使用 -debug 参数,得到的详细输出如下
|
1 2 3 4 5 6 7 8 9 |
2:34:15.273 [ERROR] [org.gradle.BuildExceptionReporter] at org.gradle.launcher.bootstrap.ProcessBootstrap.runNoExit(ProcessBootstrap.java:50) 22:34:15.278 [ERROR] [org.gradle.BuildExceptionReporter] at org.gradle.launcher.bootstrap.ProcessBootstrap.run(ProcessBootstrap.java:32) 22:34:15.279 [ERROR] [org.gradle.BuildExceptionReporter] at org.gradle.launcher.GradleMain.main(GradleMain.java:26) 22:34:15.281 [ERROR] [org.gradle.BuildExceptionReporter] Caused by: java.io.FileNotFoundException: /System/Library/Frameworks/JavaVM.framework/Versions/1.5.0/Home/lib/security/cacerts (No such file or directory) 22:34:15.284 [ERROR] [org.gradle.BuildExceptionReporter] at java.io.FileInputStream.open(Native Method) 22:34:15.285 [ERROR] [org.gradle.BuildExceptionReporter] at java.io.FileInputStream.<init>(FileInputStream.java:106) 22:34:15.286 [ERROR] [org.gradle.BuildExceptionReporter] at org.apache.http.conn.ssl.SSLSocketFactory.createSystemSSLContext(SSLSocketFactory.java:299) 22:34:15.288 [ERROR] [org.gradle.BuildExceptionReporter] at org.apache.http.conn.ssl.SSLSocketFactory.createSystemSSLContext(SSLSocketFactory.java:366) 22:34:15.289 [ERROR] [org.gradle.BuildExceptionReporter] ... 147 more |
可以看到,异常信息为
|
1 |
22:34:15.281 [ERROR] [org.gradle.BuildExceptionReporter] Caused by: java.io.FileNotFoundException: /System/Library/Frameworks/JavaVM.framework/Versions/1.5.0/Home/lib/security/cacerts (No such file or directory) |
到具体的目录下面去看,这个文件果然是不存在的,有些版本链接到了一个不存在的目录,这种情况一般是经历过系统升级,往往会造成这个现象,另外,就是系统安装的Java 是Apple 提供的 Java 版本,而不是 Orcale 官网下载的独立版本。
解决方法是可以到Orcale 官网下载最新版本的 Java ,安装替换即可解决问题。
在命令行下使用
|
1 |
$ brew install FORMULANAME |
就可以安装 FORMULANAME 对应的工具,它会处理好依赖关系,非常方便。默认情况下,安装最新版本。但是现在在使用 Gradle 的时候,最新版本的 Gradle 是1.10,但是编译Android 的项目失败,只能降级成 1.9 版本的才行,解决方法如下
1.查看 brew 支持哪些版本的 gradle
|
1 2 3 4 5 6 7 8 9 10 11 12 13 14 15 16 17 18 19 20 21 22 23 24 25 26 27 28 29 30 31 32 |
$ sudo brew versions gradle Warning: brew-versions is unsupported and may be removed soon. Please use the homebrew-versions tap instead: https://github.com/Homebrew/homebrew-versions 1.10 git checkout 2b10422 Library/Formula/gradle.rb 1.9 git checkout 5bab5e9 Library/Formula/gradle.rb 1.8 git checkout 9214e60 Library/Formula/gradle.rb 1.7 git checkout f826cc9 Library/Formula/gradle.rb 1.6 git checkout fff7c0b Library/Formula/gradle.rb 1.5 git checkout 57931e0 Library/Formula/gradle.rb 1.4 git checkout 0b7303a Library/Formula/gradle.rb 1.3 git checkout c259bda Library/Formula/gradle.rb 1.2 git checkout 9b7d294 Library/Formula/gradle.rb 1.1 git checkout 7941972 Library/Formula/gradle.rb 1.0 git checkout dff67fb Library/Formula/gradle.rb 1.0-rc-3 git checkout 5f9e348 Library/Formula/gradle.rb 1.0-rc-2 git checkout f72e33f Library/Formula/gradle.rb 1.0-rc-1 git checkout e2438cf Library/Formula/gradle.rb 1.0-milestone-9 git checkout c27c667 Library/Formula/gradle.rb 1.0-milestone-8a git checkout 69eb948 Library/Formula/gradle.rb 1.0-milestone-8 git checkout 34da975 Library/Formula/gradle.rb 1.0-milestone-7 git checkout 6a8c437 Library/Formula/gradle.rb 1.0-milestone-6 git checkout dae625d Library/Formula/gradle.rb 1.0-milestone-5 git checkout baff305 Library/Formula/gradle.rb 1.0-milestone-3 git checkout d9f2e06 Library/Formula/gradle.rb 1.0-milestone-4 git checkout 4b1230c Library/Formula/gradle.rb 1.0-milestone-2 git checkout 6801464 Library/Formula/gradle.rb 1.0-milestone-1 git checkout 0476235 Library/Formula/gradle.rb 0.9.2 git checkout 38b9338 Library/Formula/gradle.rb 0.9.1 git checkout f986d7d Library/Formula/gradle.rb 0.9 git checkout 45e09d7 Library/Formula/gradle.rb 0.8 git checkout e6f608f Library/Formula/gradle.rb |
可以看到,支持 1.9 版本的。
2. 进入 brew 所在的git仓库
|
1 |
$ cd `brew --prefix` |
3.复制粘贴刚才 brew versions gradle 命令的提示,我们需要1.9 版本的,因此执行
|
1 |
$ git checkout 5bab5e9 Library/Formula/gradle.rb |
此时,本地仓库中的gradle 就被替换成了 1.9 的链接地址信息。
4. 安装
|
1 2 |
$ sudo brew install gradle ==> Downloading http://services.gradle.org/distributions/gradle-1.9-bin.zip |
可以看到输出的信息已经是 1.9 的版本了。
使用 Gradle 升级到 1.10 版本,编译 Android 项目的时候报告类似如下的异常信息
|
1 2 3 4 5 6 7 8 9 |
15:35:52.069 [ERROR] [org.gradle.BuildExceptionReporter] Caused by: java.lang.NoClassDefFoundError: org/gradle/api/artifacts/result/ResolvedModuleVersionResult 15:35:52.073 [ERROR] [org.gradle.BuildExceptionReporter] at com.android.build.gradle.AppPlugin.$getStaticMetaClass(AppPlugin.groovy) 15:35:52.077 [ERROR] [org.gradle.BuildExceptionReporter] at com.android.build.gradle.BasePlugin.<init>(BasePlugin.groovy:1627) 15:35:52.101 [ERROR] [org.gradle.BuildExceptionReporter] at com.android.build.gradle.AppPlugin.<init>(AppPlugin.groovy:73) 15:35:52.105 [ERROR] [org.gradle.BuildExceptionReporter] at org.gradle.api.internal.DependencyInjectingInstantiator.newInstance(DependencyInjectingInstantiator.java:62) 15:35:52.123 [ERROR] [org.gradle.BuildExceptionReporter] at org.gradle.api.internal.plugins.DefaultPluginRegistry.loadPlugin(DefaultPluginRegistry.java:67) 15:35:52.132 [ERROR] [org.gradle.BuildExceptionReporter] ... 43 more 15:35:52.135 [ERROR] [org.gradle.BuildExceptionReporter] Caused by: java.lang.ClassNotFoundException: org.gradle.api.artifacts.result.ResolvedModuleVersionResult 15:35:52.157 [ERROR] [org.gradle.BuildExceptionReporter] ... 48 more |
搜索了一下,找到答案如下
|
1 2 3 4 5 |
请注意 ResolvedModuleVersionResult 是丢失在这里 http://www.gradle.org/docs/1.10/javadoc/org/gradle/api/artifacts/result/package-summary.html 但这里存在 http://www.gradle.org/docs/1.9/javadoc/org/gradle/api/artifacts/result/package-summary.html 所以降级到 1.9 就可以了 |
也就是说Gradle 1.9 以上的版本编译 Android 代码目前是存在问题的。
dante-server是一个很好的socks4/5代理服务器软件。
|
1 |
apt-get install dante-server |
|
1 2 |
useradd proxyuser passwd proxyuser |
|
1 |
sudo vim /etc/passwd |
将proxyuser的shell改成 /bin/false
|
1 2 |
sudo mv /etc/danted.conf /etc/danted.conf_old sudo vim /etc/danted.conf |
输入以下内容:
|
1 2 3 4 5 6 7 8 9 10 11 12 13 14 15 16 17 18 19 20 21 22 23 24 25 26 27 28 29 30 31 32 33 34 35 36 37 38 39 40 41 42 43 44 45 46 47 48 49 50 51 52 53 54 55 56 57 58 59 60 61 62 63 64 65 66 67 68 69 70 71 72 |
# #logoutput: stderr #logoutput: syslog logoutput: /var/log/sockd/sockd.log internal: 0.0.0.0 port = 10080 external: eth0 #method: username none #method: pam method: username user.privileged: root user.notprivileged: proxyuser user.libwrap: nobody compatibility: sameport compatibility: reuseaddr extension: bind client pass { from: 0.0.0.0/0 to: 0.0.0.0/0 log: connect disconnect error } pass { from: 0.0.0.0/0 to: 0.0.0.0/0 command: bind log: connect disconnect error } pass { from: 0.0.0.0/0 to: 0.0.0.0/0 command: bindreply udpreply log: connect error } pass { from: 0.0.0.0/0 to: 0.0.0.0/0 port 1-65535 protocol: tcp udp } pass { from: 0.0.0.0/0 to: 0.0.0.0/0 port 1-65535 command: udpassociate } #block { # from: 0.0.0.0/0 to: 0.0.0.0/0 port 1-65535 # protocol: tcp udp # log: connect erro #} |
|
1 |
mkdir /var/log/sockd |
|
1 |
/etc/init.d/danted start |
|
1 |
netstat -anp | grep 10080 |
现在你就可以使用socks5了
DELL E5400 笔记本,安装Ubuntu 13.10 ,今天突然发现,插入外置音响,耳机的时候,没有声音了,而内置的喇叭是正常的,网上查询了一下得到解决方法,目前仅仅针对IDT 92HD71B7X 芯片组,其他芯片组不保证能用。
查看声卡芯片组
|
1 |
cat /proc/asound/card0/codec#0 | grep Codec |
输出结果如果为
|
1 |
Codec: IDT 92HD71B7X |
则尝试本方法
|
1 |
sudo vim /etc/modprobe.d/alsa-base.conf |
如果文件存在,则在文件的最后增加
|
1 2 |
#for Codec: IDT 92HD71B7X options snd-hda-intel model=auto position_fix=0 |
重启机器,如果不想重启机器,可以尝试
|
1 |
sudo alsa force-reload |
注意,重启,或者强制声卡重新加载之后,可能声音被强制设置为静音了,因此,需要手动打开音量,这个要注意一下。
As long as I’ve been using a Mac I always understood that if you needed to set $JAVA_HOME for any program.
On my machine this points to the 1.6 JDK:
|
1 2 |
$ls -alh `whereis java` lrwxr-xr-x 1 root wheel 74B 10 24 16:19 /usr/bin/java -> /System/Library/Frameworks/JavaVM.framework/Versions/Current/Commands/java |
This was a bit surprising to me since I’ve actually got Java 7 installed on the machine as well so I’d assumed the symlink would have been changed:
|
1 2 3 4 |
$ java -version java version "1.7.0_09" Java(TM) SE Runtime Environment (build 1.7.0_09-b05) Java HotSpot(TM) 64-Bit Server VM (build 23.5-b02, mixed mode) |
Andres and I were looking at something around this yesterday and wanted to set $JAVA_HOME to the location of the 1.7 JDK on the system if it had been installed.
We eventually came across the following article which explains that you can use the /usr/libexec/java_homecommand line tool to do this.
For example, if we want to find where the 1.7 JDK is we could run the following:
|
1 2 |
$ /usr/libexec/java_home -v 1.7 /Library/Java/JavaVirtualMachines/jdk1.7.0_09.jdk/Contents/Home |
And if we want 1.6 the following does the trick:
|
1 2 |
$ /usr/libexec/java_home -v 1.6 /System/Library/Java/JavaVirtualMachines/1.6.0.jdk/Contents/Home |
We can also list all the JVMs installed on the machine:
|
1 2 3 4 5 6 |
$ /usr/libexec/java_home -V Matching Java Virtual Machines (2): 1.6.0_35-b10-428, x86_64: "Java SE 6" /Library/Java/JavaVirtualMachines/1.6.0_35-b10-428.jdk/Contents/Home 1.6.0_35-b10-428, i386: "Java SE 6" /Library/Java/JavaVirtualMachines/1.6.0_35-b10-428.jdk/Contents/Home /Library/Java/JavaVirtualMachines/1.6.0_35-b10-428.jdk/Contents/Home |
使用Ubuntu和Fedora的用户经常会在进入GNOME时出现
|
1 |
Could not update /home/$USER/.ICEauthority |
这样的提示。然后就不能正常进入GNOME了(之前在GNOME上的配置都消失了)
解决办法:以root的用户执行
|
1 2 |
chown $USER:$USER -R /home/$USER/ chmod 644 /home/$USER/.ICEauthority |
解决问题很简单,但为什么会出现这种情况呢?下面是我的一些个人理解
首先:先介绍下sudo和gksudo
sudo和gksudo都是使用root权限来执行应用,sudo执行程序时使用的是当前用户的配置和家目录,而gksudo使用的是root用户 的家目录和配置,一般情况下看不出什么区别,但是对于那些针对不同用户有不同的配置文件和表现形式的应用程序来说,这两种方式的结果区别就很明显了。比如 下面原文中举的firefox例子。在不通过终端运行程序时,sudo没有办法提供一个界面来输入管理员密码,比如在快捷方式中。还有些GUI程序只能用 gksudo。细心的朋友肯定发现了,在/root下并没有.ICEauthority。那么当用sudo运行程序之后,由于使用的是当前用户的配置和家 目录,
系统将整个家目录的所属者和所属组归属到root:root下,并将.ICEauthority的权限修改成600。故当再次以普通用户身份登入系统时,由于没有权限故无法读取用户的配置文件。根据上述分析,显然,当使用gksudo将能避免这种情况的发生。
一般情况下,可以这样,运行命令行程序时使用sudo,运行GUI程序时用gksudo。
下面是原文:
What’s the Issue?
Since most Ubuntu documentation asks you to use sudo even with graphical applications, I often get asked by Ubuntu users why I recommendgksudo or kdesu for graphical applications instead of sudo.
For example, a lot of guides (including the first book ever published about Ubuntu) will ask you to type this sort of command:
|
1 |
sudo gedit /etc/apt/sources.list |
I will always recommend, however, that people use instead this sort of command:
|
1 |
gksudo gedit /etc/apt/sources.list |
And reserve sudo for command-line applications, like so:
|
1 |
sudo nano /etc/apt/sources.list |
Why is it an issue?
Well, to be perfectly honest, most of the time it isn’t. For a lot of applications, you can run them the improper way—using sudo for graphical applications and see no adverse side effects.
1. There are other times, though, when side effects can be as mild as Firefox extensions not sticking or as extreme as as not being able to log in any more because the permissions on your .ICEauthority changed. You can read a full discussion on the issue here.
These errors occur because sometimes when sudo launches an application, it launches with root privileges but uses the user’s configuration file.

For example, if you launch Firefox with the command
|
1 |
gksudo firefox |
it uses root’s Firefox configuration file.
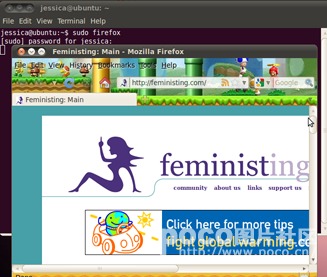
But if you launch Firefox with the command
|
1 |
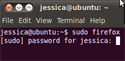
sudo firefox |
Change a few settings while launched as root, and you'll see if you dig into your Firefox profile that certain files are now owned by root.

it runs with root privileges but uses the user’s configuration file (in this case, you can see the homepage and theme are different).
2. Running graphical applications with sudo also has the downside of always having to be run from the terminal. If you don’t use the proper command—gksudo or kdesu, you will not be able to use the command as an icon launcher or keyboard shortcut because there will be no graphical dialogue box to enter your sudo password in.
3. There are also some graphical applications that simply will not run with the sudo command. Kate, for example, can be run as
|
1 |
kdesu kate |
but cannot be run as
|
1 |
sudo kate |
Why not make exceptions?
Bottom line: most of the time when you use sudo for graphical applications, it’s fine. Some of the time, though, it is not fine, and is, in fact, extremely bad.
If you made exceptions, you would have to give people a list of all the graphical applications that are okay to run as sudo and a list of all the graphical applications that must be run as gksudo or kdesu.
Why make a list that needs to be compiled and updated, that most people won’t refer to, and that is completely unnecessary? Just be consistent in suggesting good practice: gksudo and kdesu for graphical applications. sudo for command-line applications.
But gksudo sometimes gives me an error… even though it appears to work…
You may notice that even though gksudo is the proper way to launch graphical applications, if you launch a gksudo application it will sometimes give you what appears to be an error. This, for example:
|
1 2 |
(gedit:####): GnomeUI-WARNING **: While connecting to session manager: Authentication Rejected, reason : None of the authentication protocols specified are supported and host-based authentication failed. |
or these
|
1 2 3 |
Initializing nautilus-gdu extension Nautilus-Share-Message: Called "net usershare info" but it failed: 'net usershare' returned error 255: net usershare: cannot open usershare directory /var/lib/samba/usershares. Error No such file or directory Please ask your system administrator to enable user sharing. |
That is not a real error, and there’s already been a bug report filed on the message appearing. The developers have seen the bug and labeled it a low priority. In the meantime, just ignore the message and keep encouraging people to not use sudo for graphical applications so they won’t potentially mess up their ~/.ICEauthority and other user configuration files.
android-ndk-r9c 下编译时候报告
|
1 |
error trying to exec 'cc1': execvp: No such file or directory |
修改
|
1 |
CC="$NDK_ROOT/toolchains/arm-linux-androideabi-4.8/prebuilt/linux-x86_64/arm-linux-androideabi/bin/gcc" |
为
|
1 |
CC="$NDK_ROOT/toolchains/arm-linux-androideabi-4.8/prebuilt/linux-x86_64/bin/arm-linux-androideabi-gcc" |
即可。
Ubuntu 中,有时候编译器安装的太多版本的情况下,如果只设置PATH 到 toolchains 目录,CC只写编译器名字,让系统根据PATH中的路径来自动寻找,有时候是无效的,此时需要直接指定CC的绝对路径就可以了。
http://www.cnblogs.com/pengwang/archive/2013/03/06/2945720.html
arm-eabi-gcc: error trying to exec 'cc1': execvp: No such file or directory arm-eabi-gcc: error trying to exec 'cc1': execvp: No such file or directory
在使用ndk编译本地文件时出错,最后发现是交叉编译工具的权限问题,chmod +x 就可以了我的NDK版本是android-ndk-r5b,CC1在android-ndk-r5b/toolchains/arm- linux-androideabi-4.4.3/prebuilt/linux-x86/libexec/gcc/arm-linux- androideabi/4.4.3目录下面。
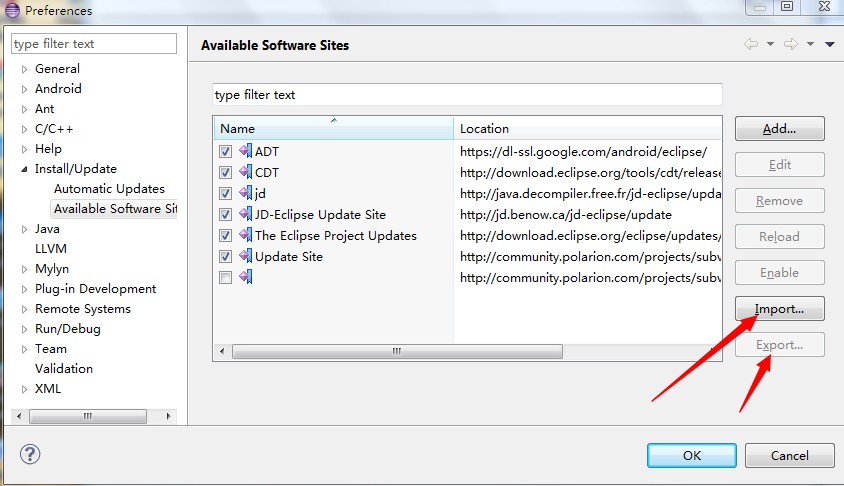
Eclipse 中点击更新可能会突然弹出一个类似“No repository found containing”的错误提示信息:
|
1 2 3 4 |
An error occurred while collecting items to be installed session context was:(profile=epp.package.java,phase=org.eclipse.equinox.internal.p2.engine.phases.Collect, operand=, action=). No repository found containing: osgi.bundle,com.android.ide.eclipse.traceview,20.0.3.v201208082019-427395 No repository found containing:org.eclipse.update.feature,com.android.ide.eclipse.traceview,20.0.3.v201208082019- |
我们可以这样处理:
点击“Available Software Sites”(Work with下面),就会弹出一个配置站点信息列表,选中全部列表,再点击“Export”导出,保存为“bookmarks.xml”,回到配置站点信息列表,选中全部,点击“Remove”移除,然后又回到配置站点信息列表,点击“Import”把“bookmarks.xml”文件导入