Apache Nutch是一个用Java编写的开源网络爬虫。通过它,我们就能够自动地找到网页中的超链接,从而极大地减轻了维护工作的负担,例如检查那些已经断开了的链接,或是对所有已经访问过的网页创建一个副本以便用于搜索。接下来就是Apache Solr所要做的。Apache Solr是一个开源的全文搜索框架,通过Apache Solr我们能够搜索Apache Nutch已经访问过的网页。
Apache Nutch对于Apache Solr已经支持得很好,这大大简化了Apache Nutch与Apache Solr的整合。这也消除了过去依赖于Apache Tomcat来运行老的Nutch网络应用以及依赖于Apache Lucene来进行索引的麻烦。
目前官方2.x只提供了源码下载,不再提供编译发布版本,需要用户自己去编译。
请先参考Ubuntu 15.10,12.04 安装Apache Solr 4.10.4 安装Apache Solr。(注意,目前的Apache Nutch只能支持到Apache Solr 4.10.4版本,因此不能安装高于这个版本的Apache Solr,实验后确定目前不能使用高于这个版本的Apache Solr)
然后参考Ubuntu 15.10,12.04 单机安装并配置Apache HBase安装HBase。
之后再进行后续的操作。
1.安装Java,并设置JAVA_HOME
|
1 2 3 4 5 |
$sudo apt-get install openjdk-7-jre $sudo apt-get install openjdk-7-jdk $export JAVA_HOME=$(readlink -f `which java` | xargs dirname | xargs dirname | xargs dirname) |
建议在系统的环境变量中增加"JAVA_HOME"环境变量,也可以写在~/bashrc里面。
|
1 |
$sudo vim /etc/profile |
文件尾部增加
|
1 |
export JAVA_HOME=$(readlink -f `which java` | xargs dirname | xargs dirname | xargs dirname) |
然后,重启机器。
2.下载并安装Nutch
|
1 2 3 4 5 |
$wget http://apache.opencas.org/nutch/2.3.1/apache-nutch-2.3.1-src.tar.gz $sudo tar -zxvf apache-nutch-2.3.1-src.tar.gz -C /var/opt $sudo ln -s /var/opt/apache-nutch-2.3.1/ /var/opt/apache-nutch |
3.编译Nutch
安装ant
|
1 |
$sudo apt-get install ant |
配置Nutch需要使用的数据库,由于我们会与Apache Solr整合,因此需要配置Nutch编译的时候打开Apache Solr的支持。(目前测试情况来看,是无法配置成功使用org.apache.gora.solr.store.SolrStore作为存储后端的,只能是使用HBase作为存储后端)。
1.修改ivy/ivy.xml,设置可以使用的后端存储模块,可以多选,至于最后使用哪个存储模块,需要在conf/nutch-site.xml中指明。
|
1 |
$sudo vim /var/opt/apache-nutch/ivy/ivy.xml |
找到如下信息:
|
1 2 3 4 5 6 7 8 9 10 11 12 13 14 15 16 17 18 19 20 21 22 23 24 25 26 27 28 29 30 31 32 33 |
<!-- Uncomment this to use SQL as Gora backend. It should be noted that the gora-sql 0.1.1-incubating artifact is NOT compatable with gora-core 0.3. Users should downgrade to gora-core 0.2.1 in order to use SQL as a backend however this is not suggested. --> <!-- <dependency org="org.apache.gora" name="gora-sql" rev="0.1.1-incubating" conf="*->default" /> --> <!-- Uncomment this to use MySQL as database with SQL as Gora store. --> <!-- <dependency org="mysql" name="mysql-connector-java" rev="5.1.18" conf="*->default"/> --> <!-- Uncomment this to use HBase as Gora backend. --> <!-- <dependency org="org.apache.gora" name="gora-hbase" rev="0.6.1" conf="*->default" /> --> <!-- Uncomment this to use Accumulo as Gora backend. --> <!-- <dependency org="org.apache.gora" name="gora-accumulo" rev="0.6.1" conf="*->default" /> --> <!-- Uncomment this to use Cassandra as Gora backend. --> <!-- <dependency org="org.apache.gora" name="gora-cassandra" rev="0.6.1" conf="*->default" /> --> <!-- Uncomment this to use MongoDB as Gora backend. --> <!-- <dependency org="org.apache.gora" name="gora-mongodb" rev="0.6.1" conf="*->default" /> --> <!-- Uncomment this to use Solr as Gora backend. --> <!-- <dependency org="org.apache.gora" name="gora-solr" rev="0.6.1" conf="*->default" /> --> <!-- The gora-compiler is used within the 'ant generate-gora-src' target to compile the Gora .avsc files within ./src/gora --> |
找到如下:
|
1 2 3 4 |
<!-- Uncomment this to use HBase as Gora backend. --> <!-- <dependency org="org.apache.gora" name="gora-hbase" rev="0.6.1" conf="*->default" /> --> |
去掉注释。
同时为了修复gora-hbase 0.6.1的BUG,需要在刚刚去掉注释的代码下面,增加如下一句:
|
1 |
<dependency org="org.apache.hbase" name="hbase-common" rev="0.98.8-hadoop2" conf="*->default" /> |
2.配置conf/nutch-site.xml,指明需要的后端存储模块。
|
1 |
$sudo vim /var/opt/apache-nutch/conf/nutch-site.xml |
在configuration字段中指明需要的后端存储类型(此处我们需要整合Solr,因此指定org.apache.gora.solr.store.SolrStore,具体配置的字符串,参考上面的conf/gora.properties中的gora.datastore.default字段),同时需要指明"http.agent.name"字段,否则运行时候会报错,没有设置"http.agent.name"。设置"plugin.includes"字段,否则在最后建立Solr索引的时候会报告"No IndexWriters activated - check your configuration"。
|
1 2 3 4 5 6 7 8 9 10 11 12 13 14 15 |
<configuration> <property> <name>http.agent.name</name> <value>MyNutchSpider</value> </property> <property> <name>storage.data.store.class</name> <value>org.apache.gora.hbase.store.HBaseStore</value> <description>Default class for storing data</description> </property> <property> <name>plugin.includes</name> <value>protocol-httpclient|urlfilter-regex|index-(basic|more)|query-(basic|site|url|lang)|indexer-solr|nutch-extensionpoints|protocol-httpclient|urlfilter-regex|parse-(text|html|msexcel|msword|mspowerpoint|pdf)|summary-basic|scoring-opic|urlnormalizer-(pass|regex|basic)protocol-http|urlfilter-regex|parse-(html|tika|metatags)|index-(basic|anchor|more|metadata)</value> </property> </configuration> |
3.修改conf/gora.properties,打开需要的后端存储,单机情况下,一般默认即可,Apache Solr的监听端口,要根据自己机器的监听端口设置。
|
1 |
$sudo vim /var/opt/apache-nutch/conf/gora.properties |
找到
|
1 2 3 4 5 6 7 8 9 10 11 12 13 14 15 16 17 |
######################### # HBaseStore properties # ######################### # HBase requires that the Configuration has a valid "hbase.zookeeper.quorum" # property. It should be included within hbase-site.xml on the classpath. When # this property is omitted, it expects Zookeeper to run on localhost:2181. # To greatly improve scan performance, increase the hbase-site Configuration # property "hbase.client.scanner.caching". This sets the number of rows to grab # per request. # HBase autoflushing. Enabling autoflush decreases write performance. # Available since Gora 0.2. Defaults to disabled. # hbase.client.autoflush.default=false # HBase client cache that improves the scan in HBase (default 0) # gora.datastore.scanner.caching=1000 |
最后一行增加:
|
1 |
gora.datastore.default=org.apache.gora.hbase.store.HBaseStore |
4.修改ivy中配置的maven仓库地址,配置ivy/ivysettings.xml。
|
1 |
$sudo vim /var/opt/apache-nutch/ivy/ivysettings.xml |
找到如下代码:
|
1 2 3 |
<property name="repo.maven.org" value="http://repo1.maven.org/maven2/" override="false"/> |
把默认的maven中央库地址 http://repo1.maven.org/maven2/ 替换成国内OSC提供的镜像:http://maven.oschina.net/content/groups/public/ 。
编译Nutch,并下载依赖的Jar包
|
1 2 3 |
$cd /var/opt/apache-nutch $sudo ant runtime |
4.增加Nutch安装目录的环境变量${NUTCH_RUNTIME_HOME}
|
1 |
$sudo vim /etc/profile |
文件尾部增加
|
1 |
export NUTCH_RUNTIME_HOME=/var/opt/apache-nutch/runtime/local |
然后,重启机器。
5.检验Nutch安装
- 运行"${NUTCH_RUNTIME_HOME}/bin/nutch"。如果您能看见下列内容说明您的安装是正确的:
|
1 2 3 4 5 6 7 8 9 10 11 12 13 14 15 16 17 18 19 20 21 22 23 24 25 26 |
Usage: nutch COMMAND where COMMAND is one of: inject inject new urls into the database hostinject creates or updates an existing host table from a text file generate generate new batches to fetch from crawl db fetch fetch URLs marked during generate parse parse URLs marked during fetch updatedb update web table after parsing updatehostdb update host table after parsing readdb read/dump records from page database readhostdb display entries from the hostDB index run the plugin-based indexer on parsed batches elasticindex run the elasticsearch indexer - DEPRECATED use the index command instead solrindex run the solr indexer on parsed batches - DEPRECATED use the index command instead solrdedup remove duplicates from solr solrclean remove HTTP 301 and 404 documents from solr - DEPRECATED use the clean command instead clean remove HTTP 301 and 404 documents and duplicates from indexing backends configured via plugins parsechecker check the parser for a given url indexchecker check the indexing filters for a given url plugin load a plugin and run one of its classes main() nutchserver run a (local) Nutch server on a user defined port webapp run a local Nutch web application junit runs the given JUnit test or CLASSNAME run the class named CLASSNAME Most commands print help when invoked w/o parameters. |
一些解决问题的提示:
- 如果您看见"Permission denied"那么请运行下列命令:
|
1 |
$chmod +x ${NUTCH_RUNTIME_HOME}/bin/nutch |
- 如果您看见JAVA_HOME没有设置那么请设置JAVA_HOME环境变量。在Mac上,您可以运行下述命令或者把它添加到~/.bashrc里面去:
|
1 |
export JAVA_HOME=/System/Library/Frameworks/JavaVM.framework/Versions/1.6/Home |
6.配置Apache Solr
1.备份需要修改的配置文件
|
1 |
$sudo cp ${NUTCH_RUNTIME_HOME}/conf/schema.xml ${NUTCH_RUNTIME_HOME}/conf/schema.xml.old |
2.复制Nutch运行目录下的schema.xml到我们设置的目录下。
|
1 2 3 4 |
$sudo cp ${NUTCH_RUNTIME_HOME}/conf/schema.xml ${SOLR_HOME}/example/solr/collection1/conf/ $sudo cp ${NUTCH_RUNTIME_HOME}/conf/gora-solr-host-schema.xml ${SOLR_HOME}/example/solr/collection1/conf/gora-solr-schema.xml |
3.重启Apache Solr
|
1 |
$sudo -E java -Djetty.home=${SOLR_HOME}/example -Djetty.logs=/tmp -Dsolr.solr.home=${SOLR_HOME}/example/solr -Djetty.port=9876 -jar ${SOLR_HOME}/example/start.jar |
7.抓取您的第一个网站
- 添加要抓取的URL(以自己的网站为例)
123$cd ~$mkdir ~/urls$vim ~/urls/seed.txt
在seed.txt中添加需要抓取的地址:http://www.mobibrw.com/ - 启动HBase
|
1 |
$sudo -E $HBASE_HOME/bin/start-hbase.sh |
- 使用如下命令进行网页的抓取(以百度为例)
123$cd ~$sudo -E ${NUTCH_RUNTIME_HOME}/bin/crawl ~/urls/ StoreCrawl http://localhost:9876/solr/collection1 2~/urls是存放了种子url,也就是要抓取的网站地址的目录StoreCrawl是存放数据的根目录(在Nutch 2.x中,则表示crawlId,这会在HBase中创建一张以crawlId为前缀的表,例如StoreCrawl_Webpage)- "
http://localhost:9876/solr/collection1" Apache Solr的访问链接,此处注意,网页访问的链接是"http://localhost:9876/solr/#/collection1",但是Nutch上行数据的链接不可以有"#",否则会报告"Expected mime type application/octet-stream but got text/html"。 2,numberOfRounds,迭代的次数,表明从根网页开始那应该被抓取的链接深度。
注意,如果执行sudo的话,一定要加-E参数,否则会导致提示找不到JAVA_HOME。原因是sudo出于安全原因,默认禁止环境变量输出到子进程中。
执行完成后,不应该出现任何的失败提示才对。
如果执行出错的话,详细的错误信息可以在${NUTCH_RUNTIME_HOME}/logs/hadoop.log中看到。
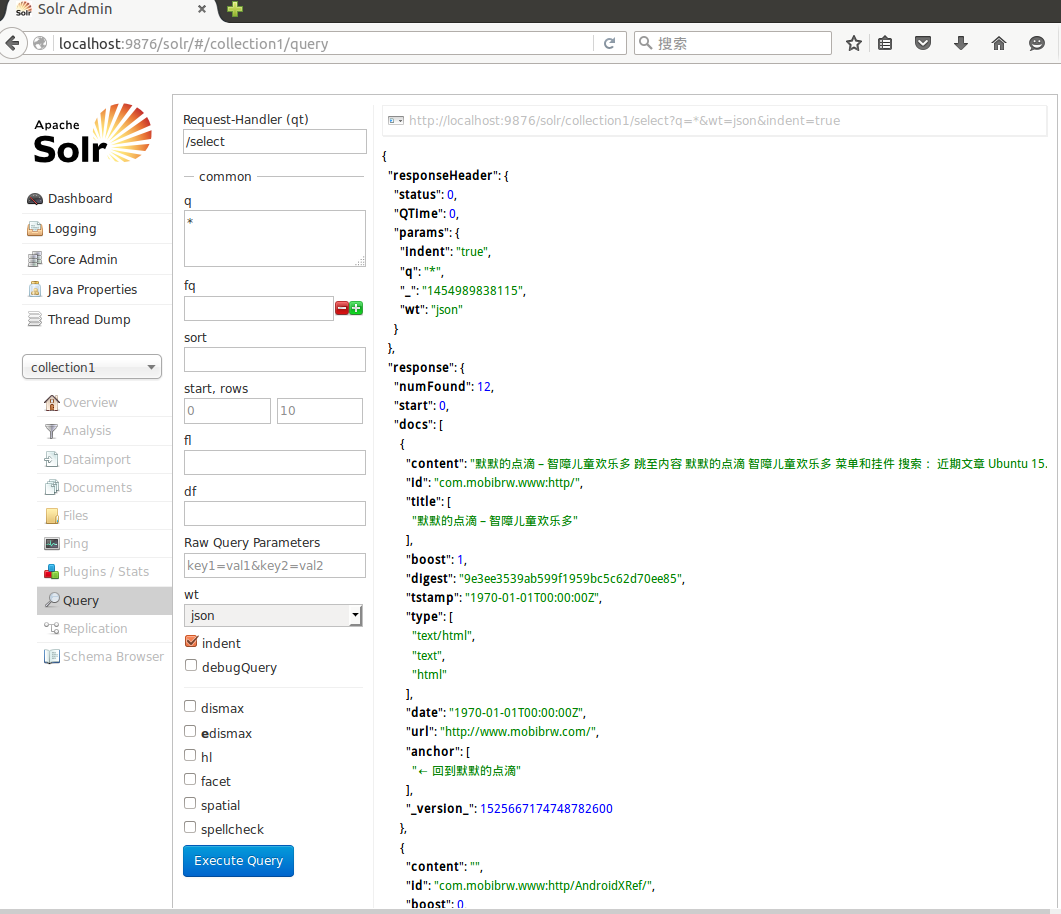
索引完成后,在Apache Solr中查询的结果如下图所示:
你好,我按照您的教程完成了hbase和solr的安装,同时对nutch安装也是严格按照您的教程执行的,但是我在测试的时候发现:抓取网页的时候一切正常,在最后的时候提示:No IndexWriters activated - check your configuration;我google了一下,有的说配置plugin.includes,我在conf和/runtime/local/conf中的nutch-site.xml中均进行了配置;同时在打开server.url的时候,提示:Problem accessing /solr/collection1. Reason:
Not Found
同时我发现在执行的时候出现:fetch of http://jisq.nju.edu.cn/ failed with: java.net.SocketException: Connection reset(这个网页我在浏览器也打不开,不知道会不会影响呢?)
在脚本中去掉无法打开的网址试试 No IndexWriters activated 应该是说你的solr服务没有开启。要么是端口设置错了。
Error running:
/home/wangchenyang/download/apache-nutch-2.3.1/runtime/local/bin/nutch updatedb -D mapred.reduce.tasks=2 -D mapred.child.java.opts=-Xmx1000m -D mapred.reduce.tasks.speculative.execution=false -D mapred.map.tasks.speculative.execution=false -D mapred.compress.map.output=true 1458484657-20543 -crawlId StoreCrawl
Failed with exit value 1.
你好我这次运行的时候出现这个错误,实在是不知道该如何解决,烦请告知以下
errno.01 is: Operation not permitted 权限不足,试试sudo执行。
我在安装hadoop的时候发现每次执行一次命令产生的文件要手动删除,之后才可以执行同一条命令,不是所谓的覆盖式的,我不知道nutch也是这样?因为我用同一条命令在验证我的nutch安装是否正确(我可以保证hbase和solr安装都是正确的),还有为什么我明明改变seed.txt中的url,执行命令,依然没有什么影响?(No IndexWriters activated 应该是说你的solr服务没有开启。要么是端口设置错了。)不过幸运的是我之前提出的一个问题好像已经解决了,非常感谢(毕竟是菜鸟,刚接触nutch,好多东西不是很懂,最近打扰的着实频繁,实在不好意思)
如果"改变seed.txt中的url,执行命令,依然没有什么影响",请检查一下目录是不是错了。可以尝试先重命名一下seed.txt,如果依旧可以正常执行,那么明显不是读取的这个目录下面的。