前言
参照IntelliJ IDEA 2016.1建立Strut2工程并使用Tomcat调试建立了项目后,然后按照IntelliJ IDEA 2016.1.1的Struts2项目中引入Junit4.12单元测试,引入Junit到项目之后,开始引入Hibernate并且使用H2作为数据存储,完成一个比较完整的示例服务器。
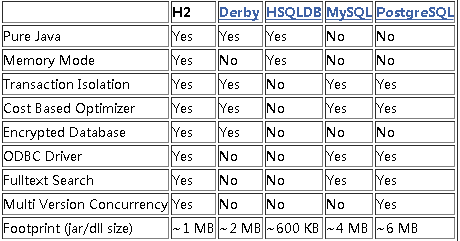
简单介绍一下H2嵌入式数据库
H2是一个短小精干的嵌入式数据库引擎,主要的特性包括:
- 免费、开源、快速;
- 嵌入式的数据库服务器,支持集群;
- 提供
JDBC,ODBC访问接口,提供基于浏览器的控制台管理程序;
Java编写,可使用GCJ和IKVM.NET编译;- 短小精干的软件,
1M左右。
几个嵌入式数据库的对比:
实战
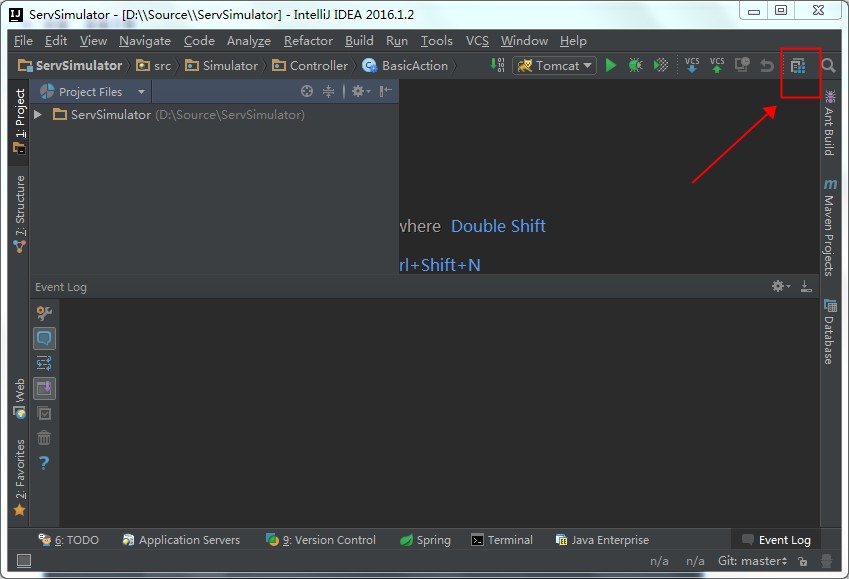
1.引入H2数据库
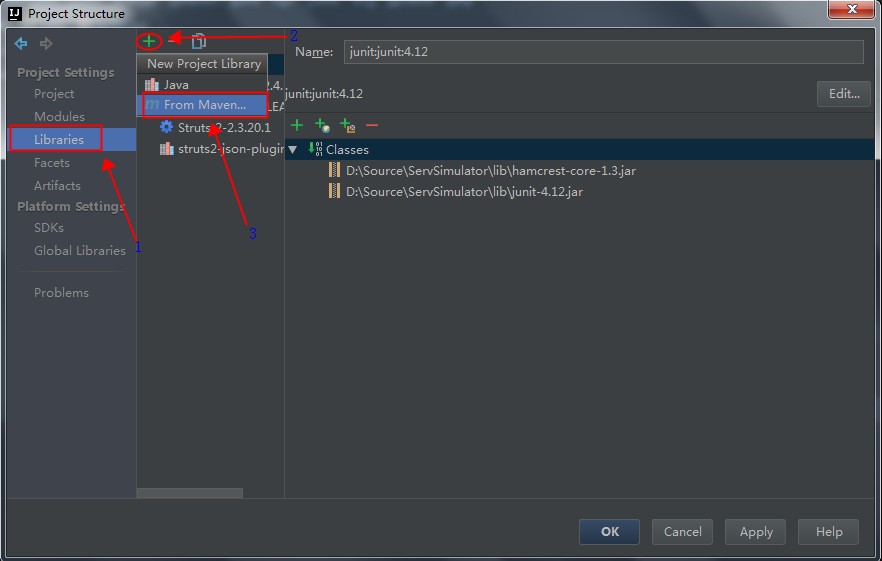
点击工程的"Project Structure"图标,如下图所示:
在弹出的界面中根据顺序,依次选择,选择从Maven服务器下载
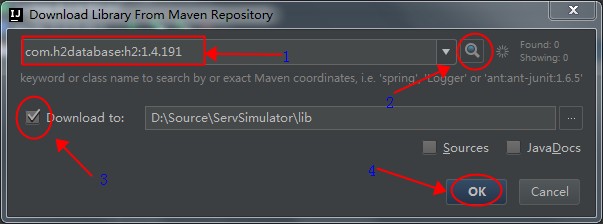
在弹出的界面中根据顺序依次操作,点击搜索图标之后,要等待比较长的一段时间,才能看到下面的OK按钮可以点击。目前H2最新的版本是1.4.191,因此输入"com.h2database:h2:1.4.191"。详细操作如下图:
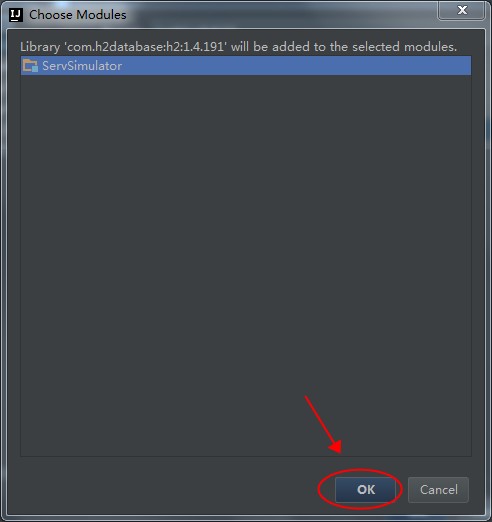
点击OK按钮,关闭窗口后,稍等,会发现出现一个Problems的提示,点击这个提示列表,如下图所示:
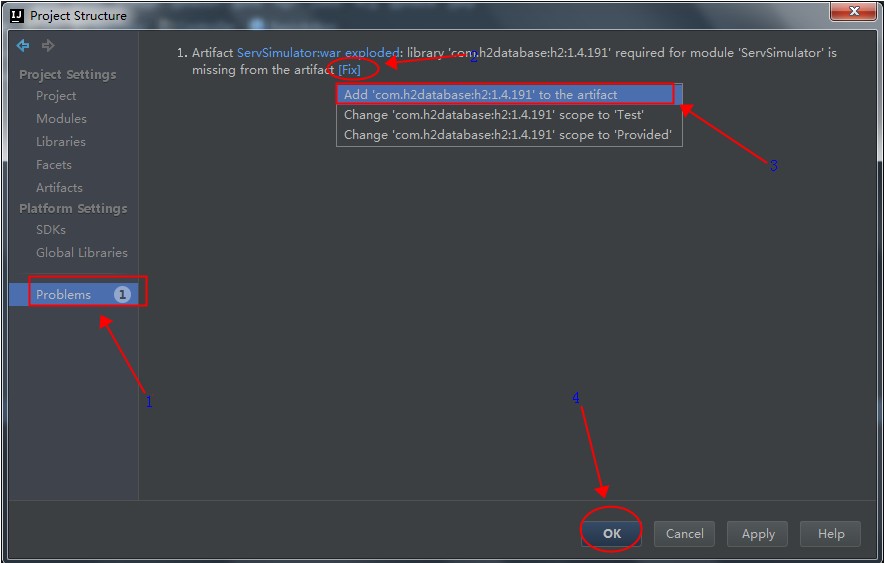
完成后点击OK按钮关闭界面。
2.引入Hibernate框架
切换工程的视图到"Project"模式下

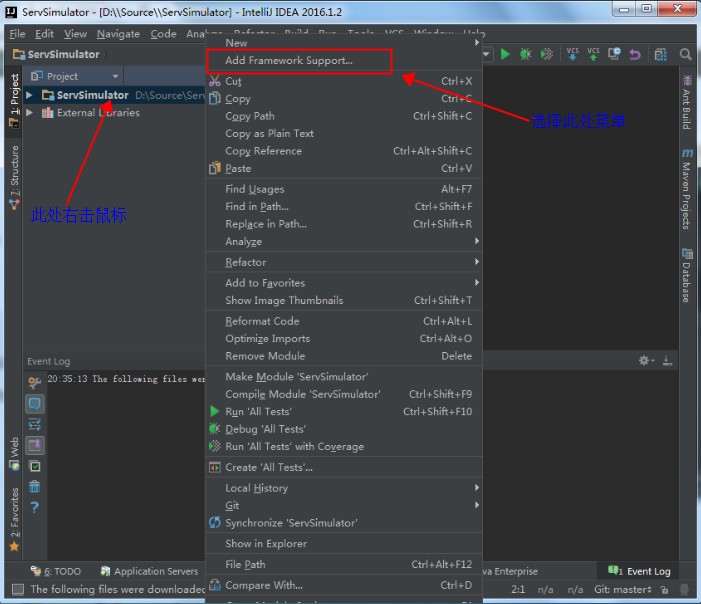
项目上面右击鼠标,选择"Add Framework Support ..."菜单,如下图:
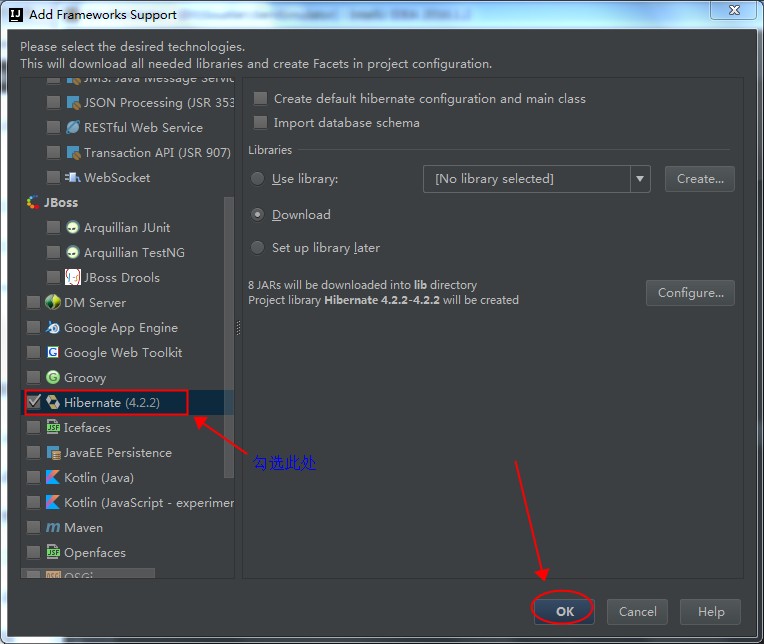
在弹出的界面中选择"Hibernate",如下图所示
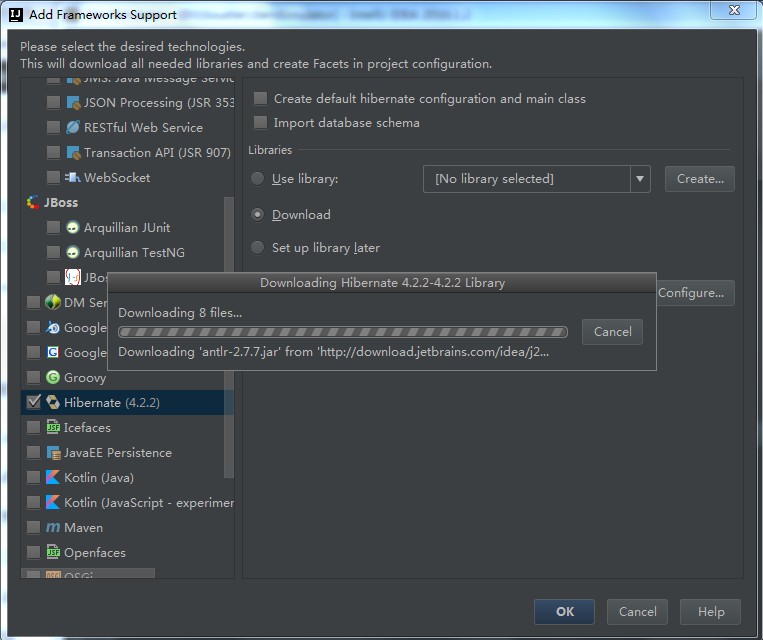
点击后,出现下载进度,等待进度完成,如下图:
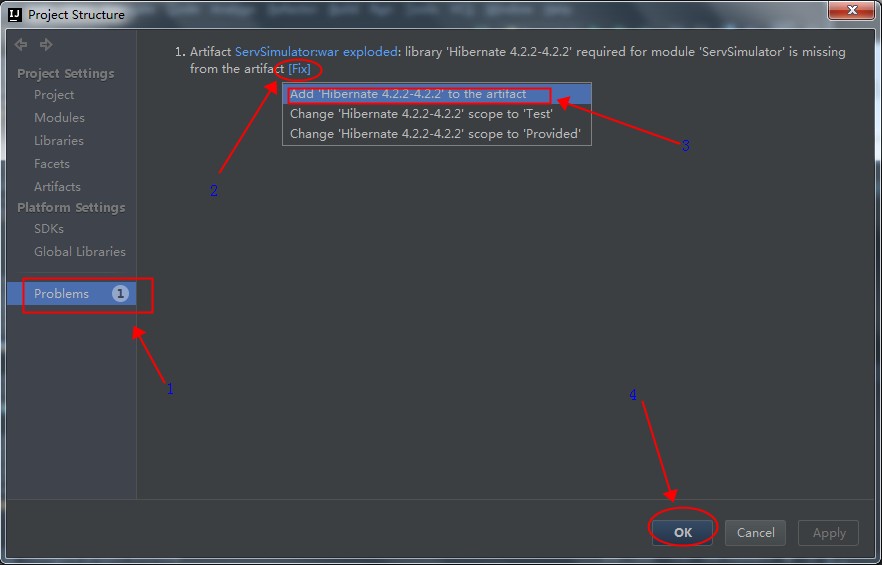
下载完成后,再次点击工程的"Project Structure"图标,如下图:

同样在出现的界面中修复提示的Problems,如下图:
增加"Hibernate"配置文件,点击工程的"Project Structure"图标,如下图:
增加"Hibernate"配置文件,如下图: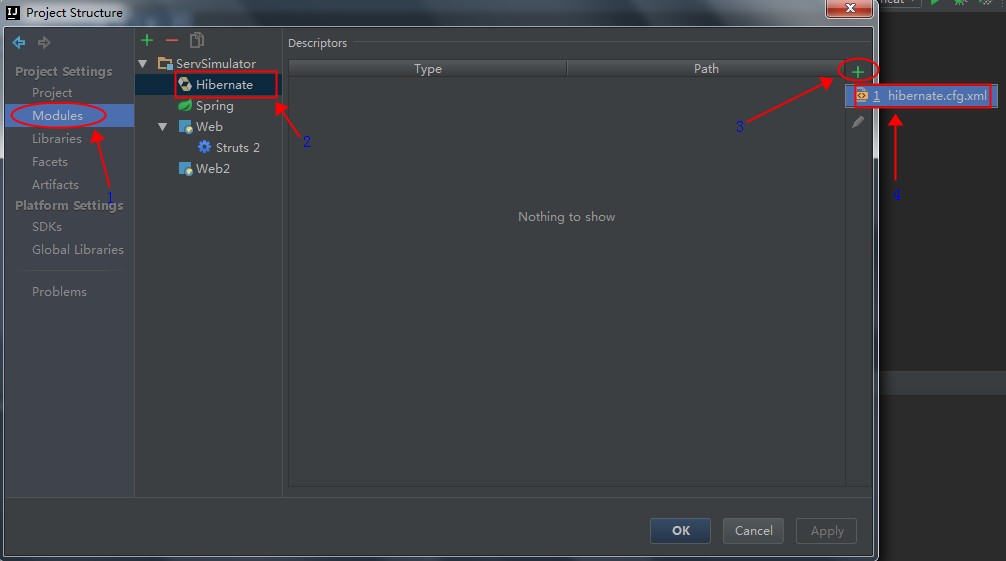
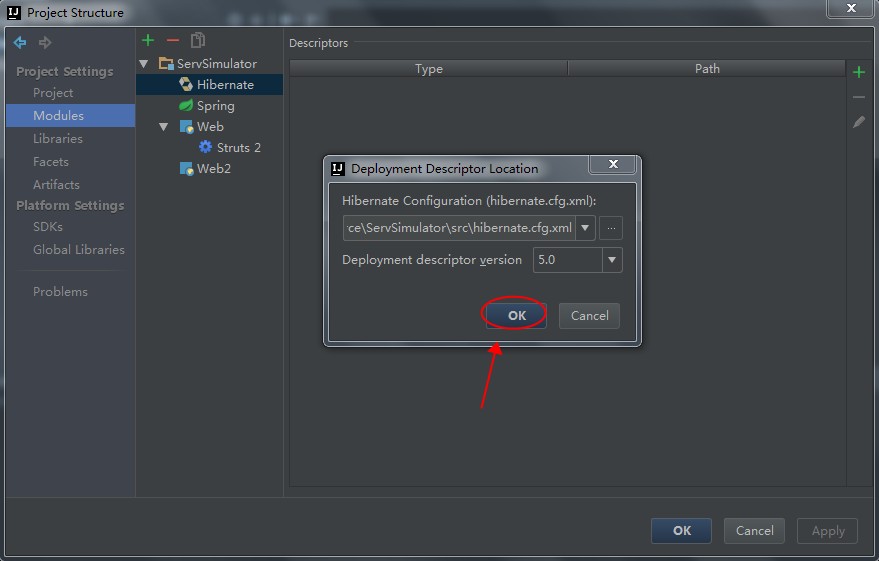
选择文件的路径,此处我们使用默认路径,点击OK即可。
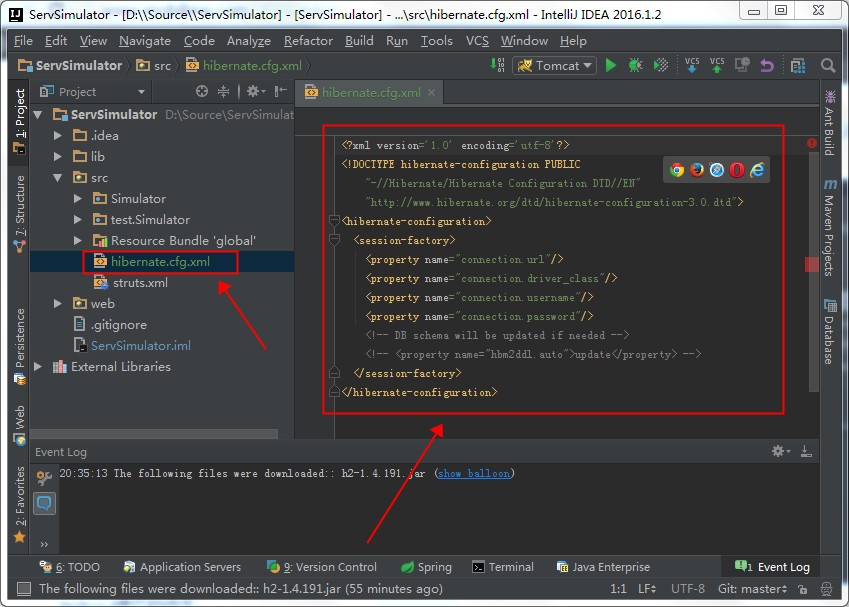
此时我们点击工程目录,会发现,已经新增了一个名字为hibernate.cfg.xml的配置文件,如下图:
3.配置Hibernate与H2数据库通信
按下面所示的修改hibernate.cfg.xml文件,如下:
1 2 3 4 5 6 7 8 9 10 11 12 13 14 15 16 17 18 19 20 21 22 23 24 25 |
<?xml version='1.0' encoding='utf-8'?> <!DOCTYPE hibernate-configuration PUBLIC "-//Hibernate/Hibernate Configuration DTD//EN" "http://www.hibernate.org/dtd/hibernate-configuration-3.0.dtd"> <hibernate-configuration> <session-factory> <!-- 驱动位置 --> <property name="connection.driver_class">org.h2.Driver</property> <!-- 文件模式 db.h2文件--> <!-- <property name="connection.url">jdbc:h2:~/HibernateH2/db</property> --> <!-- 内存模式 --> <property name="connection.url">jdbc:h2:mem:db</property> <!-- 用户名 下面是密码 --> <property name="connection.username">sa</property> <property name="connection.password">sa</property> <!-- 使用的数据库方言 --> <property name="dialect">org.hibernate.dialect.H2Dialect</property> <property name="show_sql">true</property> <!-- DB schema will be updated if needed 自动创建表结构--> <property name="hbm2ddl.auto">update</property> <property name="current_session_context_class">thread</property> <!-- 引入的实体 --> <mapping class="Simulator.Hibernate.Model.Visitor"/> </session-factory> </hibernate-configuration> |
此时会提示我们,找不到Simulator.Hibernate.Model.Visitor这个类,因此我们创建这个类,如下图所示:

三个文件的源代码如下:
Visitor.Java中的代码如下:
|
|
package Simulator.Hibernate.Model; import javax.persistence.*; import java.io.Serializable; @Entity @Table public class Visitor implements Serializable { @Id @GeneratedValue(strategy=GenerationType.TABLE,generator="tableGenerator") @TableGenerator(name="tableGenerator",initialValue=1,allocationSize=1) @Column(unique=true, nullable=false) public long id; /*消息记录的ID*/ public String v;/*版本号*/ public String TimeStamp; /*消息记录的时间戳*/ } |
代码解释一下,@Entry,@Table的注解来告知Hibernate,这个是个数据库的表配置类,其中的每个成员变量对应数据库表的字段。
如下的注解
|
|
@Id @GeneratedValue(strategy=GenerationType.TABLE,generator="tableGenerator") @TableGenerator(name="tableGenerator",initialValue=1,allocationSize=1) @Column(unique=true, nullable=false) |
表示id为整个表的自增主键。
VisitorDao.Java中的代码如下,这个文件提供了访问数据的接口定义:
|
|
package Simulator.Hibernate.Dao; import Simulator.Hibernate.Model.Visitor; import java.util.List; public interface VisitorDao { boolean insert(Visitor visitor); List<Visitor> getAll(); } |
VisitorDaoImpl.Java中的代码如下,这个文件对VisitorDao中定义的接口进行了实现:
1 2 3 4 5 6 7 8 9 10 11 12 13 14 15 16 17 18 19 20 21 22 23 24 25 26 27 28 29 30 31 32 33 34 35 36 37 38 39 40 41 42 43 44 45 46 47 48 49 50 51 52 53 54 55 56 57 58 59 60 61 62 63 64 65 66 67 68 69 70 71 |
package Simulator.Hibernate.Impl; import Simulator.Hibernate.Model.Visitor; import org.hibernate.Query; import org.hibernate.Session; import org.hibernate.Transaction; import org.hibernate.SessionFactory; import org.hibernate.cfg.Configuration; import org.hibernate.service.ServiceRegistry; import org.hibernate.service.ServiceRegistryBuilder; import java.util.ArrayList; import java.util.List; public class VisitorDaoImpl implements Simulator.Hibernate.Dao.VisitorDao{ @Override public boolean insert(Visitor visitor) { Configuration configuration = new Configuration(); configuration.configure(); ServiceRegistry serviceRegistry = new ServiceRegistryBuilder().applySettings(configuration.getProperties()).buildServiceRegistry(); SessionFactory sessionFactory = new Configuration().configure().buildSessionFactory(serviceRegistry); try{ Session session = sessionFactory.openSession(); try { Transaction tas = session.beginTransaction(); try { session.save(visitor); tas.commit(); } catch (Exception ex) { ex.printStackTrace(); tas.rollback(); } }finally { session.close(); } }catch(Exception e){ e.printStackTrace(); return false; } return true; } @Override public List<Visitor> getAll(){ Configuration configuration = new Configuration(); configuration.configure(); ServiceRegistry serviceRegistry = new ServiceRegistryBuilder().applySettings(configuration.getProperties()).buildServiceRegistry(); SessionFactory sessionFactory = new Configuration().configure().buildSessionFactory(serviceRegistry); try{ Session session = sessionFactory.openSession(); try { Transaction tas = session.beginTransaction(); try { Query query = session.createQuery("from Visitor"); tas.commit(); return query.list(); }catch (Exception e){ tas.rollback(); e.printStackTrace(); } }finally { session.close(); } }catch(Exception e){ e.printStackTrace(); } return new ArrayList<>(); } } |
这部分的代码需要着重解释一下
|
|
Query query = session.createQuery("from Visitor"); |
这个语句,注意,这个语句中的"from Visitor"为Visitor.Java中定义的类的名称,由Hibernate内部进行变量,表之间的对应。
如上操作之后,就可以在任意的Action中通过调用VisitorDaoImpl实现对于数据库的写入,查询了。
参考链接
Frequently Asked Questions