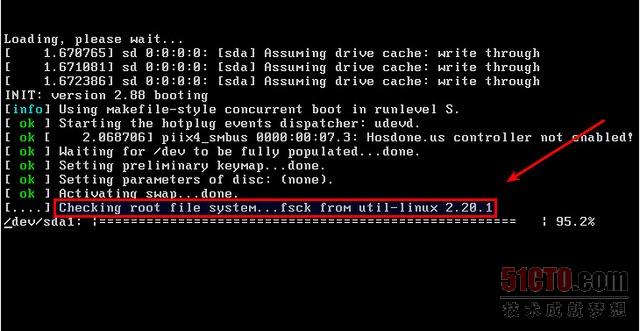
平常Linux管理方面最重要的任务之一就是,检查文件系统的完整性。Linux文件系统有可能在各种各样的情况下受到损坏,比如系统崩溃、突然断电、磁盘断开,或者文件节点(i-node)不小心被覆盖等等。因此,定期检查文件系统的完整性是个好主意,以便尽量减小文件系统受到损坏的风险。而说到检查和修复Linux文件系统,fsck是一款实用的工具。
我在本教程中将介绍如何借助fsck工具,实现文件系统的自动检查。
系统一启动,就触发文件系统自动检查机制
如果你希望系统一启动,就自动触发fsck,那么有一些方法可以设置在启动过程中实现无人值守的fschk,这些方法具体取决于特定的Linux发行版。
在Debian、Ubuntu或Linux Mint上,编辑/etc/default/rcS,如下所示。
|
|
$ sudo vi /etc/default/rcS |
# 启动过程中,自动修复出现不一致性的文件系统
在CentOS上,使用下列内容,编辑/etc/sysconfig/autofsck(要是它没有,就创建)。
|
|
$ sudo vi /etc/sysconfig/autofsck AUTOFSCK_DEF_CHECK=yes |
强制定期检查文件系统
如果文件系统很庞大,你可以强制定期检查文件系统,而不是每次系统启动时检查文件系统。为了实现这个操作,先要借助tune2fs命令,找到文件系统配置。下面这个命令行显示了文件系统相关参数的当前值。请注意:/dev/sda1是文件系统超级块所在的分区。
|
|
$ sudo tune2fs -l /dev/sda1 |
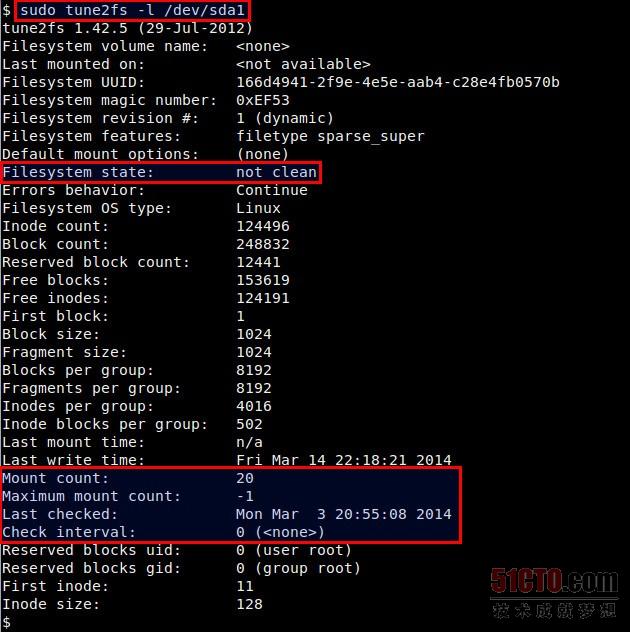
从tune2fs的输出结果中,我们不仅可以看到文件系统的状态(干净与否),还可以看到与文件系统检查有关的一些参数。"Maximum mount count"(最大挂载次数)这个参数是指文件系统检查被触发后的挂载次数。"Check interval"(检查时间间隔)这个参数显示了两次文件系统检查之间的最长时间。在大多数Linux发行版上,这些参数并不是默认情况下被设置的,这意味着并不进行任何定期的文件系统检查。
如果想强制每隔30次挂载就检查文件系统,请运行下面这个命令。
|
|
$ sudo tune2fs -c 30 /dev/sda1 |
如果想强制每隔3个月就检查文件系统,请使用下面这个命令。
|
|
$ sudo tune2fs -i 3m /dev/sda1 |
现在确认刚添加上去的文件系统检查条件已正确设置。
|
|
$ sudo tune2fs -l /dev/sda1 . . . Last mount time: n/a Last write time: Fri Mar 14 22:29:24 2014 Mount count: 20 Maximum mount count: 30 Last checked: Mon Mar 3 20:55:08 2014 Check interval: 7776000 (3 months) Next check after: Sun Jun 1 21:55:08 2014 |
强制下一次系统重启时,进行一次性的文件系统检查
如果你想在下一次系统重启时触发一次性的文件系统检查,可以使用这个命令。
一旦你在类似上面的顶层目录(/)中创建了一个名为forcefsck的空文件,它就会在你下一次重启时,强制进行文件系统检查。系统成功启动后,/forcefsck则会自动被清除。