由于内容脚本在网页而不是扩展程序的环境中运行,它们通常需要某种方式与扩展程序的其余部分通信。例如,RSS 阅读器扩展程序可能使用内容脚本检测页面上是否存在 RSS 供稿,然后通知后台页面,为当前页面显示页面按钮图标。
扩展程序和内容脚本间的通信使用消息传递的方式。两边均可以监听另一边发来的消息,并通过同样的通道回应。消息可以包含任何有效的 JSON 对象(null、boolean、number、string、array 或 object)。对于一次性的请求有一个简单的 API,同时也有更复杂的 API,允许您通过长时间的连接与共享的上下文交换多个消息。另外您也可以向另一个扩展程序发送消息,只要您知道它的标识符,这将在跨扩展程序消息传递部分介绍。
简单的一次性请求
如果您只需要向您的扩展程序的另一部分发送一个简单消息(以及可选地获得回应),您应该使用比较简单的 runtime.sendMessage 方法。这些方法允许您从内容脚本向扩展程序发送可通过 JSON 序列化的消息,可选的 callback 参数允许您在需要的时候从另一边处理回应。
如下列代码所示从内容脚本中发送请求:
|
1 2 3 |
chrome.runtime.sendMessage({greeting: "您好"}, function(response) { console.log(response.farewell); }); |
从扩展程序向内容脚本发送请求与上面类似,唯一的区别是您需要指定发送至哪一个标签页。这一例子演示如何向选定标签页中的内容脚本发送消息。
|
1 2 3 4 5 |
chrome.tabs.query({active: true, currentWindow: true}, function(tabs) { chrome.tabs.sendMessage(tabs[0].id, {greeting: "您好"}, function(response) { console.log(response.farewell); }); }); |
在接收端,您需要设置一个 runtime.onMessage 事件监听器来处理消息。
|
1 2 3 4 5 6 7 8 |
chrome.runtime.onMessage.addListener( function(request, sender, sendResponse) { console.log(sender.tab ? "来自内容脚本:" + sender.tab.url : "来自扩展程序"); if (request.greeting == "您好") sendResponse({farewell: "再见"}); }); |
注意: 如果多个页面都监听 onMessage 事件,对于某一次事件只有第一次调用 sendResponse() 能成功发出回应,所有其他回应将被忽略。
长时间的连接
有时候需要长时间的对话,而不是一次请求和回应。在这种情况下,您可以使用runtime.connect 或 tabs.connect 从您的内容脚本建立到扩展程序的长时间连接。建立的通道可以有一个可选的名称,让您区分不同类型的连接。
使用长时间连接的一种可能的情形为自动填充表单的扩展程序。对于一次登录操作,内容脚本可以连接到扩展程序页面,每次页面上的输入元素需要填写表单数据时向扩展程序发送消息。共享的连接允许扩展程序保留来自内容脚本的不同消息之间的状态联系。
建立连接时,两端都将获得一个 runtime.Port 对象,用来通过建立的连接发送和接收消息。
如下代码演示如何从内容脚本中建立连接,发送并监听消息:
|
1 2 3 4 5 6 7 8 |
var port = chrome.runtime.connect({name: "敲门"}); port.postMessage({joke: "敲门"}); port.onMessage.addListener(function(msg) { if (msg.question == "是谁?") port.postMessage({answer: "女士"}); else if (msg.question == "哪位女士?") port.postMessage({answer: "Bovary 女士"}); }); |
为了处理传入连接,您需要设置一个 runtime.onConnect 事件监听器。这一步无论在内容脚本还是扩展程序页面中都是一样的。当您的扩展程序的另一部分调用 connect() 时,会产生这一事件,同时传递您可以通过建立的连接发送和接受消息的 runtime.Port 对象。如下代码演示如何回应传入连接:
|
1 2 3 4 5 6 7 8 9 10 11 |
chrome.runtime.onConnect.addListener(function(port) { console.assert(port.name == "敲门"); port.onMessage.addListener(function(msg) { if (msg.joke == "敲门") port.postMessage({question: "是谁?"}); else if (msg.answer == "女士") port.postMessage({question: "哪位女士?"}); else if (msg.answer == "Bovary 女士") port.postMessage({question: "我没听清楚。"}); }); }); |
您可能想知道连接何时关闭,例如您需要为每一个打开的端口单独保留状态。这种情况下您可以监听 runtime.Port.onDisconnect 事件,当连接的另一端调用 runtime.Port.disconnect 或包含该端口的页面已结束(例如标签页转到了另一个页面)时,对于每一个端口确保都会发生一次该事件。
跨扩展程序消息传递
除了在您的扩展程序的不同组成部分间发送消息以外,您也可以使用消息传递 API 与其他扩展程序通信。这样您可以提供一个公共的 API,让其他扩展程序使用。
监听传入的请求和连接与处理内部的消息类似,唯一的区别是您分别使用runtime.onMessageExternal 和 runtime.onConnectExternal 事件。如下是分别处理这两个事件的例子:
|
1 2 3 4 5 6 7 8 9 10 11 12 13 14 15 16 17 18 19 |
// 用于简单的请求: chrome.runtime.onMessageExternal.addListener( function(request, sender, sendResponse) { if (sender.id == blacklistedExtension) return; // 不允许这一扩展程序访问 else if (request.getTargetData) sendResponse({targetData: targetData}); else if (request.activateLasers) { var success = activateLasers(); sendResponse({activateLasers: success}); } }); // 用于长时间的连接: chrome.runtime.onConnectExternal.addListener(function(port) { port.onMessage.addListener(function(msg) { // 有关处理 onMessage 事件的示例请参见其他例子 }); }); |
同样,向另一个扩展程序发送消息与在您的扩展程序中发送消息类似,唯一的区别是您必须传递您需要与之通信的扩展程序的标识符。例如:
|
1 2 3 4 5 6 7 8 9 10 11 12 13 |
// 我们需要与之通信的扩展程序的标识符。 var laserExtensionId = "abcdefghijklmnoabcdefhijklmnoabc"; // 发出一个简单请求: chrome.runtime.sendMessage(laserExtensionId, {getTargetData: true}, function(response) { if (targetInRange(response.targetData)) chrome.runtime.sendMessage(laserExtensionId, {activateLasers: true}); }); // 建立一个长时间的连接: var port = chrome.runtime.connect(laserExtensionId); port.postMessage(...); |
从网页发送消息
与跨扩展程序消息传递类似,您的应用或扩展程序可以接受并响应来自普通网页的消息。要使用该特性,您必须首先在您的 manifest.json 中指定您希望与之通信的网站,例如:
|
1 2 3 |
"externally_connectable": { "matches": ["*://*.example.com/*"] } |
这样会将消息传递 API 提供给所有匹配您指定的 URL 表达式的网页。URL 表达式必须至少包含一个二级域名,也就是说禁止使用类似于“*”、“*.com”、“*.co.uk”和“*.appspot.com”之类的主机名。在网页中,使用 runtime.sendMessage 或 runtime.connect API 向指定应用或扩展程序发送消息。例如:
|
1 2 3 4 5 6 7 8 9 |
// 我们希望与之通信的扩展程序标识符。 var editorExtensionId = "abcdefghijklmnoabcdefhijklmnoabc"; // 发送一个简单的请求: chrome.runtime.sendMessage(editorExtensionId, {openUrlInEditor: url}, function(response) { if (!response.success) handleError(url); }); |
在您的应用或扩展程序中,您可以通过 runtime.onMessageExternal 或runtime.onConnectExternal API 监听来自网页的消息,与跨扩展程序消息传递类似。只有网页才能发起连接。如下是一个例子:
|
1 2 3 4 5 6 7 |
chrome.runtime.onMessageExternal.addListener( function(request, sender, sendResponse) { if (sender.url == blacklistedWebsite) return; // 不允许该网页访问 if (request.openUrlInEditor) openUrl(request.openUrlInEditor); }); |
原生消息通信
扩展程序可以与原生应用程序交换消息。支持该特性的原生应用程序必须注册一个了解如何与扩展程序通信的原生消息宿主,Chrome 浏览器将在单独的进程中启动宿主,并通过标准输入和标准输出流与之通信。
原生消息通信宿主
为了注册一个原生消息通信宿主,应用程序必须安装一个清单文件,定义原生消息通信宿主的配置。如下是这一清单文件的例子:
|
1 2 3 4 5 6 7 8 9 |
{ "name": "com.my_company.my_application", "description": "我的应用程序", "path": "C:\\Program Files\\My Application\\chrome_native_messaging_host.exe", "type": "stdio", "allowed_origins": [ "chrome-extension://knldjmfmopnpolahpmmgbagdohdnhkik/" ] } |
消息通信宿主清单文件包含如下字段:
| 名称 | 描述 |
|---|---|
name |
原生消息通信宿主的名称,客户端需要将该字符串传递给runtime.connectNative 或 runtime.sendNativeMessage。 |
description |
应用程序的简短描述。 |
path |
原生消息通信宿主的二进制文件路径。在 Linux 和 OSX 上必须使用绝对路径,在 Windows 上可以使用相对于清单文件所在目录的路径。 |
type |
与原生消息通信宿主交流时所使用的接口类型。目前该参数只有一种可能的值:stdio,它表示 Chrome 浏览器应该使用stdin(标准输入)和 stdout(标准输出)与宿主通信。 |
allowed_origins |
允许访问原生消息通信宿主的扩展程序列表。 |
清单文件的类型取决与平台:
- Windows:
- 清单文件可以在文件系统中的任意位置,应用程序的安装程序必须创建如下注册表键
HKEY_LOCAL_MACHINE\SOFTWARE\Google\Chrome\NativeMessagingHosts\com.my_company.my_application或HKEY_CURRENT_USER\SOFTWARE\Google\Chrome\NativeMessagingHosts\com.my_company.my_application,并将键的默认值设置为清单文件的完整路径。 - OSX:
- 清单文件必须位于
/Library/Google/Chrome/NativeMessagingHosts/com.my_company.my_application.json,对于在用户级别上安装的应用程序则是~/Library/Application Support/Google/Chrome/NativeMessagingHosts/com.my_company.my_application.json。 - Linux:
- 清单文件必须位于
/etc/opt/chrome/native-messaging-hosts/com.my_company.my_application.json,对于在用户级别上安装的应用程序则是~/.config/google-chrome/NativeMessagingHosts/com.my_company.my_application.json。
Chrome 浏览器在单独的进程中启动每一个原生消息通信宿主,并使用标准输入(stdin)与标准输出(stdout)与之通信。向两个方向发送消息时使用相同的格式:每一条消息使用 JSON 序列化,以 UTF-8 编码,并在前面附加 32 位的消息长度(使用本机字节顺序)。
使用 runtime.connectNative 创建消息传递端口时,Chrome 浏览器会启动原生消息传递宿主进程,并让它一直运行,直到端口释放。如果消息是使用 runtime.sendNativeMessage 发送,没有创建消息传递端口,Chrome 浏览器会为每一条消息创建一个新的原生消息传递宿主进程。在这种情况下,宿主进程产生的第一条消息作为原始请求的响应处理,也就是说,Chrome 浏览器会将它传递给调用 runtime.sendNativeMessage 时指定的回调函数,而原生消息传递宿主产生的所有其他消息则会忽略。
连接到原生应用程序
向原生应用程序发送和接收消息类似与跨扩展程序消息传递,主要的区别是用runtime.connectNative 代替 runtime.connect,用 runtime.sendNativeMessage 代替 runtime.sendMessage。
以下例子创建一个 runtime.Port 对象,连接到原生消息通信宿主com.my_company.my_application,开始监听来自该端口的消息,并发送一条消息:
|
1 2 3 4 5 6 7 8 |
var port = chrome.runtime.connectNative('com.my_company.my_application'); port.onMessage.addListener(function(msg) { console.log("收到 " + msg); }); port.onDisconnect.addListener(function() { console.log("已断开"); }); port.postMessage({ text: "我的应用程序,您好!" }); |
runtime.sendNativeMessage 可以用来向原生应用程序发送消息,而不用创建端口。例如:
|
1 2 3 4 5 |
chrome.runtime.sendNativeMessage('com.my_company.my_application', { text: "您好" }, function(response) { console.log("收到 " + response); }); |
安全性考虑
当您从内容脚本或另一个扩展程序接收消息时,您的后台网页应该小心,以免遭到跨站脚本攻击。特别地,避免使用下面这些危险的 API:
|
1 2 3 4 |
chrome.tabs.sendMessage(tab.id, {greeting: "hello"}, function(response) { // 警告!可能会执行恶意脚本! var resp = eval("(" + response.farewell + ")"); }); |
|
1 2 3 4 |
chrome.tabs.sendMessage(tab.id, {greeting: "hello"}, function(response) { // 警告!可能会插入恶意脚本! document.getElementById("resp").innerHTML = response.farewell; }); |
您应该首选不运行脚本的更安全的API:
|
1 2 3 4 |
chrome.tabs.sendMessage(tab.id, {greeting: "hello"}, function(response) { // JSON.parse 不会执行攻击者的脚本。 var resp = JSON.parse(response.farewell); }); |
|
1 2 3 4 |
chrome.tabs.sendMessage(tab.id, {greeting: "hello"}, function(response) { // innerText 不会让攻击者插入 HTML 元素。 document.getElementById("resp").innerText = response.farewell; }); |
例子
您可以在 examples/api/messaging -->目录中找到使用消息通信的简单例子,examples/api/nativeMessaging 包含使用原生消息通信的示例应用程序,另外请参见contentscript_xhr 例子,在这个例子中内容脚本与所属扩展程序交换消息,以便扩展程序可以代表内容脚本发出跨站请求。有关更多例子以及查看源代码的帮助,请参见示例。
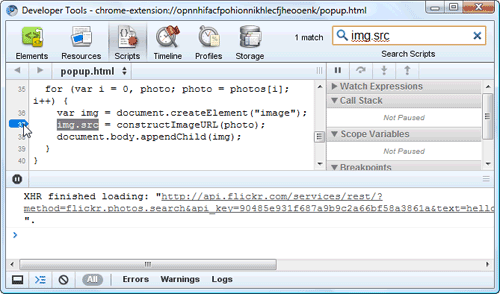
 The popup remains open as long as the Developer Tools window does.
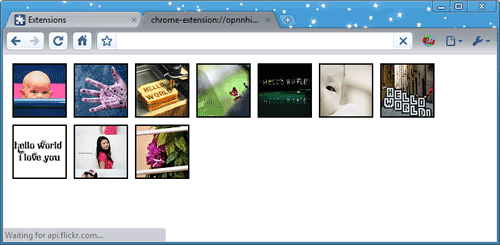