使用webview.loadUrl 给JavaScript传Base64格式的较大图片时,有的Android版本上不反馈任何错误信息,只是页面接收不到任何信息,传入的脚本不执行任何操作。
有的则报错,如下:
|
1 |
Refusing to load URL as it exceeds 2097152 characters |
Android是一种基于Linux的自由及开放源代码的操作系统,主要使用于移动设备,如智能手机和平板电脑,由Google公司和开放手机联盟领导及开发。
使用webview.loadUrl 给JavaScript传Base64格式的较大图片时,有的Android版本上不反馈任何错误信息,只是页面接收不到任何信息,传入的脚本不执行任何操作。
有的则报错,如下:
|
1 |
Refusing to load URL as it exceeds 2097152 characters |
今天升级到 Android Studio Arctic Fox | 2020.3.1 出现了如下错误:
|
1 2 3 4 5 6 7 |
Corrputed Installation Missing essential plugin: org.jetbrains.android Please reinstall Android Studio from scratch. |
借助 Android Plugin for Gradle,您可以通过命令行在 Gradle 项目中运行单元测试。如需详细了解如何为应用构建单元测试,请参阅构建有效的单元测试。
下表总结了如何使用 Gradle 运行单元测试:
| 单元测试类型 | 要运行的命令 | 测试结果所在的位置 | ||
|---|---|---|---|---|
| 本地单元测试 | 调用test任务:
|
HTML 测试结果文件:path_to_your_project/module_name/build/reports/tests/目录。
XML 测试结果文件: |
||
| 插桩单元测试 | 调用 connectedAndroidTest 任务:
|
HTML 测试结果文件:path_to_your_project/module_name/build/reports/androidTests/connected/目录。
XML 测试结果文件: |
参照 Android Studio 3.6.3/4.0/4.1/4.2配置Robolectric-4.5.1,Powermock-1.6.6单元测试环境 配置执行单元测试。
项目使用 Android Studio 4.1.3 ,Android Gradle构建工具(AGP)版本
|
1 |
com.android.tools.build:gradle:4.1.3 |
单元测试使用的 Robolectric 从 4.5.x 升级到 4.6.x ,编译时产生如下报错:
|
1 2 3 |
Failed to transform bcprov-jdk15on-1.68.jar (org.bouncycastle:bcprov-jdk15on:1.68) to match attributes {artifactType=processed-jar, org.gradle.category=library, org.gradle.libraryelements=jar, org.gradle.status=release, org.gradle.usage=java-runtime}. > Execution failed for JetifyTransform: /home/runner/.gradle/caches/modules-2/files-2.1/org.bouncycastle/bcprov-jdk15on/1.68/46a080368d38b428d237a59458f9bc915222894d/bcprov-jdk15on-1.68.jar. > Failed to transform '/home/runner/.gradle/caches/modules-2/files-2.1/org.bouncycastle/bcprov-jdk15on/1.68/46a080368d38b428d237a59458f9bc915222894d/bcprov-jdk15on-1.68.jar' using Jetifier. Reason: IllegalArgumentException, message: Unsupported class file major version 59. (Run with --stacktrace for more details.) |
问题排查了一下,发现 Robolectric 4.6.x 引入了 bcprov-jdk15on-1.68.jar ,这个库是使用 Java 15 编译的。
如果项目在 gradle.properties 中配置了 android.enableJetifier=true (目的是转换第三方不支持 AndroidX 的依赖,用以使整个工程升级到 AndroidX ), 当 Jetifier 小于等于 Jetifier 1.0.0-beta10时,无法反编译高于 Java 13 编译的代码库,进而引起上面的报错。
目前(2021/07/22)最新的 Android Studio 4.2.2 ,Android Gradle构建工具(AGP)版本
|
1 |
com.android.tools.build:gradle:4.2.2 |
依旧没有完成适配工作。
官方回复是 Android Gradle构建工具(AGP) 7.x版本修复,估计要到Android Studio 4.3 版本了。
目前的解决方法是在 gradle.properties 中配置 Jetifier 忽略 bcprov 库。比较庆幸的是 bcprov 库跟 AndroidX 没什么关系,因此忽略这个库是安全的。
如下:
|
1 2 3 4 |
android.enableJetifier=true android.jetifier.blacklist=org.robolectric.*,bcprov # Android Studio 4.2 版本开始使用 android.jetifier.ignorelist 替代 android.jetifier.blacklist |
关于Android Studio单元测试中“Method d in android.util.Log not mocked.”问题的解决。
一般发生在 Robolectric 3.x 版本上,比如 Robolectric 3.8
![]()
解决方案:
 打开对应模块的build.gradle文件
|
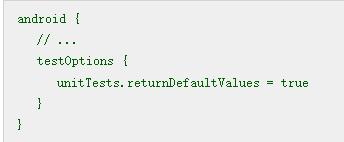
1 2 3 4 5 6 7 |
android { compileSdkVersion 27 buildToolsVersion '27.0.3' testOptions { unitTests.returnDefaultValues = true } } |
关于Android Studio单元测试中“Method d in android.util.Log not mocked.”问题的解决。
最近在引入某些库的时候,发现额外的库被引入,造成编译冲突,想具体知道是由于哪个库引起的。参照原来的Android Studio(Gradle)解决库依赖冲突问题 提示信息比较模糊,不方便定位,尤其是只在测试模块中引入某些库,业务代码不引入的情况下。
比如我们在 Android Studio 4.2.2 单元测试引入了 Robolectric 4.3.1/4.5.1,结果在业务代码不使用任何的 AndroidX 依赖的情况下,编译会报错
|
1 |
This project uses AndroidX dependencies,but the 'android.useAndroidX' property is not enabled. Set this property to true in the gradle.properties file and retry. following AnroidX dependencies are detected: androidx.test:monitor:1.2.0, androidx.annotation:annotation:1.0.0 |
这个依赖是通过 Robolectric 4.3.1/4.5.1 引入的,解决方法是调整到 Robolectric 3.8。
Android Studio 4.2.2 自带的 Project Structure 提示更加详细,可以明确的指出到底是哪个库引入,如下图:
最近在macOS Big Sur(11.4)编译Hummer
|
1 2 3 4 5 6 7 8 9 10 11 |
//代码版本 2021-07-12 $ git clone https://github.com/didi/Hummer.git $ cd Hummer $ cd android $ bash gradlew clean build # Android Studio 打开当前目录下的项目即可 |
如果报错如下:
|
1 2 3 |
* What went wrong: A problem occurred configuring project ':hummer-core'. > ABIs [arm64-v8a] are not supported for platform. Supported ABIs are [armeabi-v7a, x86]. |
参考 ABIs [arm64-v8a] are not supported for platform. Supported ABIs are [armeabi-v7a, x86].
如果运行测试用例时报错如下:
|
1 2 3 4 5 6 |
2021-07-12 10:32:56.704 11116-11116/com.didi.hummer.demo E/log: error java.lang.ClassNotFoundException: Didn't find class "com.facebook.jni.HybridData$Destructor" on path: DexPathList[[dex file "/data/data/com.didi.hummer.demo/code_cache/.overlay/base.apk/classes2.dex", zip file "/data/app/~~ayUY1JA739Wo5kLM7hjUuQ==/com.didi.hummer.demo-7LKAxXsQNZuXWiS7L2dZwg==/base.apk"],nativeLibraryDirectories=[/data/app/~~ayUY1JA739Wo5kLM7hjUuQ==/com.didi.hummer.demo-7LKAxXsQNZuXWiS7L2dZwg==/lib/x86, /data/app/~~ayUY1JA739Wo5kLM7hjUuQ==/com.didi.hummer.demo-7LKAxXsQNZuXWiS7L2dZwg==/base.apk!/lib/x86, /system/lib, /system_ext/lib]] 2021-07-12 10:32:56.705 11116-11116/com.didi.hummer.demo A/idi.hummer.dem: java_vm_ext.cc:577] JNI DETECTED ERROR IN APPLICATION: JNI NewGlobalRef called with pending exception java.lang.ClassNotFoundException: Didn't find class "com.facebook.jni.HybridData$Destructor" on path: DexPathList[[dex file "/data/data/com.didi.hummer.demo/code_cache/.overlay/base.apk/classes2.dex", zip file "/data/app/~~ayUY1JA739Wo5kLM7hjUuQ==/com.didi.hummer.demo-7LKAxXsQNZuXWiS7L2dZwg==/base.apk"],nativeLibraryDirectories=[/data/app/~~ayUY1JA739Wo5kLM7hjUuQ==/com.didi.hummer.demo-7LKAxXsQNZuXWiS7L2dZwg==/lib/x86, /data/app/~~ayUY1JA739Wo5kLM7hjUuQ==/com.didi.hummer.demo-7LKAxXsQNZuXWiS7L2dZwg==/base.apk!/lib/x86, /system/lib, /system_ext/lib]] java_vm_ext.cc:577] (Throwable with no stack trace) java_vm_ext.cc:577] java_vm_ext.cc:577] in call to NewGlobalRef java_vm_ext.cc:577] from java.lang.String java.lang.Runtime.nativeLoad(java.lang.String, java.lang.ClassLoader, java.lang.Class) |
解决方案为在项目中增加:
|
1 |
implementation 'com.facebook.fbjni:fbjni:0.0.2' |
|
1 2 3 4 5 6 7 8 9 10 11 12 13 |
//代码版本 2021-07-12 $ git clone https://github.com/didi/Hummer.git $ cd Hummer $ cd iOS $ sudo gem install cocoapods $ pod install # 使用 XCode 12.5.1 打开当前目录下的 Example.xcworkspace |
最近在macOS Big Sur(11.4)编译Hummer
|
1 2 3 4 5 6 7 8 9 10 |
$ git clone https://github.com/didi/Hummer.git # 出问题的提交版本 ece6d899da93e83d58ecbe68659d34cafaed8c38 # git checkout ece6d899da93e83d58ecbe68659d34cafaed8c38 $ cd Hummer $ cd android $ bash gradlew clean build |
结果报错如下:
|
1 2 3 |
* What went wrong: A problem occurred configuring project ':hummer-core'. > ABIs [arm64-v8a] are not supported for platform. Supported ABIs are [armeabi-v7a, x86]. |
原因为默认引入的构建工具版本如下:
|
1 |
classpath 'com.android.tools.build:gradle:3.4.1' |
解决方法为升级到:
|
1 |
classpath 'com.android.tools.build:gradle:3.6.4' |
注意: 目前测试发现,如果升级到
|
1 |
classpath 'com.android.tools.build:gradle:4.2.1' |
不能成功编译。原因为module.gradle的配置没有被正确解析。
正常情况下Android项目需要的jar包,我们可以通过放置到项目对应的libs目录下即可。但是如果我们只希望某些特定libs/jar/aar只在执行单元测试时引入,那么应该怎么处理呢?
在Android Studio 4.1.x及以上版本,build tools 4.1.x及以上版本的情况下(较低的版本可能不支持这些配置项),我们可以通过使用 androidTestImplementation fileTree的方式进行引入(同理 常规单元测试使用 testImplementation fileTree),如下:
|
1 2 3 4 5 6 7 8 9 10 11 12 13 14 15 16 17 18 19 20 21 22 23 24 25 26 27 28 29 30 31 32 33 34 35 36 37 38 39 40 41 42 43 44 45 46 47 48 49 50 51 |
apply plugin: 'android' dependencies { implementation project(':android-sdk') // The libs folder is included in the apk of the real app Implementation fileTree(dir: 'libs', include: '*.jar') // The tests-libs folder is included only for tests androidTestImplementation fileTree(dir: 'libs-tests', include: '*.jar') } android { compileSdkVersion 19 buildToolsVersion "20.0.0" compileOptions { sourceCompatibility JavaVersion.VERSION_1_7 targetCompatibility JavaVersion.VERSION_1_7 } sourceSets { main { manifest.srcFile 'AndroidManifest.xml' java.srcDirs = ['src'] resources.srcDirs = ['src'] aidl.srcDirs = ['src'] renderscript.srcDirs = ['src'] res.srcDirs = ['res'] assets.srcDirs = ['assets'] } // Move the tests to tests/java, tests/res, etc... androidTest.setRoot('tests') // Note - to run the tests from command line: // $ gradle clean connectedCheck build // (requires gradle 1.10) // Move the build types to build-types/<type> // For instance, build-types/debug/java, build-types/debug/AndroidManifest.xml, ... // This moves them out of them default location under src/<type>/... which would // conflict with src/ being used by the main source set. // Adding new build types or product flavors should be accompanied // by a similar customization. debug.setRoot('build-types/debug') release.setRoot('build-types/release') } } |
最近在编译Android项目的时候,报告如下错误:
|
1 |
Error: Attribute Signature requires InnerClasses attribute. Check -keepattributes directive |
网上查找了很久,才了解到问题出在混淆配置上,具体原因为当混淆配置项中存在
|
1 |
-keepattributes Signature |
的时候,需要同步增加
|
1 |
-keepattributes InnerClasses |
更详细的解释参考如下:
Signature (Java 8 or higher) works only Java 8 or higher and InnerClasses (Java 5 or higher) so check your Android Studio is using Java SDK version. Please update your Proguard config with below settings
Add this line to your proguard-rules.pro file:
|
1 |
-keepattributes InnerClasses |
InnerClasses (Java 5 or higher)
Specifies the relationship between a class and its inner classes and outer classes. Other than this and the naming convention with a '$' separator between the names of inner classes and outer classes, inner classes are just like ordinary classes. Compilers may need this information to find classes referenced in a compiled library. Code may access this information by reflection, for instance to derive the simple name of the class.
Signature (Java 8 or higher)
Specifies the generic signature of the class, field, or method. Compilers may need this information to properly compile classes that use generic types from compiled libraries. Code may access this signature by reflection.
More details about -keepattributes and more settings you can apply, please see below link.